9. Applying Colouring and removal of prosthetics
4th June 2024
The big day had arrived, and despite only having two hours of sleep and dealing with some painful cramps, I was determined to complete this project I had been working on for a year.
I started by wrapping my hair and preparing for the bald cap. I braided the crown section of my hair and then wrapped the rest around my head to make it as smooth as possible.
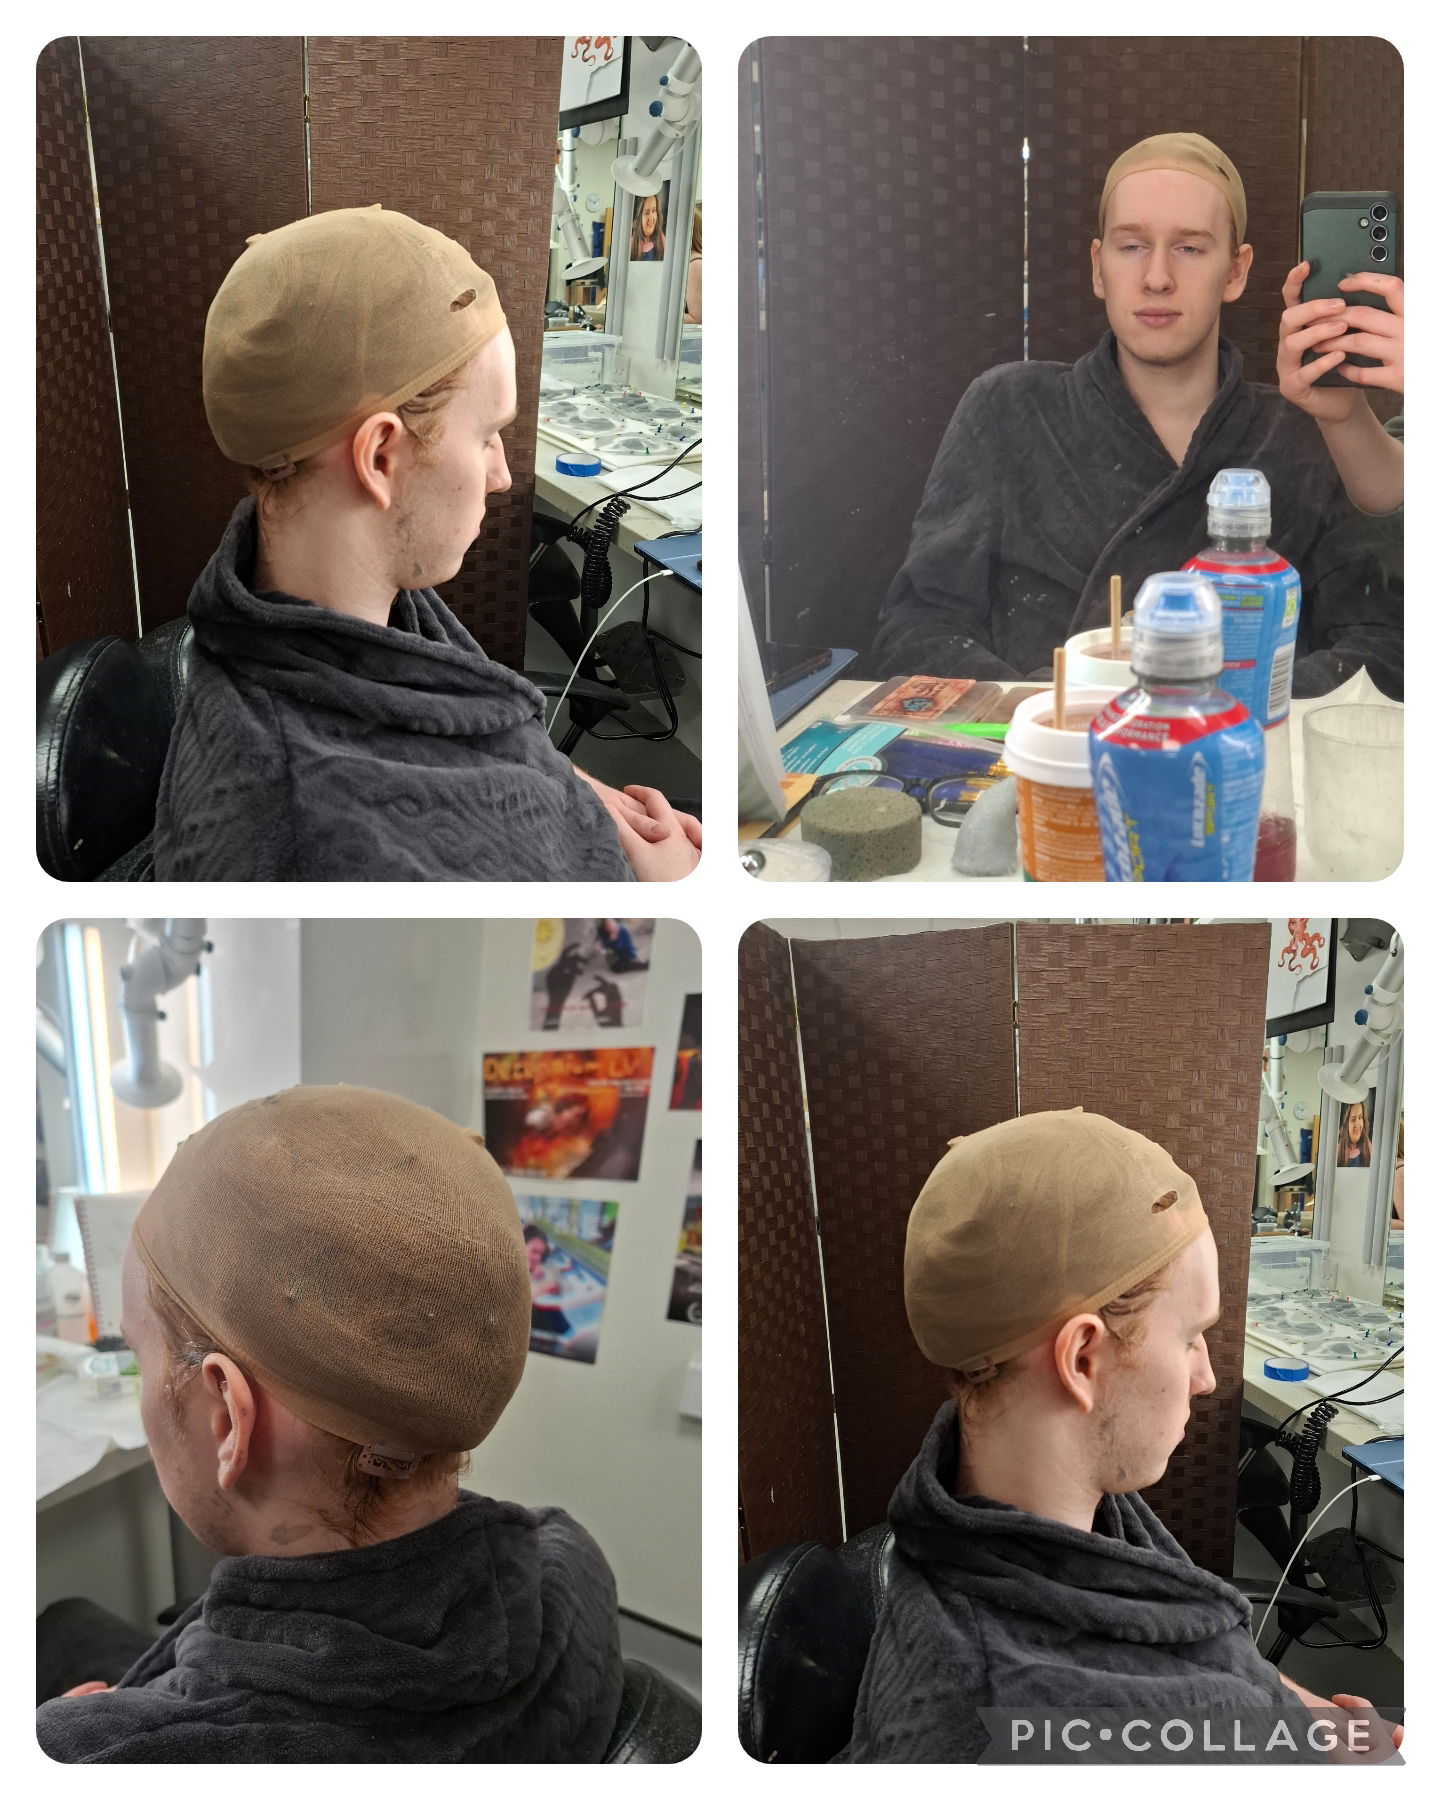
Figure 1: Left side hair warp (Keites-Gorman, 2024)
Figure 2: Front hair warp (Keites-Gorman, 2024)
Figure 3: Back hair warp (Keites-Gorman, 2024)
Figure 4: Right side hair warp (Keites-Gorman, 2024)
The next step was applying the bald cap. I used a Glatzan bald cap that was already in my kit, as I would be blending the pieces' edges with acetone. It was important that my bald cap would not dissolve, so I used a latex bald cap that dissolved with acetone. I didn't spend too much time perfecting the edges, as the forehead piece would cover that. Instead, I focused on securing the edges, as spending too much time on this would have been unnecessary.
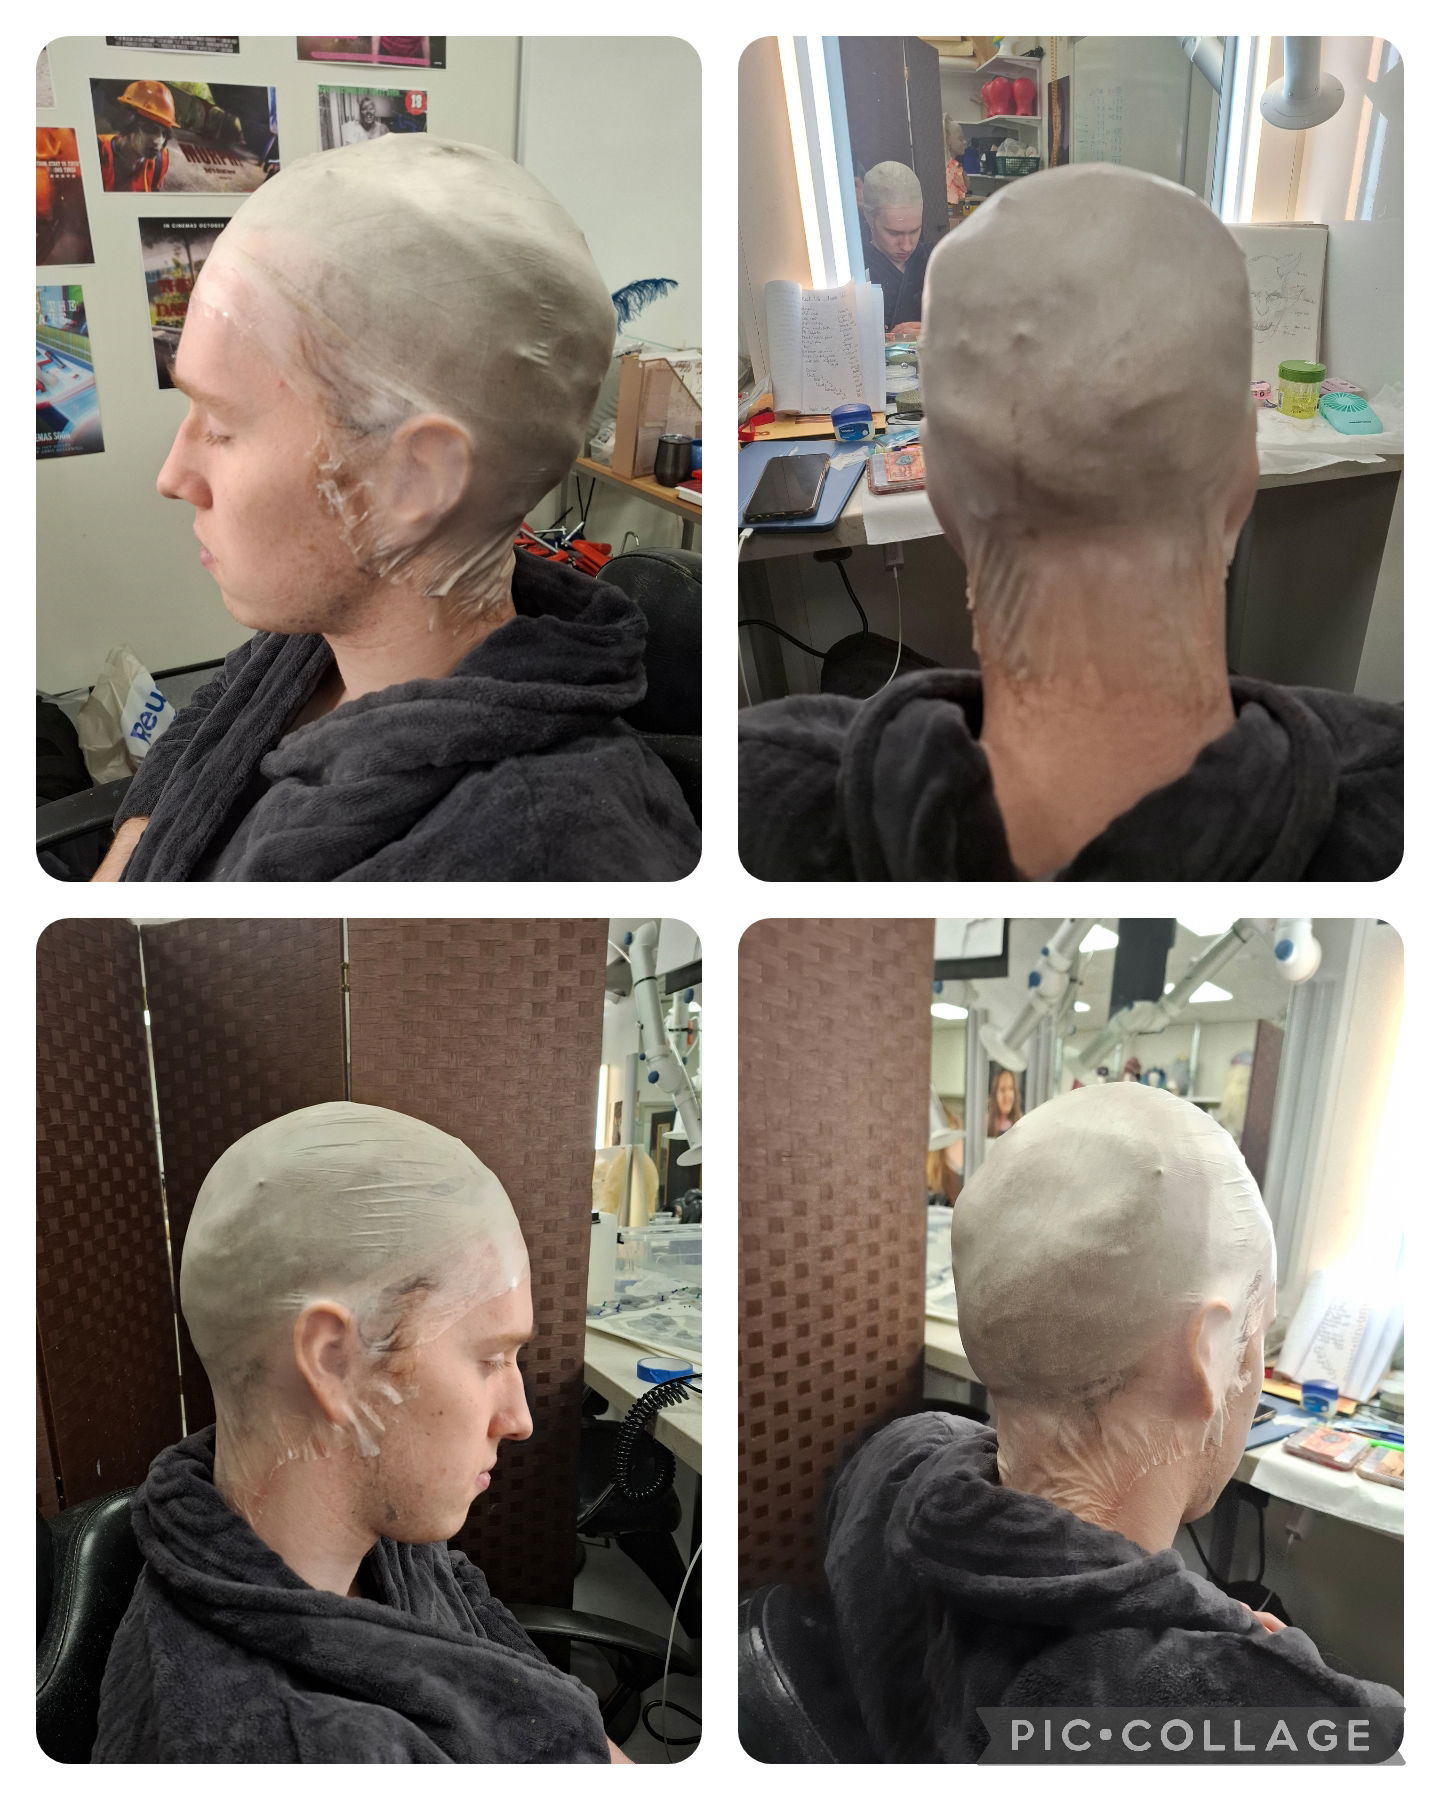
Figure 5: Left side Bold cap (Keites-Gorman, 2024)
Figure 6: Back Bold cap (Keites-Gorman, 2024)
Figure 7: Right side Bold cap (Keites-Gorman, 2024)
Figure 8: Back Left Bold cap (Keites-Gorman, 2024)
I then moved on to body painting, being mindful of my model not being able to eat after applying the prosthetics. I thought it would be best to paint his body first so that he could eat during lunchtime. Originally, I planned to use an airbrush for the entire body, but this did not go as planned. Since I was one of the last people to do the exam, many of the colours had run out and there ended up not being enough black or white to complete the body. I managed to get an arm and the right side of the chest done, but then I had to rethink. Luckily, I had brought my water-activated paints, so I used those instead.
A big mistake I made was forgetting my brushes. I absolutely kicked myself for it. I had remembered everything and even had them on the side, cleaned and ready to go. Luckily, I was able to find spares, and a friend kindly lent me some brushes, so I was okay. I then asked my housemate on my course if she could bring them when she came in, and luckily she did midway through, for which I was very grateful. I will not forget my brushes again, as it is very stressful, and I was very lucky to have the help of people in my exam; otherwise, it might have been a lot more time-consuming.
After that debacle, I grabbed a big brush and some grey water-activated paints and speed-painted. The airbrush was much quicker, so I had to pick up the pace as time was ticking away and I hadn't even started on the prosthetics. I quickly applied a base layer of grey and then began adding dimension. I felt quite panicked at the moment because it wasn't turning out as I had envisioned. The paint was turning blue then grey, and I was getting quite frustrated with myself. However, this is a natural part of the artistic process, and every piece has to go through an "ugly stage." I hated this stage, but I persevered, added more layers, deeper colours, and dimension, and finally, it started to look okay.
Now, I could move on to the prosthetics, but there was a lot to do in the time I had left. Fortunately, I had done a trial run and knew that I could do it in 3 hours. The time-lapse is great because you can see all the pieces coming together. First, I worked on the chin, then the cheeks (I had to redo one as I lined it up incorrectly). Next, it was the nose, and finally, the forehead piece, which Chloe helped me with since it was quite large and needed to be lined up and placed correctly. I also applied these pieces while my model was lying down, which made them more comfortable and made my job easier as I wasn't working against gravity and could place them correctly.
Here's the time-lapse video of this process !
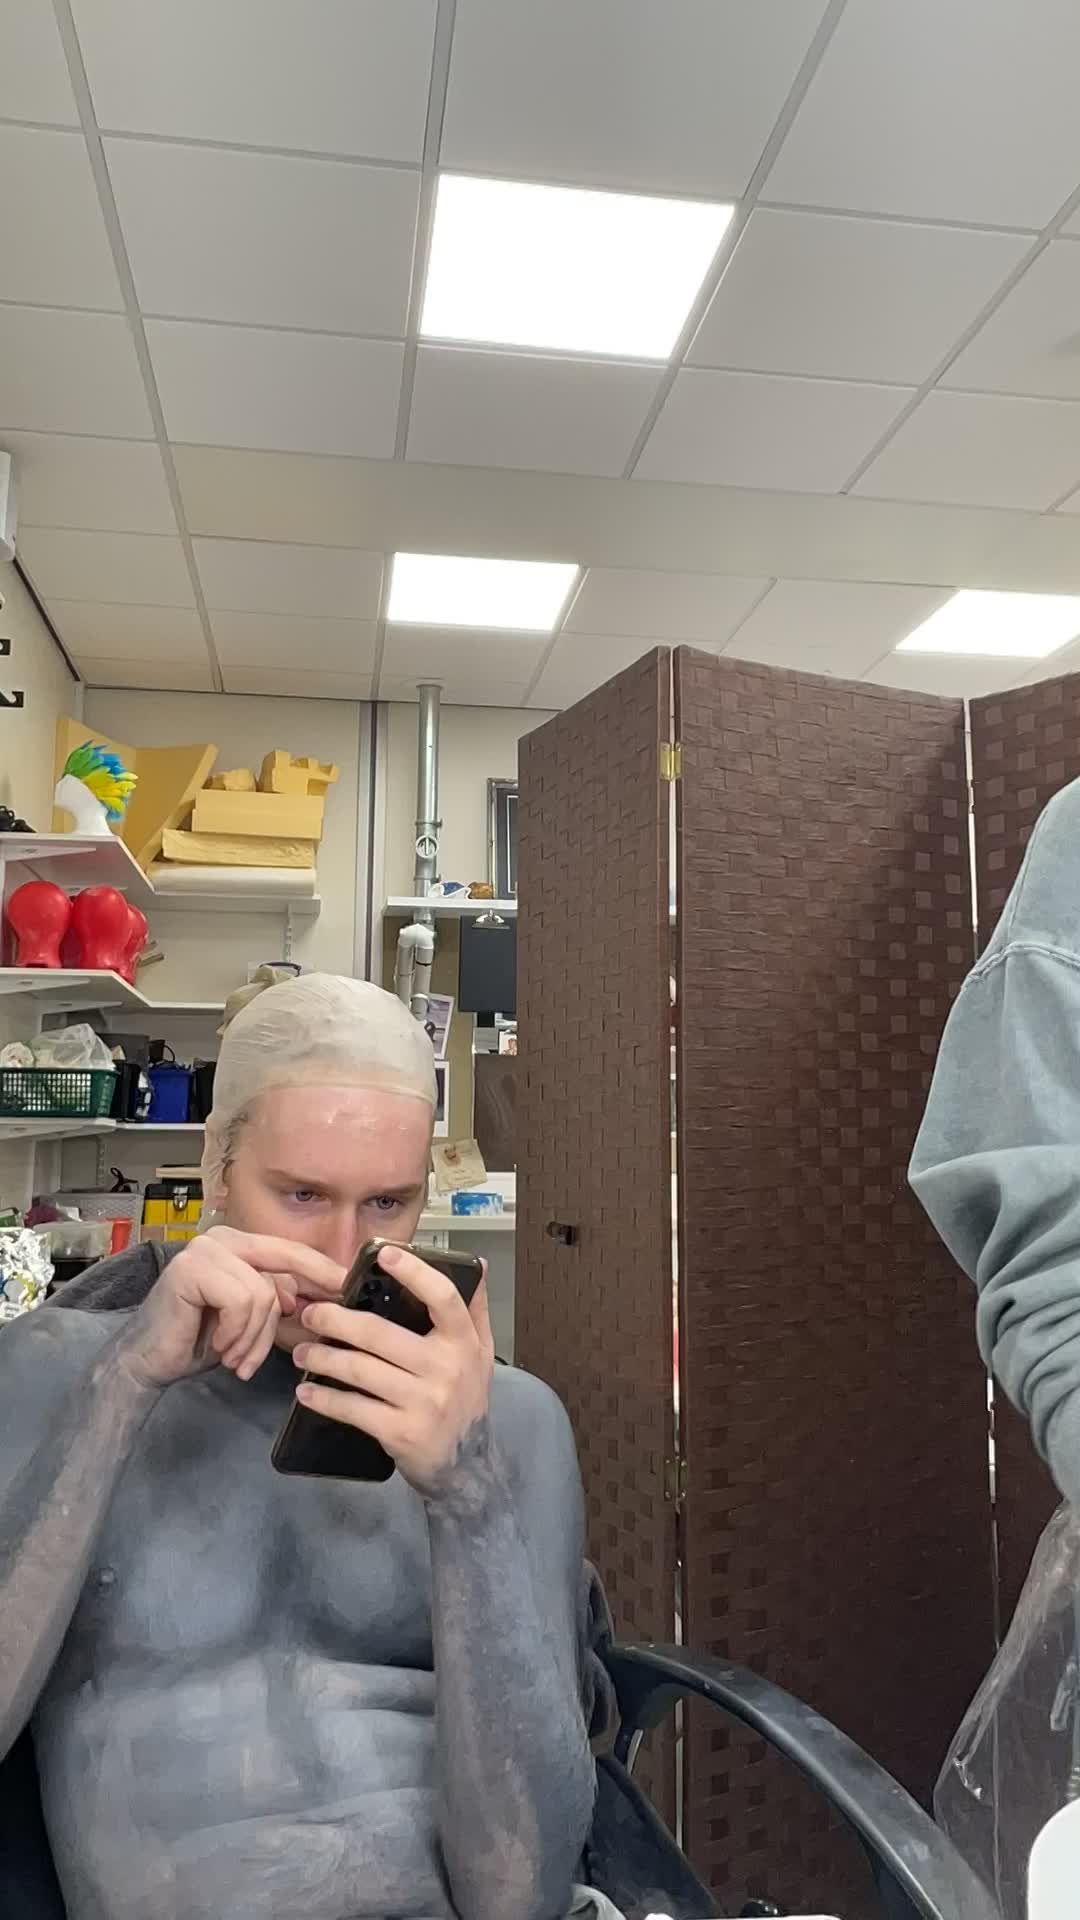
Figure 9: Time-lapse Application (Keites-Gorman,2024)
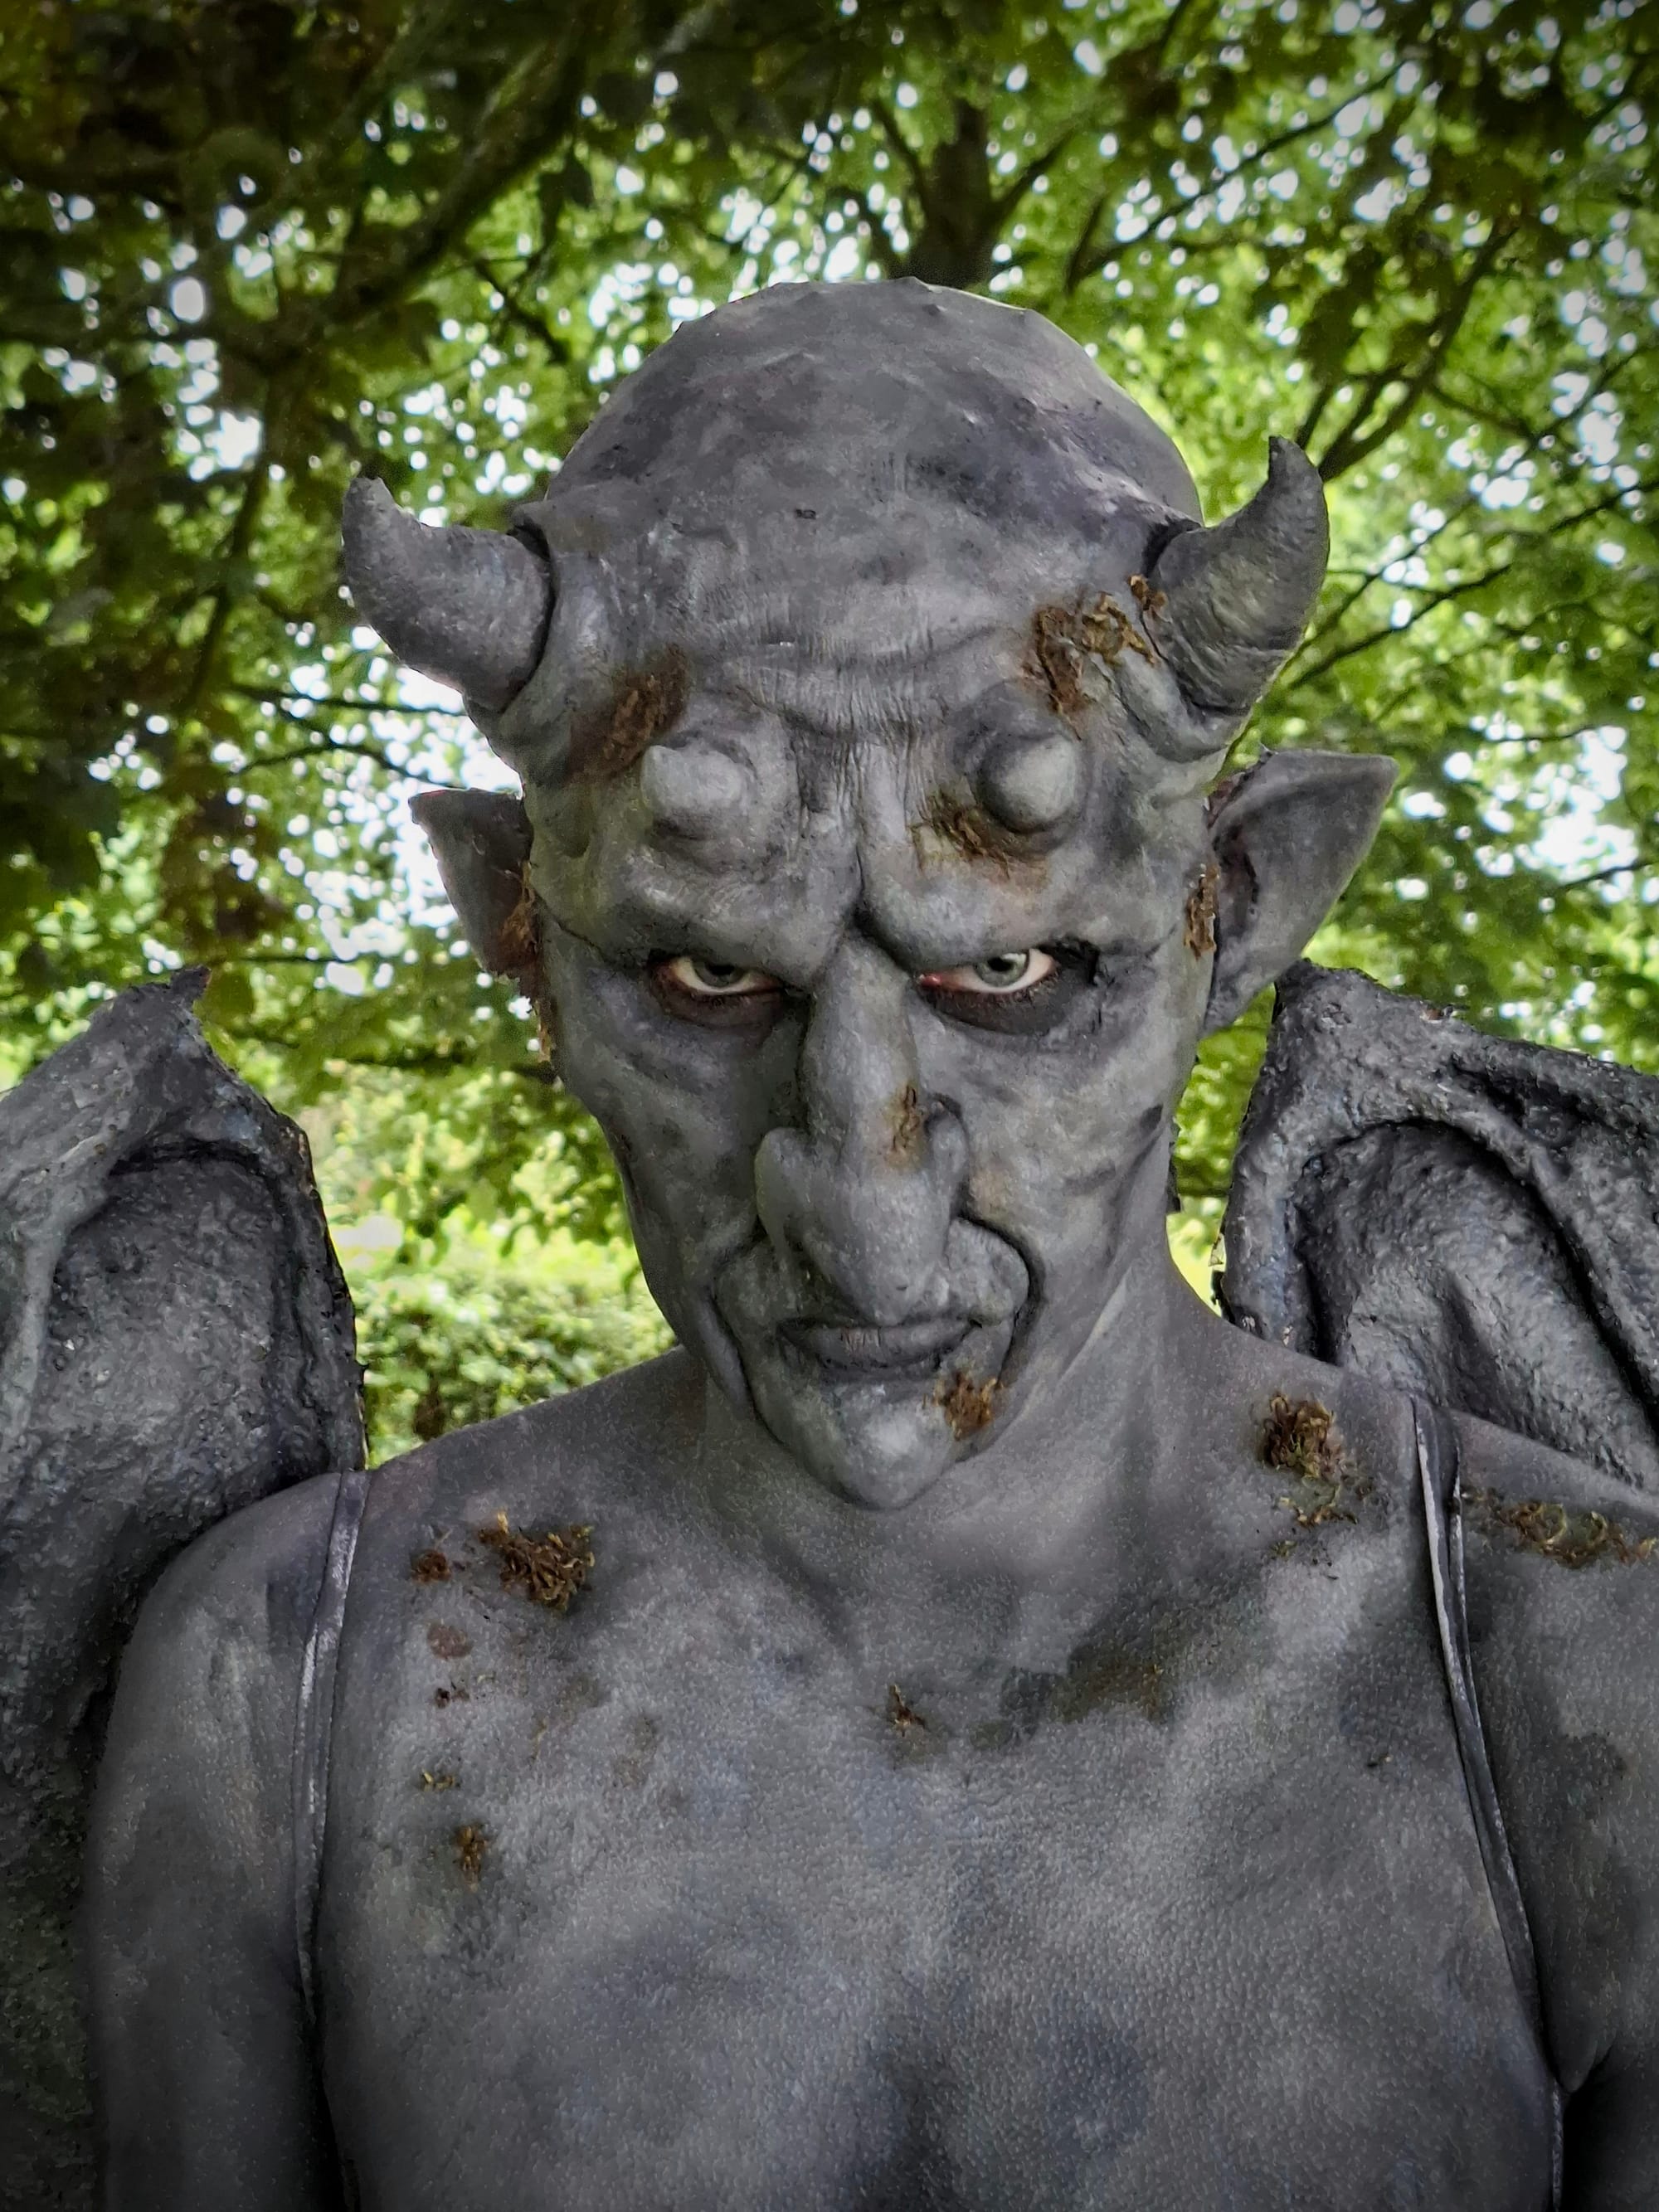
For pieces like the chin that didn't need a lot of time spent on blending the edges since they would be covered by the cheeks, I believe I did a good job in recognizing the areas that needed more attention than others. This whole process felt like a layered puzzle, but only the parts that are visible needed to be perfect. I started by darkening the eyes and painting the bold cap. Then I layered different shades of grey, adding darker tones into the cracks and wrinkles of the pieces and lighter shades onto the raised parts. I also added moss colours like greens and browns to further give it a weathered look and dimension – this was my first attempt at this. I ensured that the face and body matched in colour to give it more dimension. I wanted my gargoyle to have depth and not just be a solid grey colour.
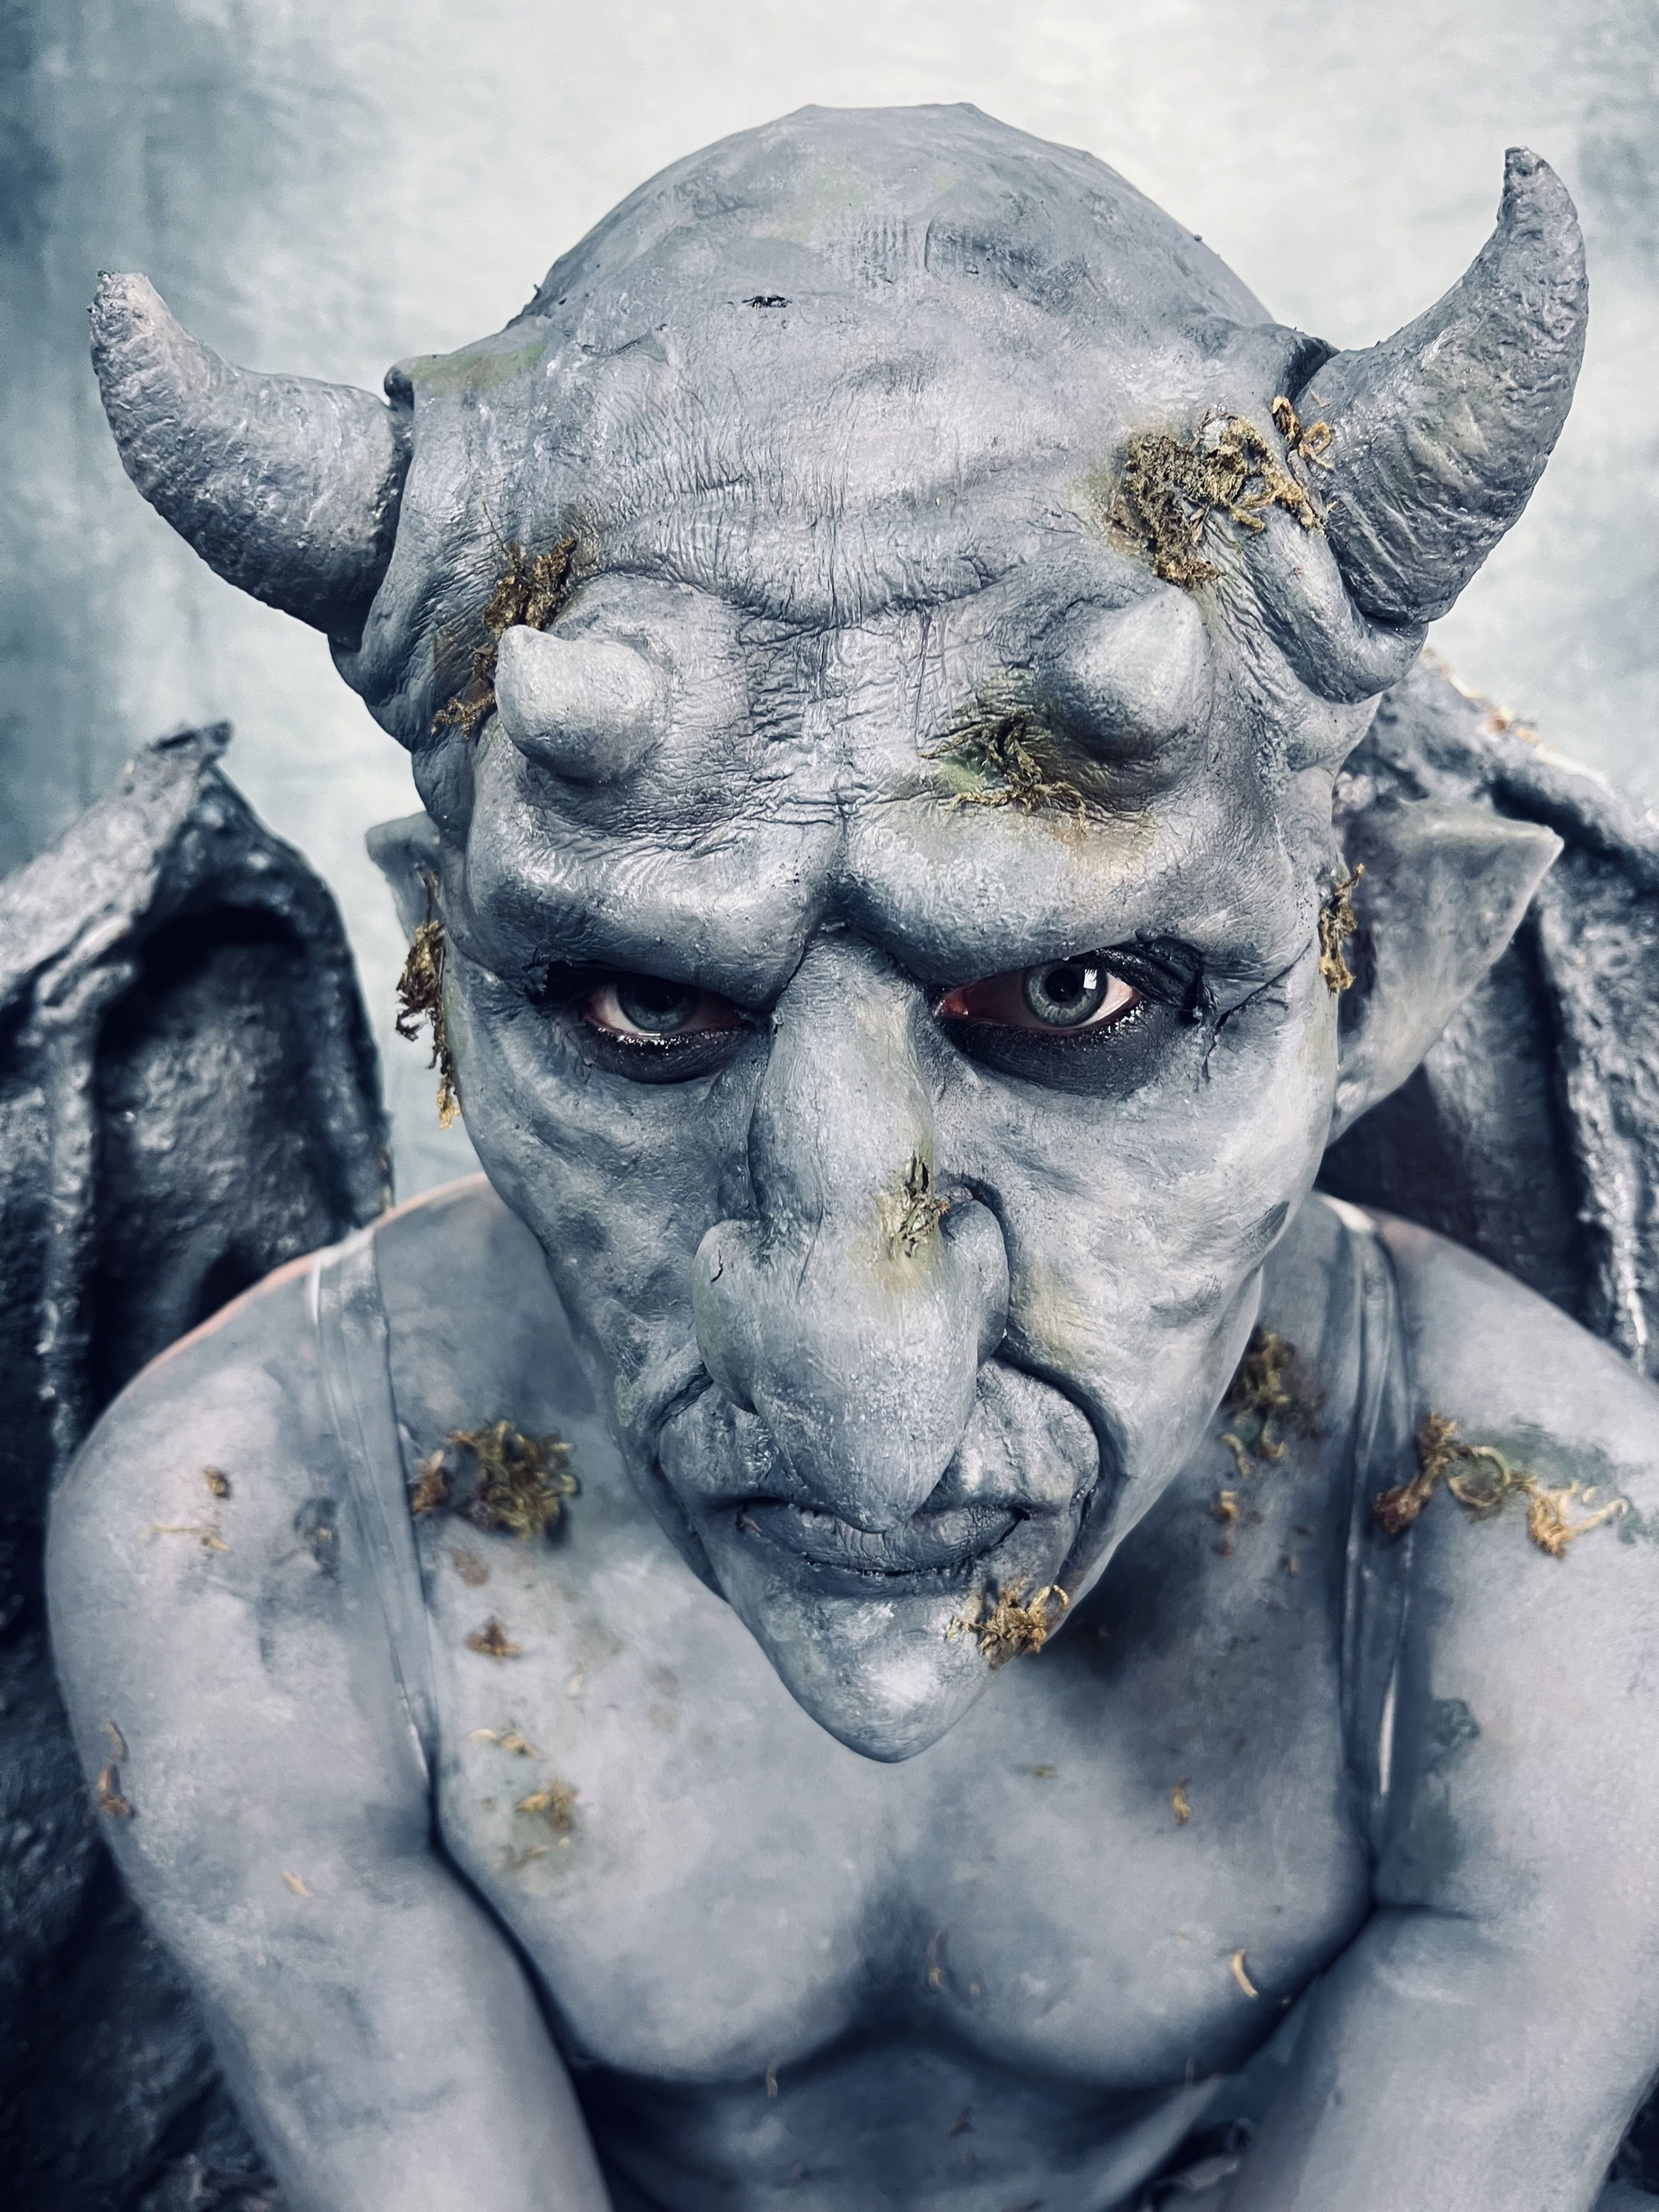
Figure 10: Close-up (Keites-Gorman, 2024)
I was very happy with the fake moss as it really made a positive difference to the weathered look. I was careful with its placement and applied it with Pros aide, which stuck wonderfully. I then added the horns and ears. These pieces didn't stick well - the ears fell off a few times and the horns did as well. In hindsight, I could have applied them after attaching the wings as their movement caused them to fall off. I used strong glue, 'snappy G' for the ears and silicone glue for the horns. I also added moss to cover up any imperfections on the ears as they didn't come out as good as I had planned. This did a good job of hiding the imperfections without making it obvious.
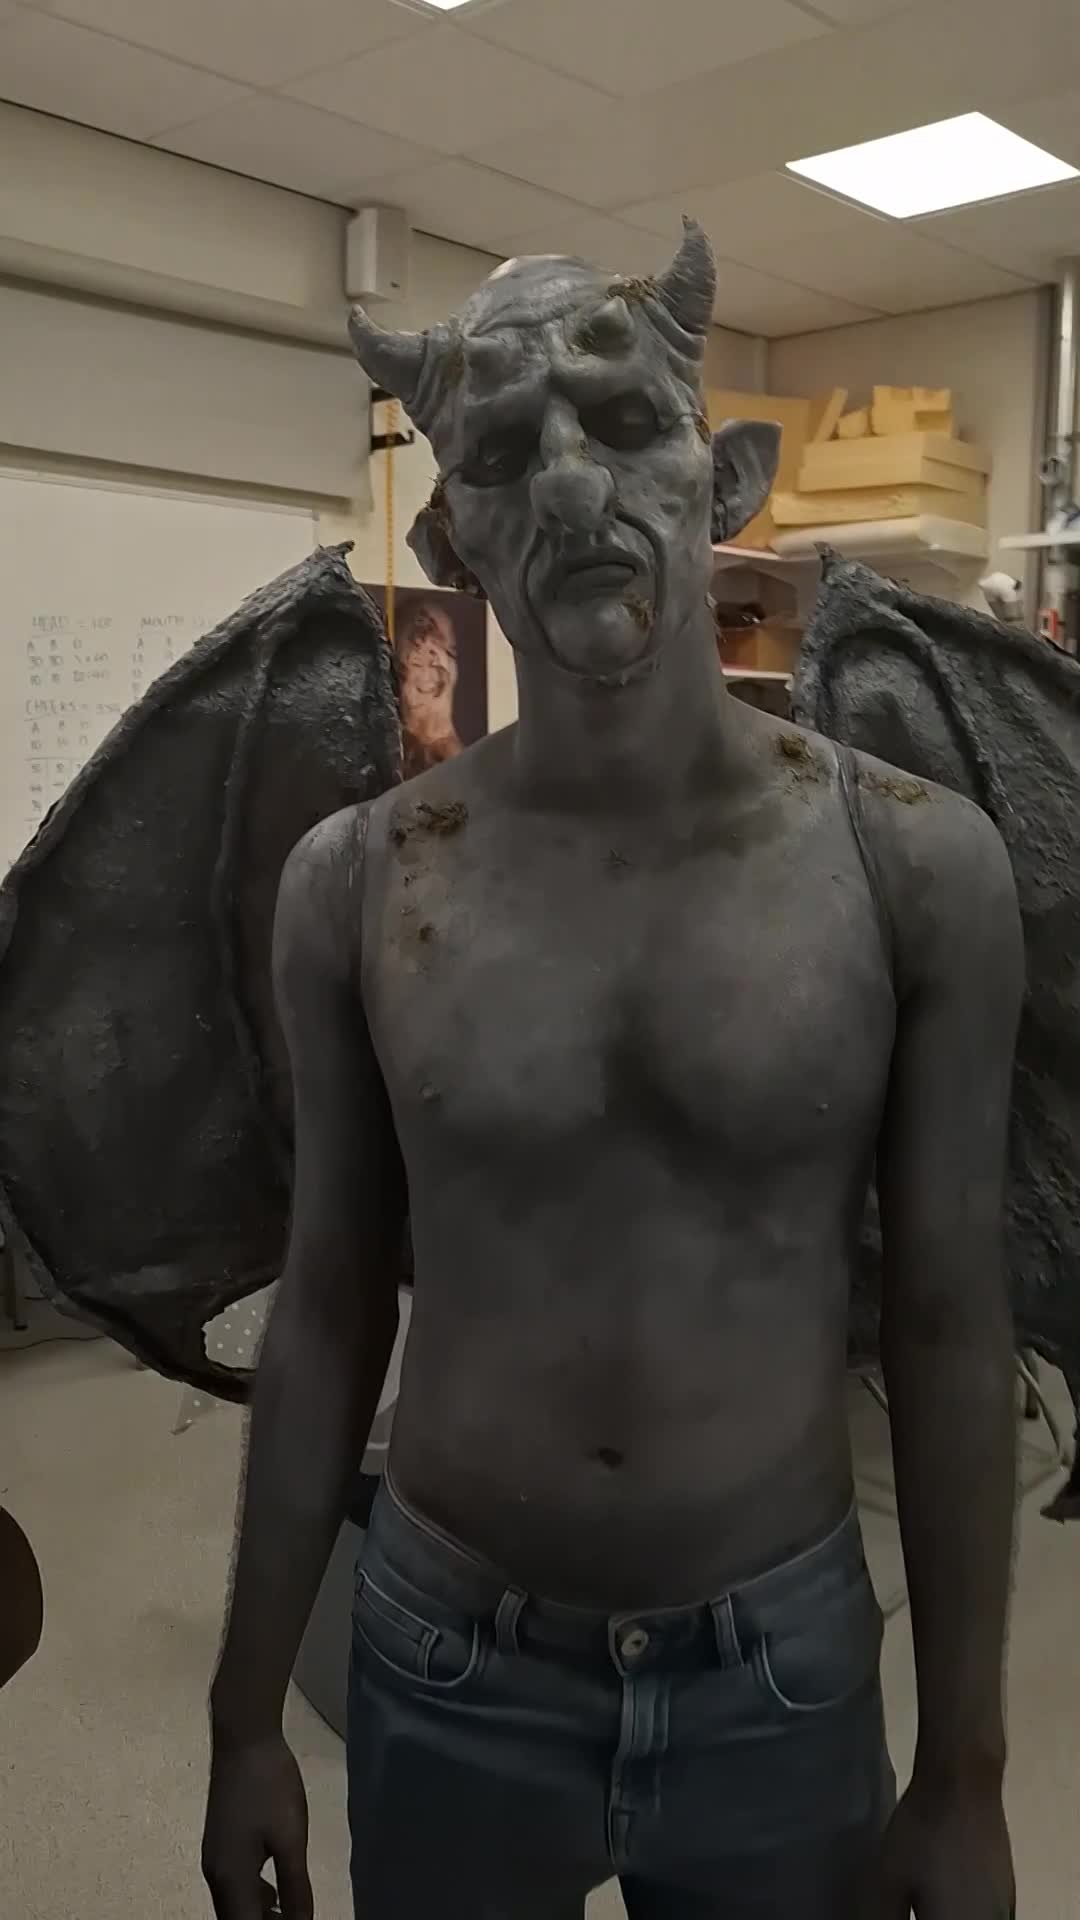
Figure 11: Full body (Keites-Gorman, 2024)
Additionally, I added false nails painted with grey to match the gargoyle. This was a last-minute decision, but I believe it added to the look and made my gargoyle look more menacing. Last but not least, I attached the wing straps around my model's shoulders, making sure they were comfortable. I then painted the straps grey to blend them in as best as I could. It took a few attempts to get it right as seen in the video, but I was impressed that I managed to do it myself, and they held themselves up.
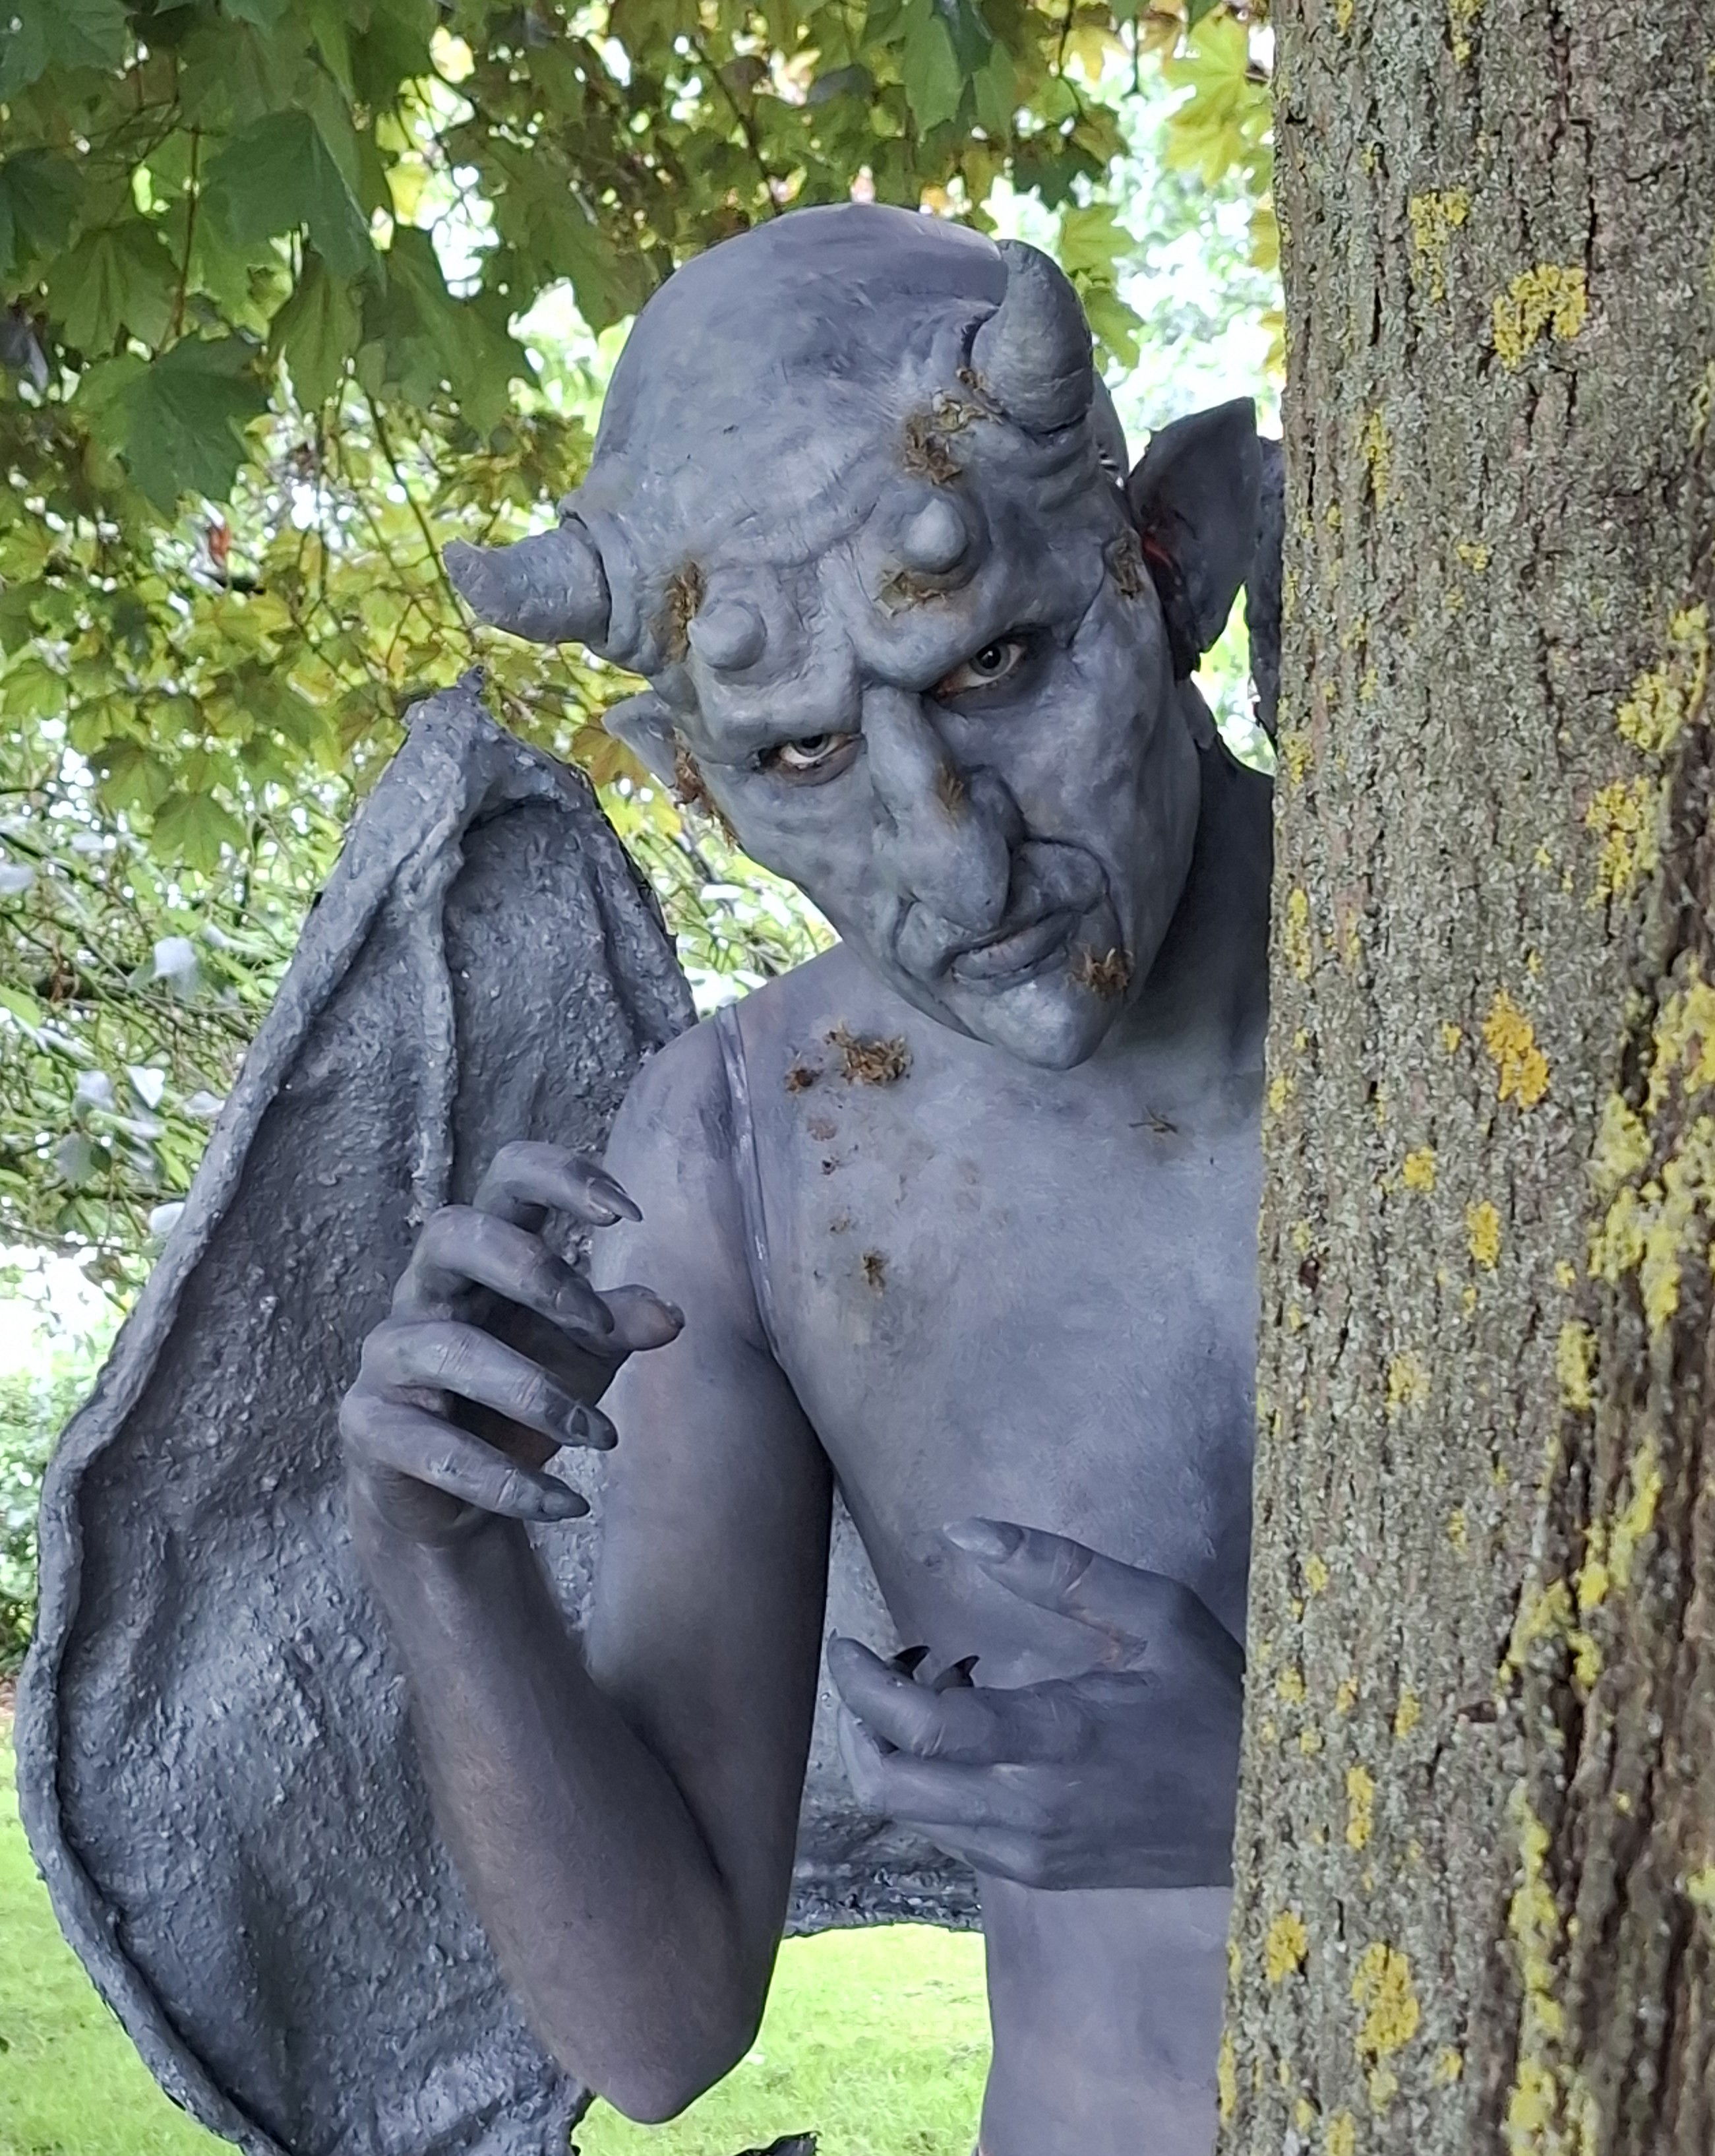
Figure 12: Outside Background (Keites-Gorman, 2024)
Finally, I was able to take photos. At this point, I was exhausted but really happy. I didn’t realise how well the exam went at the time, but I was happy with what I had created. I then went to the photography section and with help from Tracy, a trainee teacher, took photos. I was really grateful for her help, as she literally got on the floor to get certain angles and showed tips and tricks to get the best photos. I again really appreciated this and for my teacher to stay behind out of their own time, as by now everyone had gone, and I was the last to finish it as it was quite a big design.
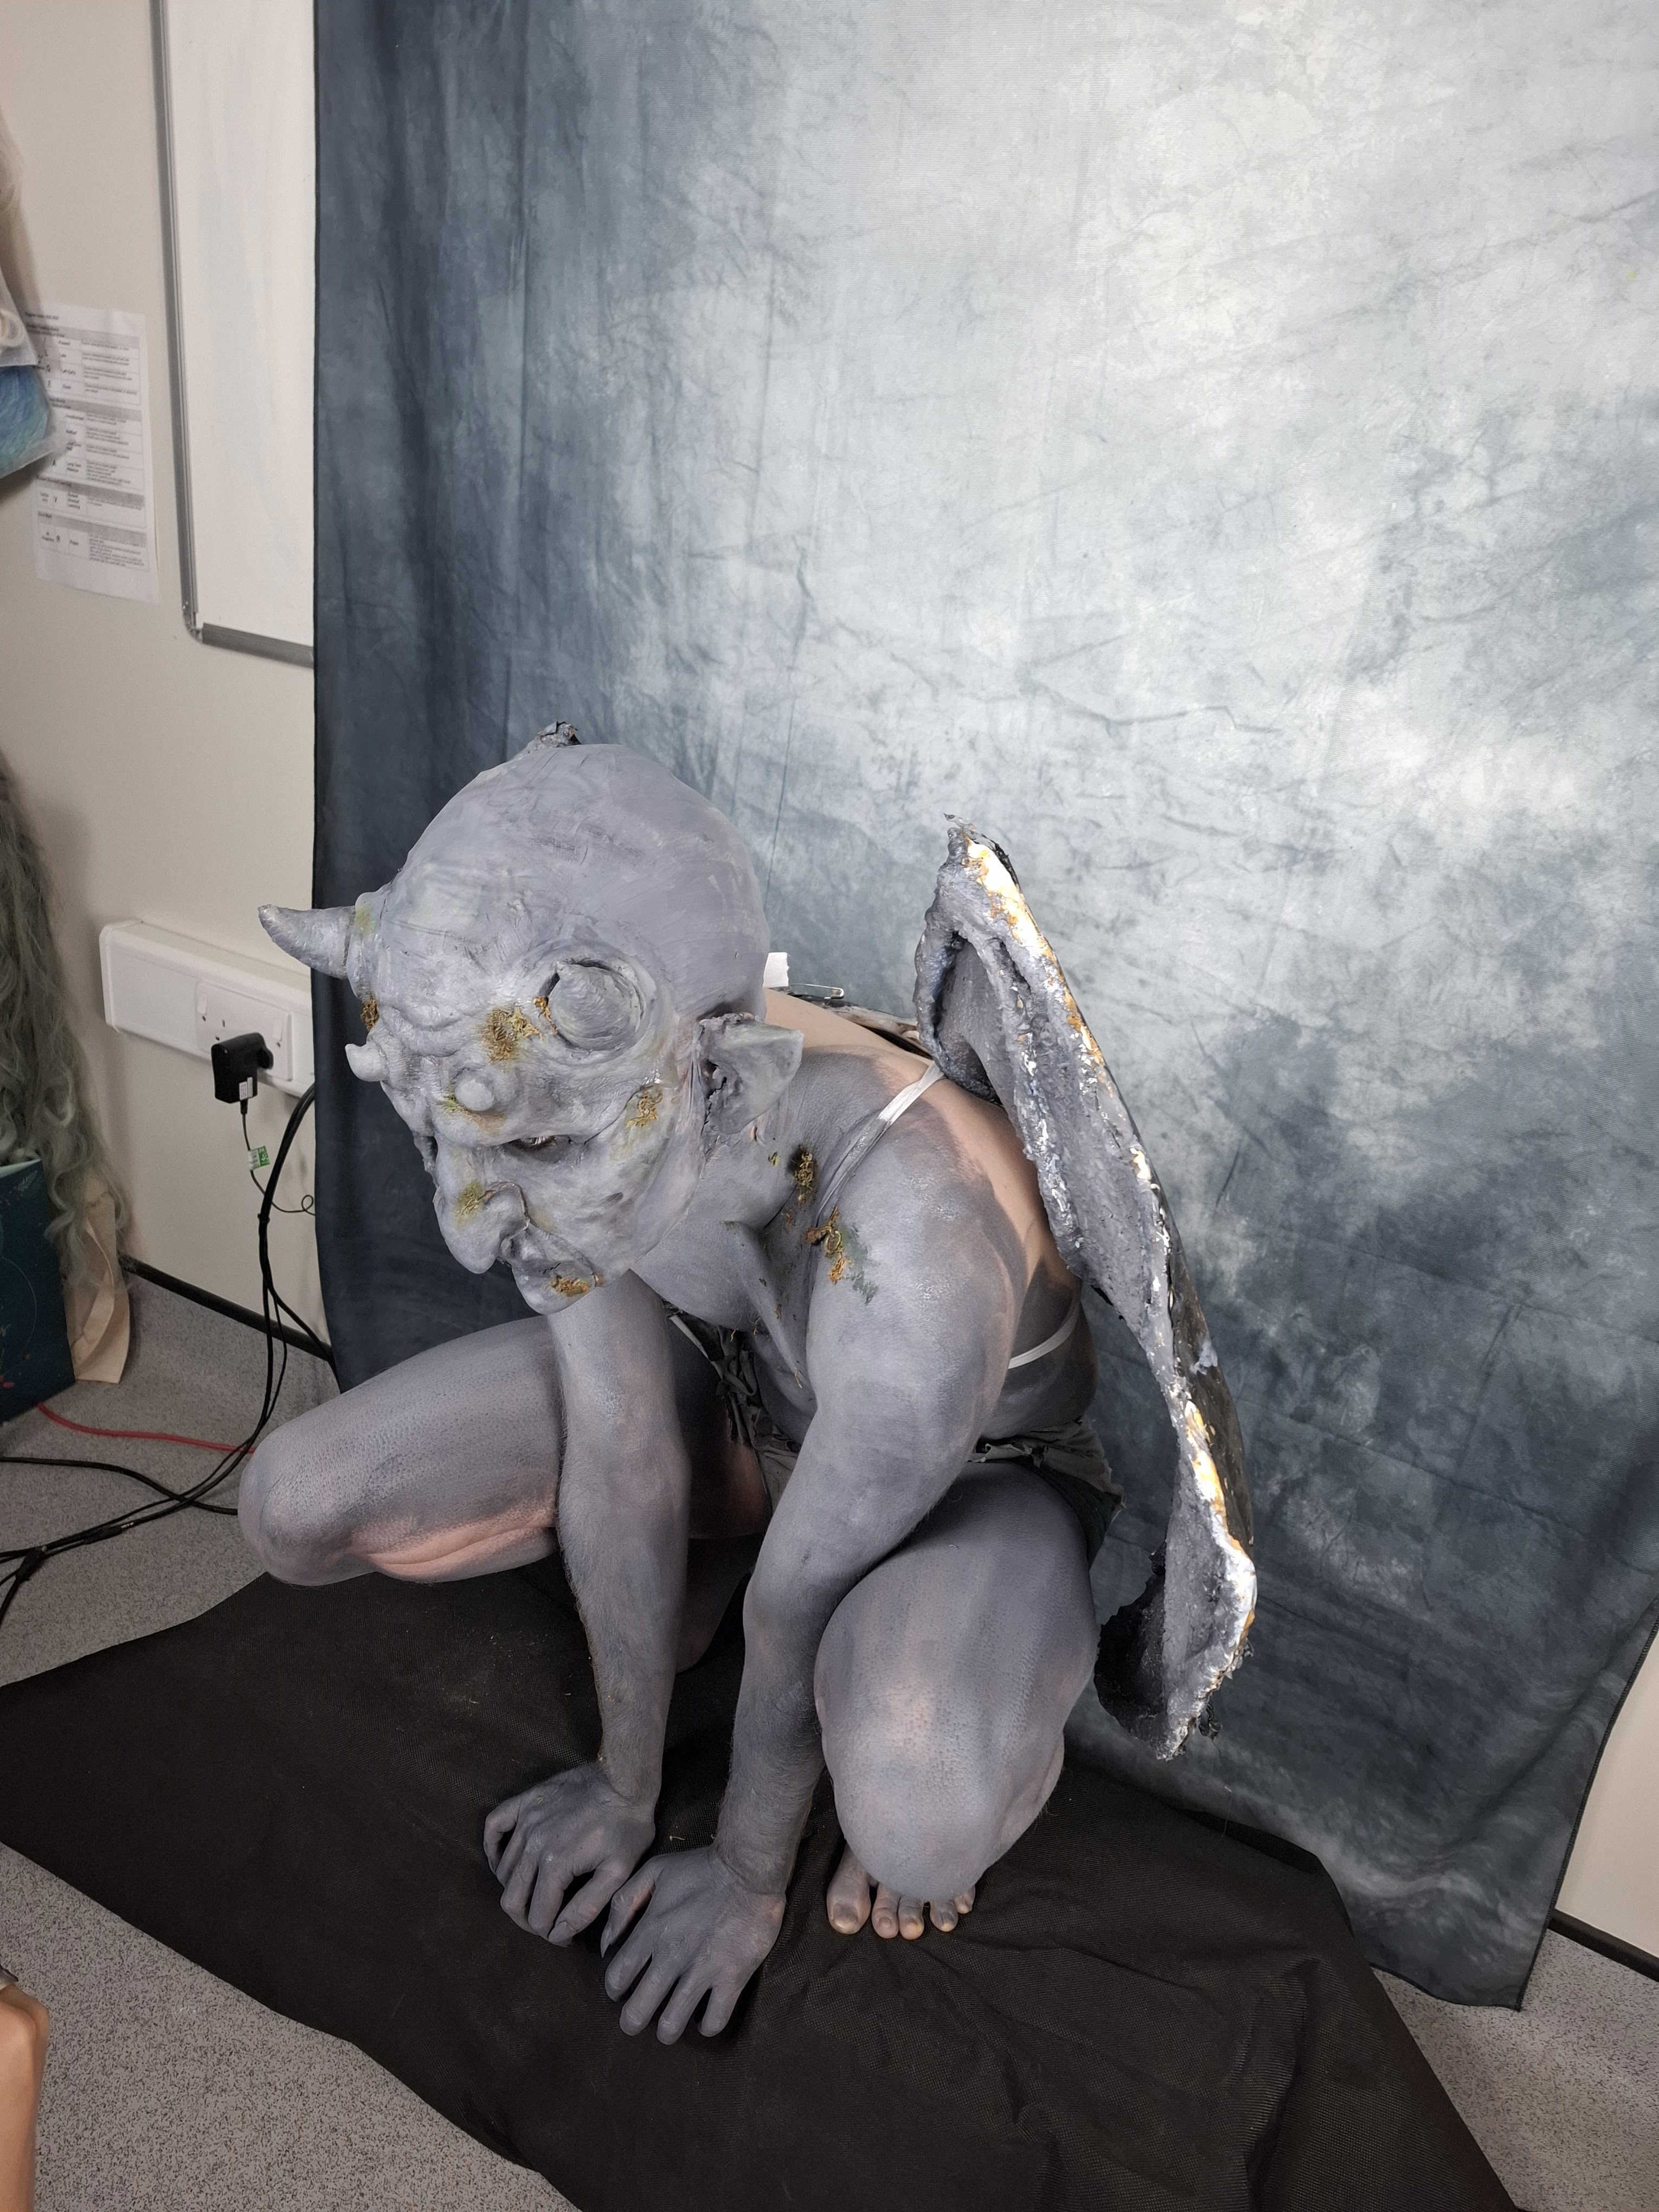
Figure 13: Behind the scenes (Keites-Gorman, 2024)
I then went back with my model to remove the paint from his legs so he could put on his jeans, and we could take photos outside. I was uncertain if I would take photos outside, one because it was very cold and it was getting quite late. I decided to, with obviously my model's approval, as prosthetics aren't the most fun things to wear for a long period of time. But we agreed if he wore jeans and took photos outside the college very quickly, then I could finally remove the prosthetics. We thought we might as well since we had the prosthetics all on. I'm very glad I did, as the outdoor photos are some of my favourites and quite good considering we only spent 5 minutes outside, as it was unbearably cold and I wasn’t going to give my model hypothermia.
Here is a video of me explaining what I've just said and yes that is paint on my face, I tend to forget I have paint on my hand and then touch my face, oops!
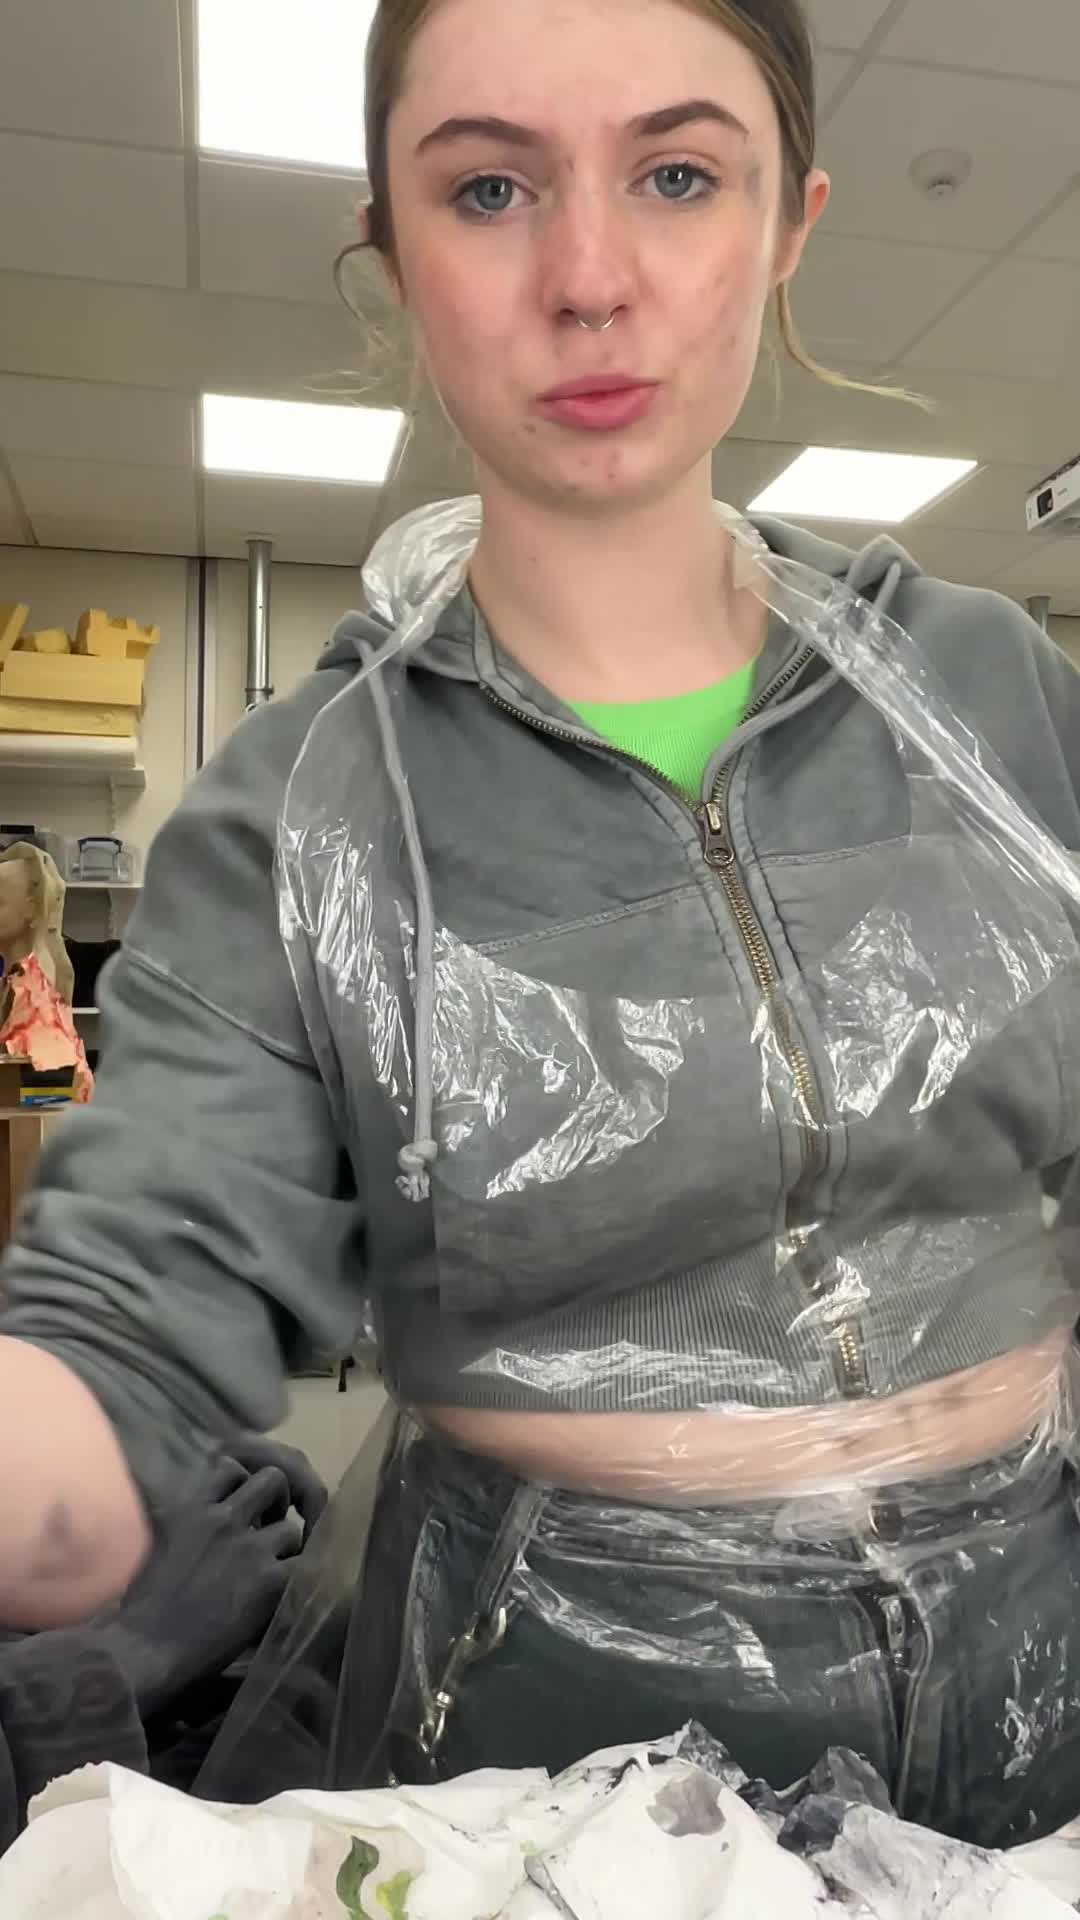
Figure 14: Exam explanation (Keites-Gorman, 2024)
Removal
I have to remove all of the hard work I've just put in. I'm a bit disappointed because of the time I spent on it, but it's important for my model's comfort. The first thing I did was remove the nails. They were attached with strong glue, so I asked my model not to soak the nails in acetone while I removed the prosthetics. The ears were less secure, so I took them off next to prevent them from falling off accidentally. Then I carefully removed the prosthetics, starting from the edges and working inwards. It came off in one piece, which was interesting. After that, I used cotton pads and Bond off to remove any remaining glue, being careful not to irritate my model's skin. I then used warm cloths to remove the water-activated body paint. My model also helped me remove some of the makeup around the eyes, as they felt more comfortable doing it themselves.
Here are the time-lapse videos showing the removal process.
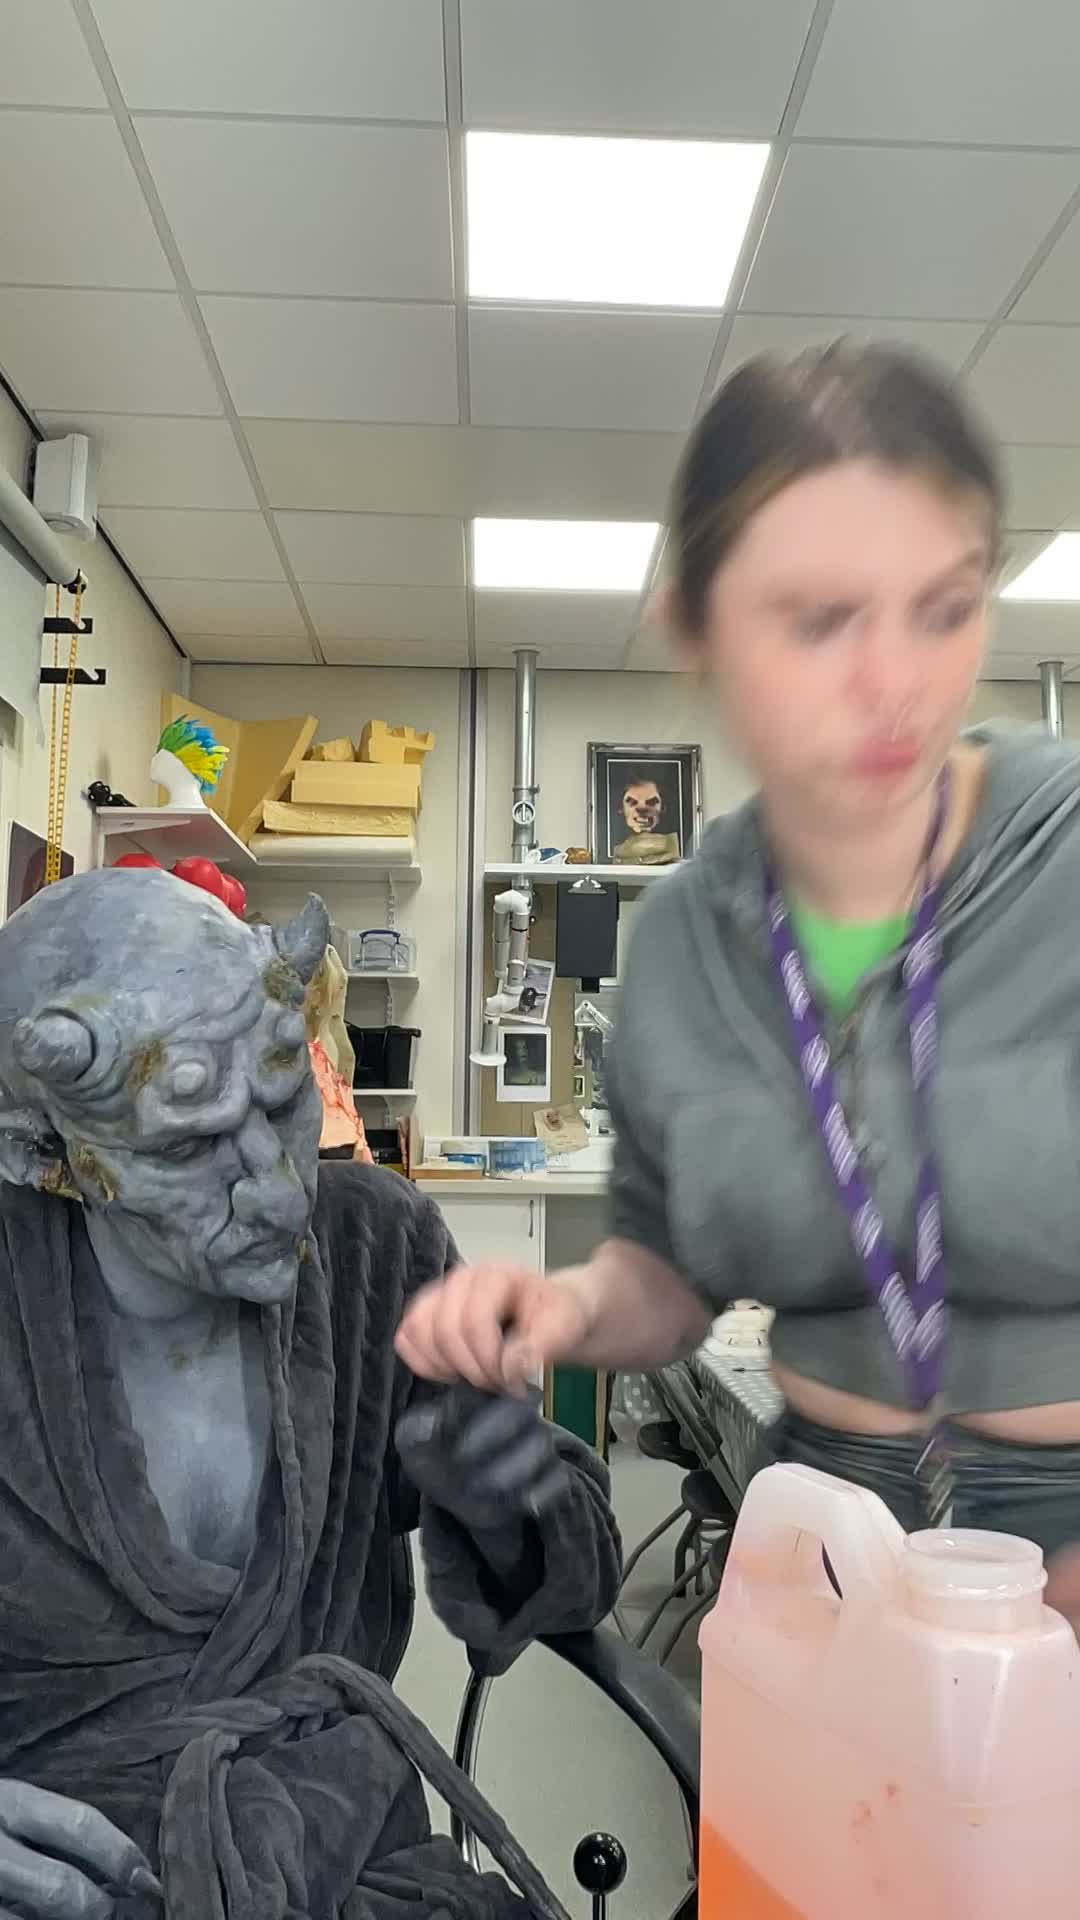
Figure 15: Removal part 1 (Keites-Gorman, 2024)
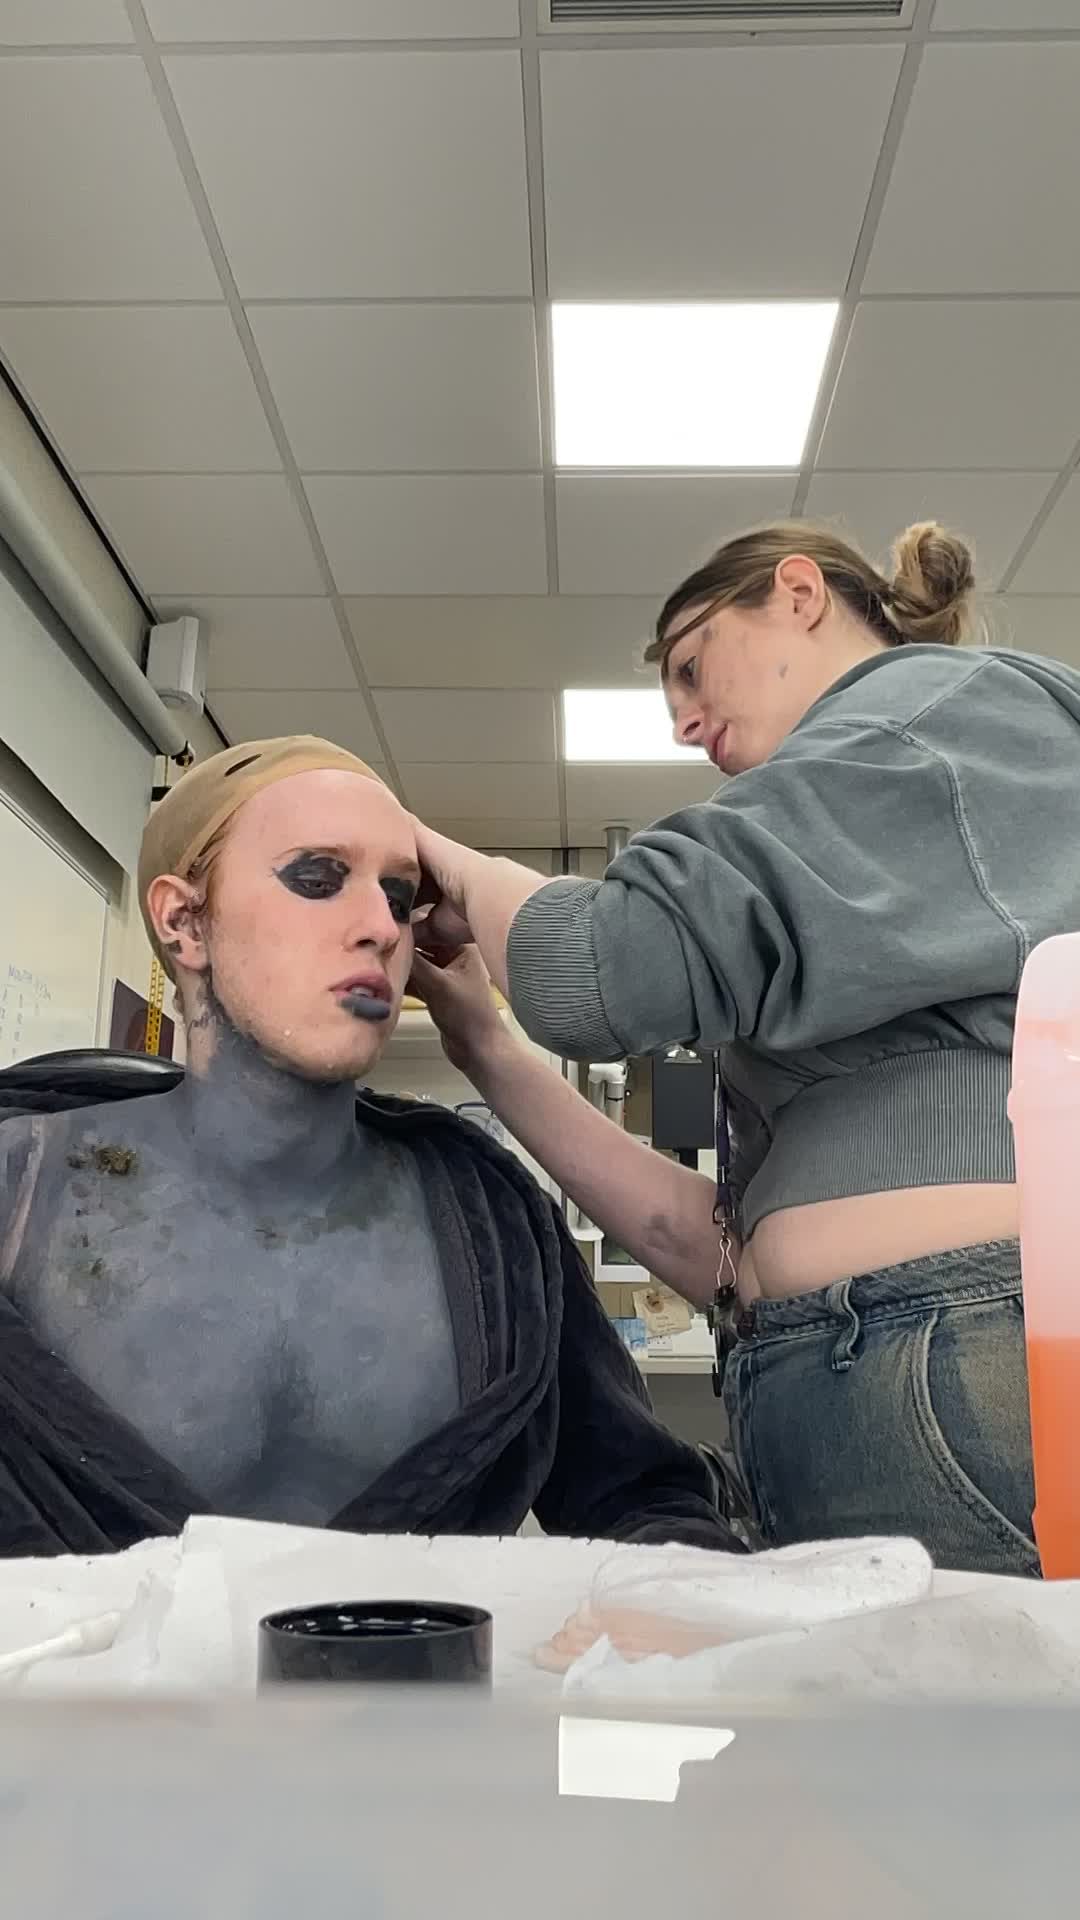
figure 16: Removal part 2 (Keites-Gorman, 2024)
After a very long day, I had finally done it. Leading up to this exam, I wasn't entirely sure if I would have anything to show after the last few months. At one point in this process, I lost my passion for special effects, feeling like I was never going to finish and that I was too far behind. Nevertheless, I didn't give up. I pushed through, especially with the setbacks and obstacles I faced in the first year. I knew I could do it. It took a lot of work, going in nearly every day for 6-8 hours at a time while also juggling a part-time job. It was a lot, but I'm so glad I stuck with it. Honestly, I surprised myself. Typically, I'm not very easy on myself and I'm rarely proud of my work. This is the first time I can say that. From challenges in my personal life to distractions in front of me and university essentially being my second home, I would like to believe that I will now believe in myself a bit more. I'm really excited to have my passion for special effects back and to see where this will take me.
Here are the videos of me applying and taking the wings off :)
Final images can be viewed on the 'final SFX images' tab on the top.

Figure 17: Attaching Wings (Keites-Gorman, 2024)
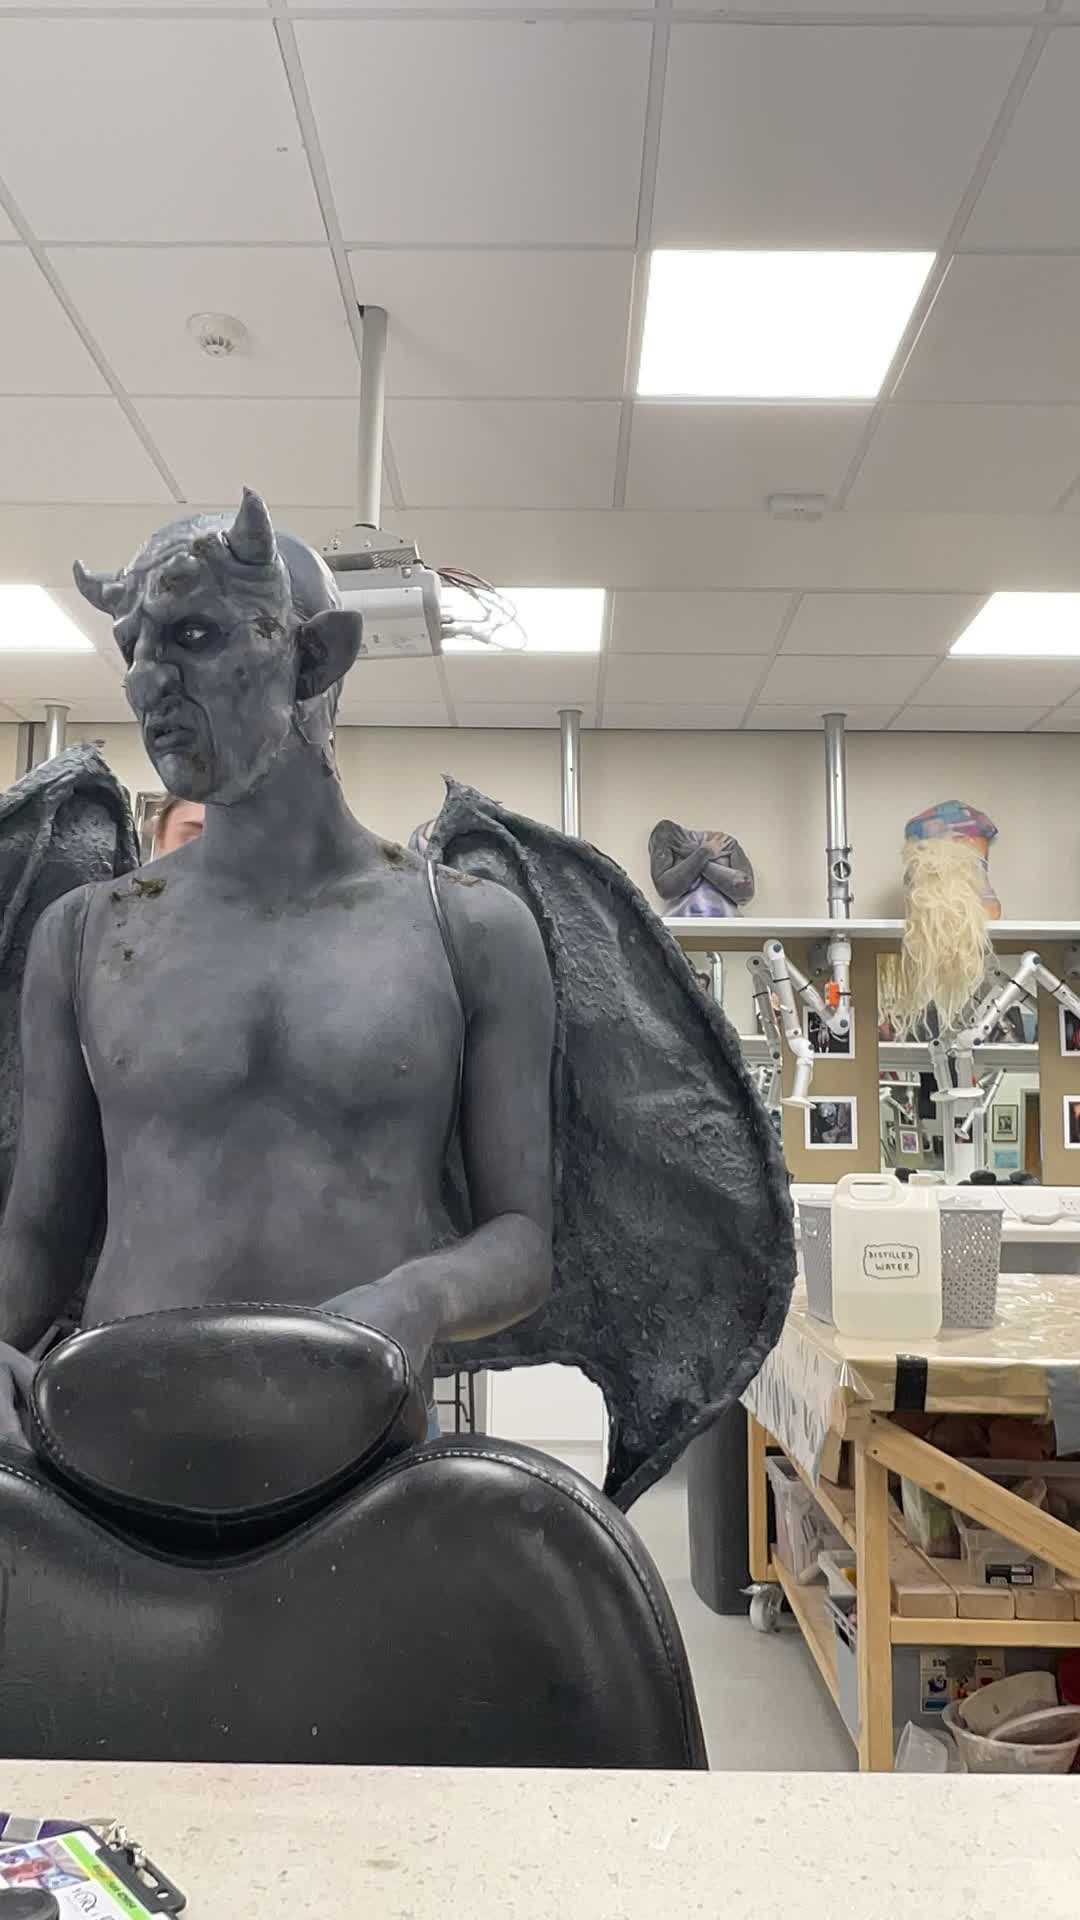
Figure 18: Removing Wings (Keites-Gorman, 2024)
Figure list
Figure 1: Keites-Gorman, E. (2024). Left side Hair wrap. [Own Work]. York College, UK.
Figure 2: Keites-Gorman, E. (2024). Front Hair wrap. [Own Work]. York College, UK.
Figure 3: Keites-Gorman, E. (2024). Back Hair wrap. [Own Work]. York College, UK.
Figure 4: Keites-Gorman, E. (2024). Right side Hair wrap. [Own Work]. York College, UK.
Figure 5: Keites-Gorman, E. (2024). Left side Bold Cap. [Own Work]. York College, UK.
Figure 6: Keites-Gorman, E. (2024). Right side bold cap. [Own Work]. York College, UK.\
Figure 7: Keites-Gorman, E. (2024). Right side Hair wrap. [Own Work]. York College, UK.
Figure 8: Keites-Gorman, E. (2024). Back Left Bold cap. [Own Work]. York College, UK.
Figure 9: Keites-Gorman, E. (2024). Time-lapse Application. [Own Work]. York College, UK.
Figure 10: Keites-Gorman, E. (2024). Close-up. [Own Work]. York College, UK.
Figure 11: Keites-Gorman, E. (2024). Full body. [Own Work]. York College, UK.
Figure 12: Keites-Gorman, E. (2024). Outside Background. [Own Work]. York College, UK.
Figure 13: Keites-Gorman, E. (2024). Behind the scenes. [Own Work]. York College, UK.
Figure 14: Keites-Gorman, E. (2024). Exam explanation. [Own Work]. York College, UK.
Figure 15: Keites-Gorman, E. (2024). Removal part 1. [Own Work]. York College, UK.
Figure 16: Keites-Gorman, E. (2024). Removal part 2. [Own Work]. York College, UK.
Figure 17: Keites-Gorman, E. (2024). Attaching Wings. [Own Work]. York College, UK.
Figure 18: Keites-Gorman, E. (2024). Removing Wings. [Own Work]. York College, UK.