7. Running pieces trails and errors
20th May 2024
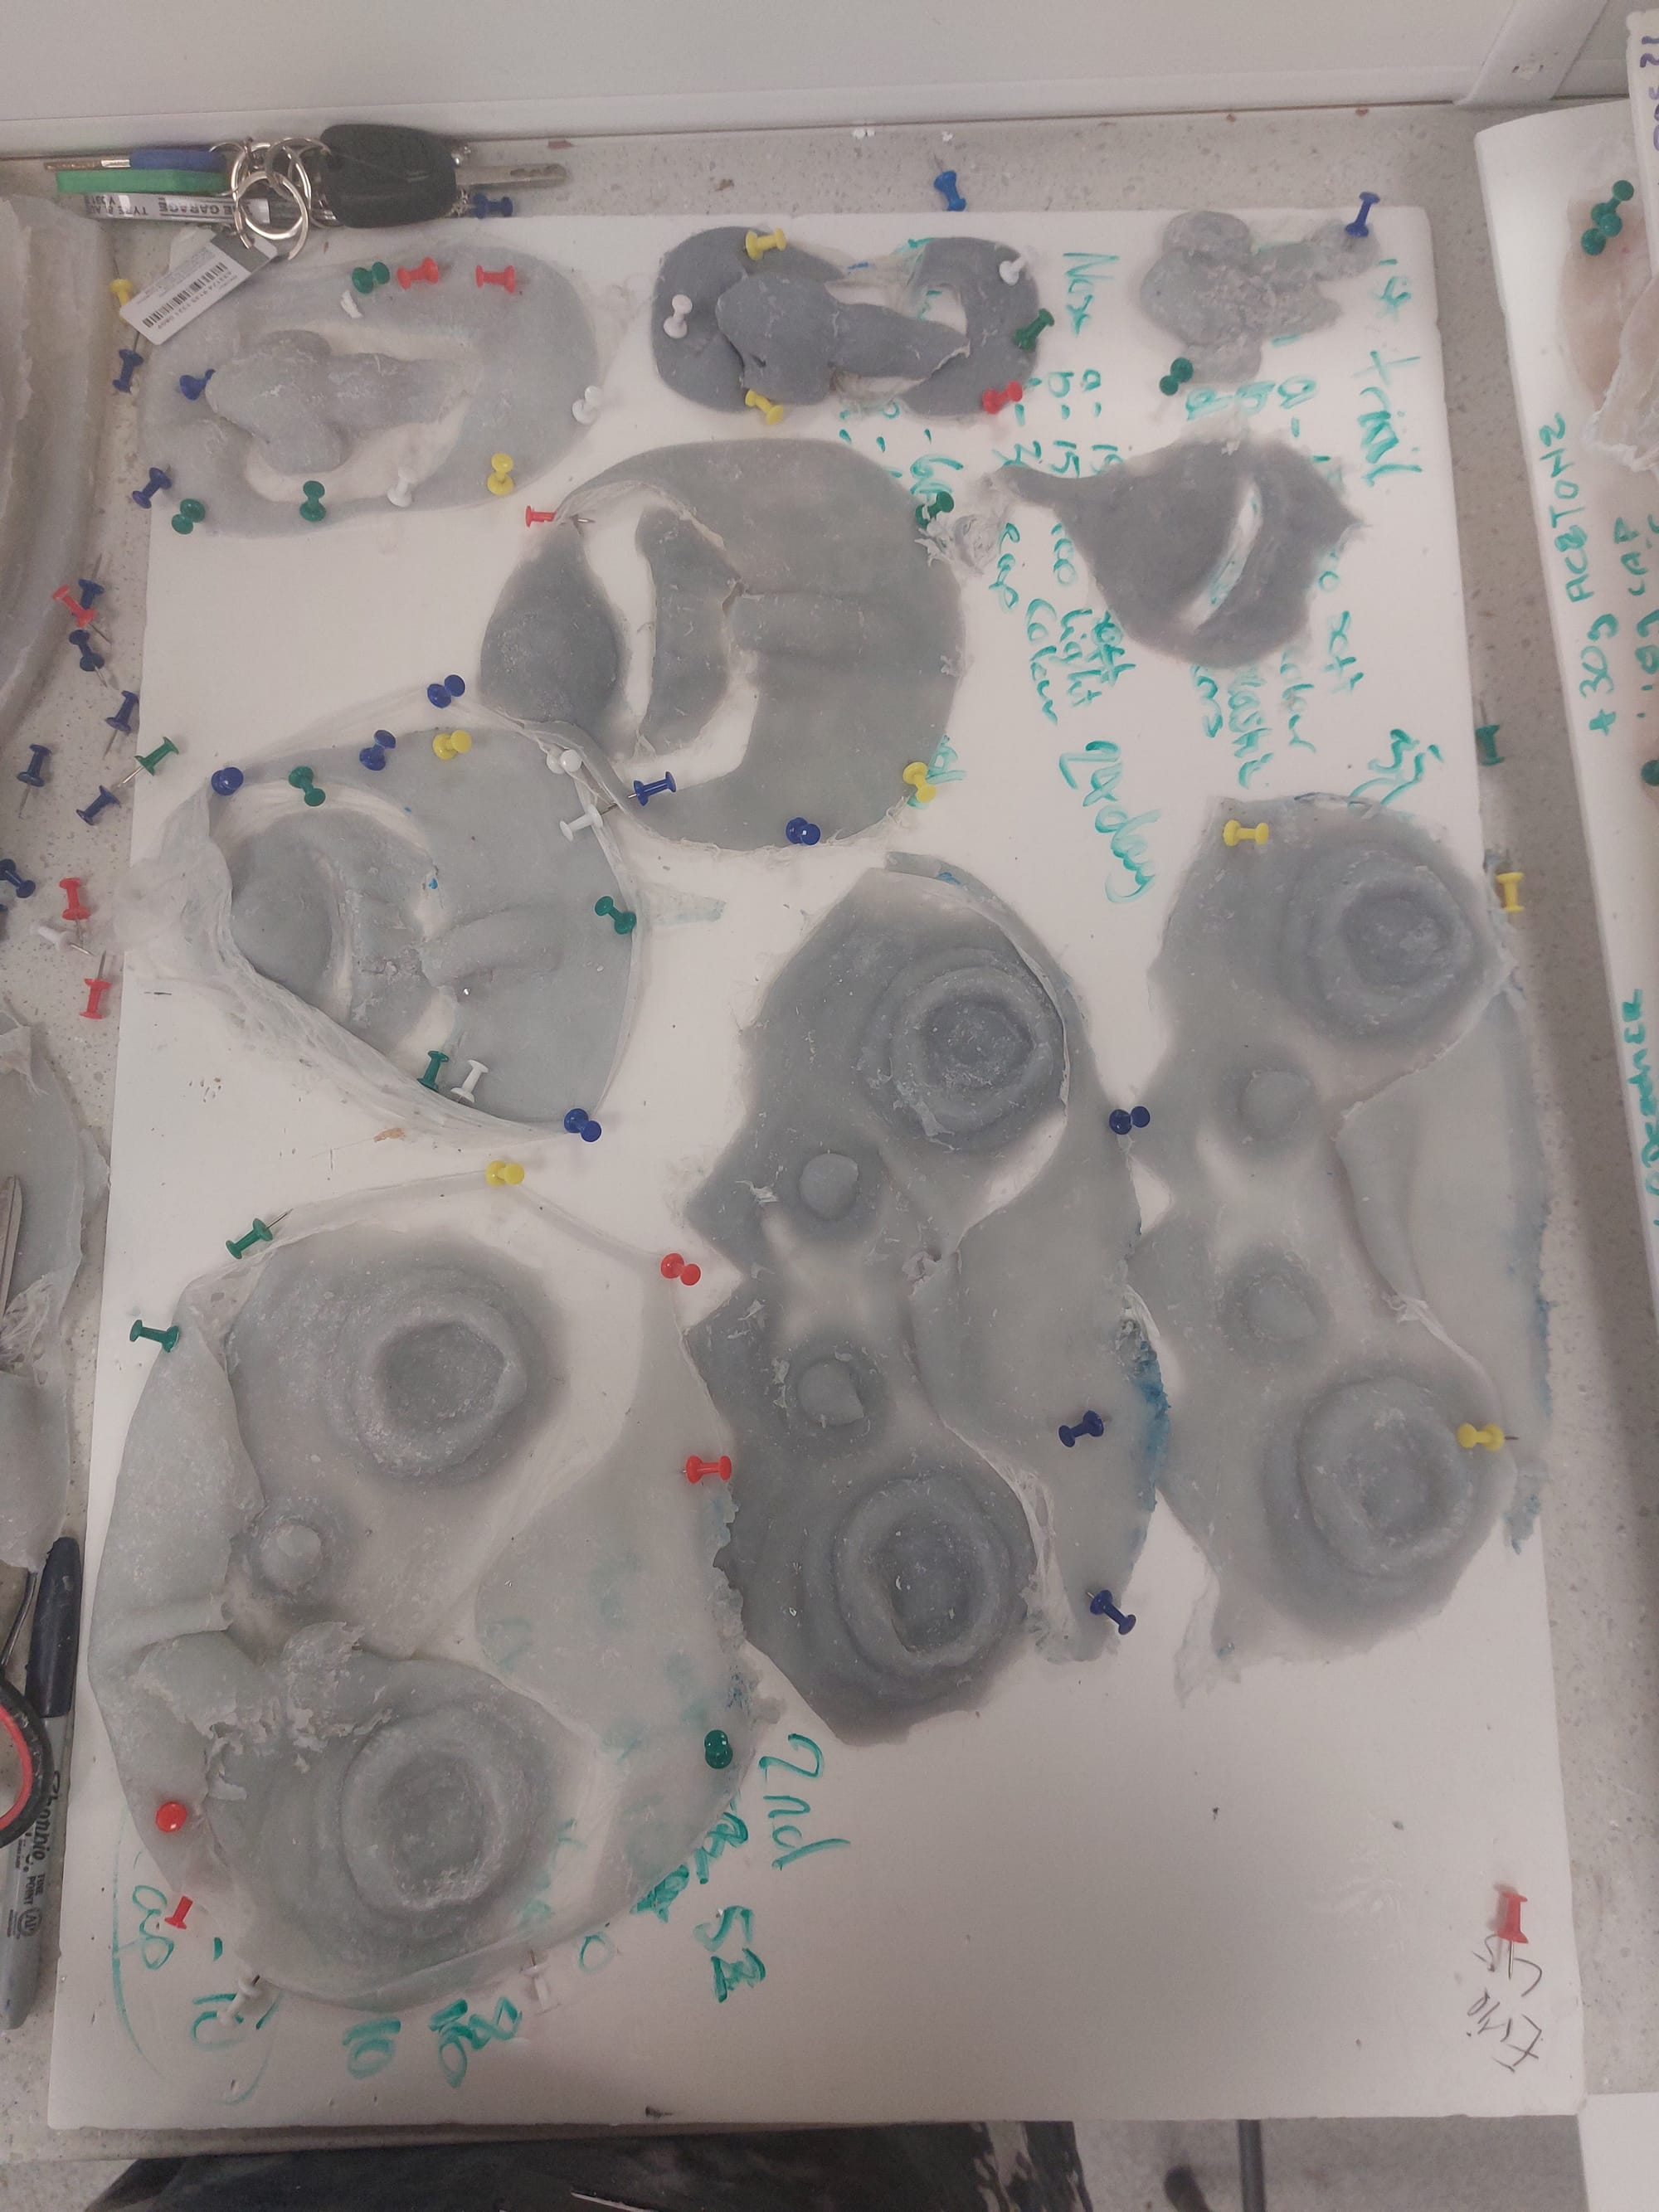
Running Pieces Before we could even start running we needed to clean and sand. Mine were not quite fitting back together so many rounds with the sandpaper it was.
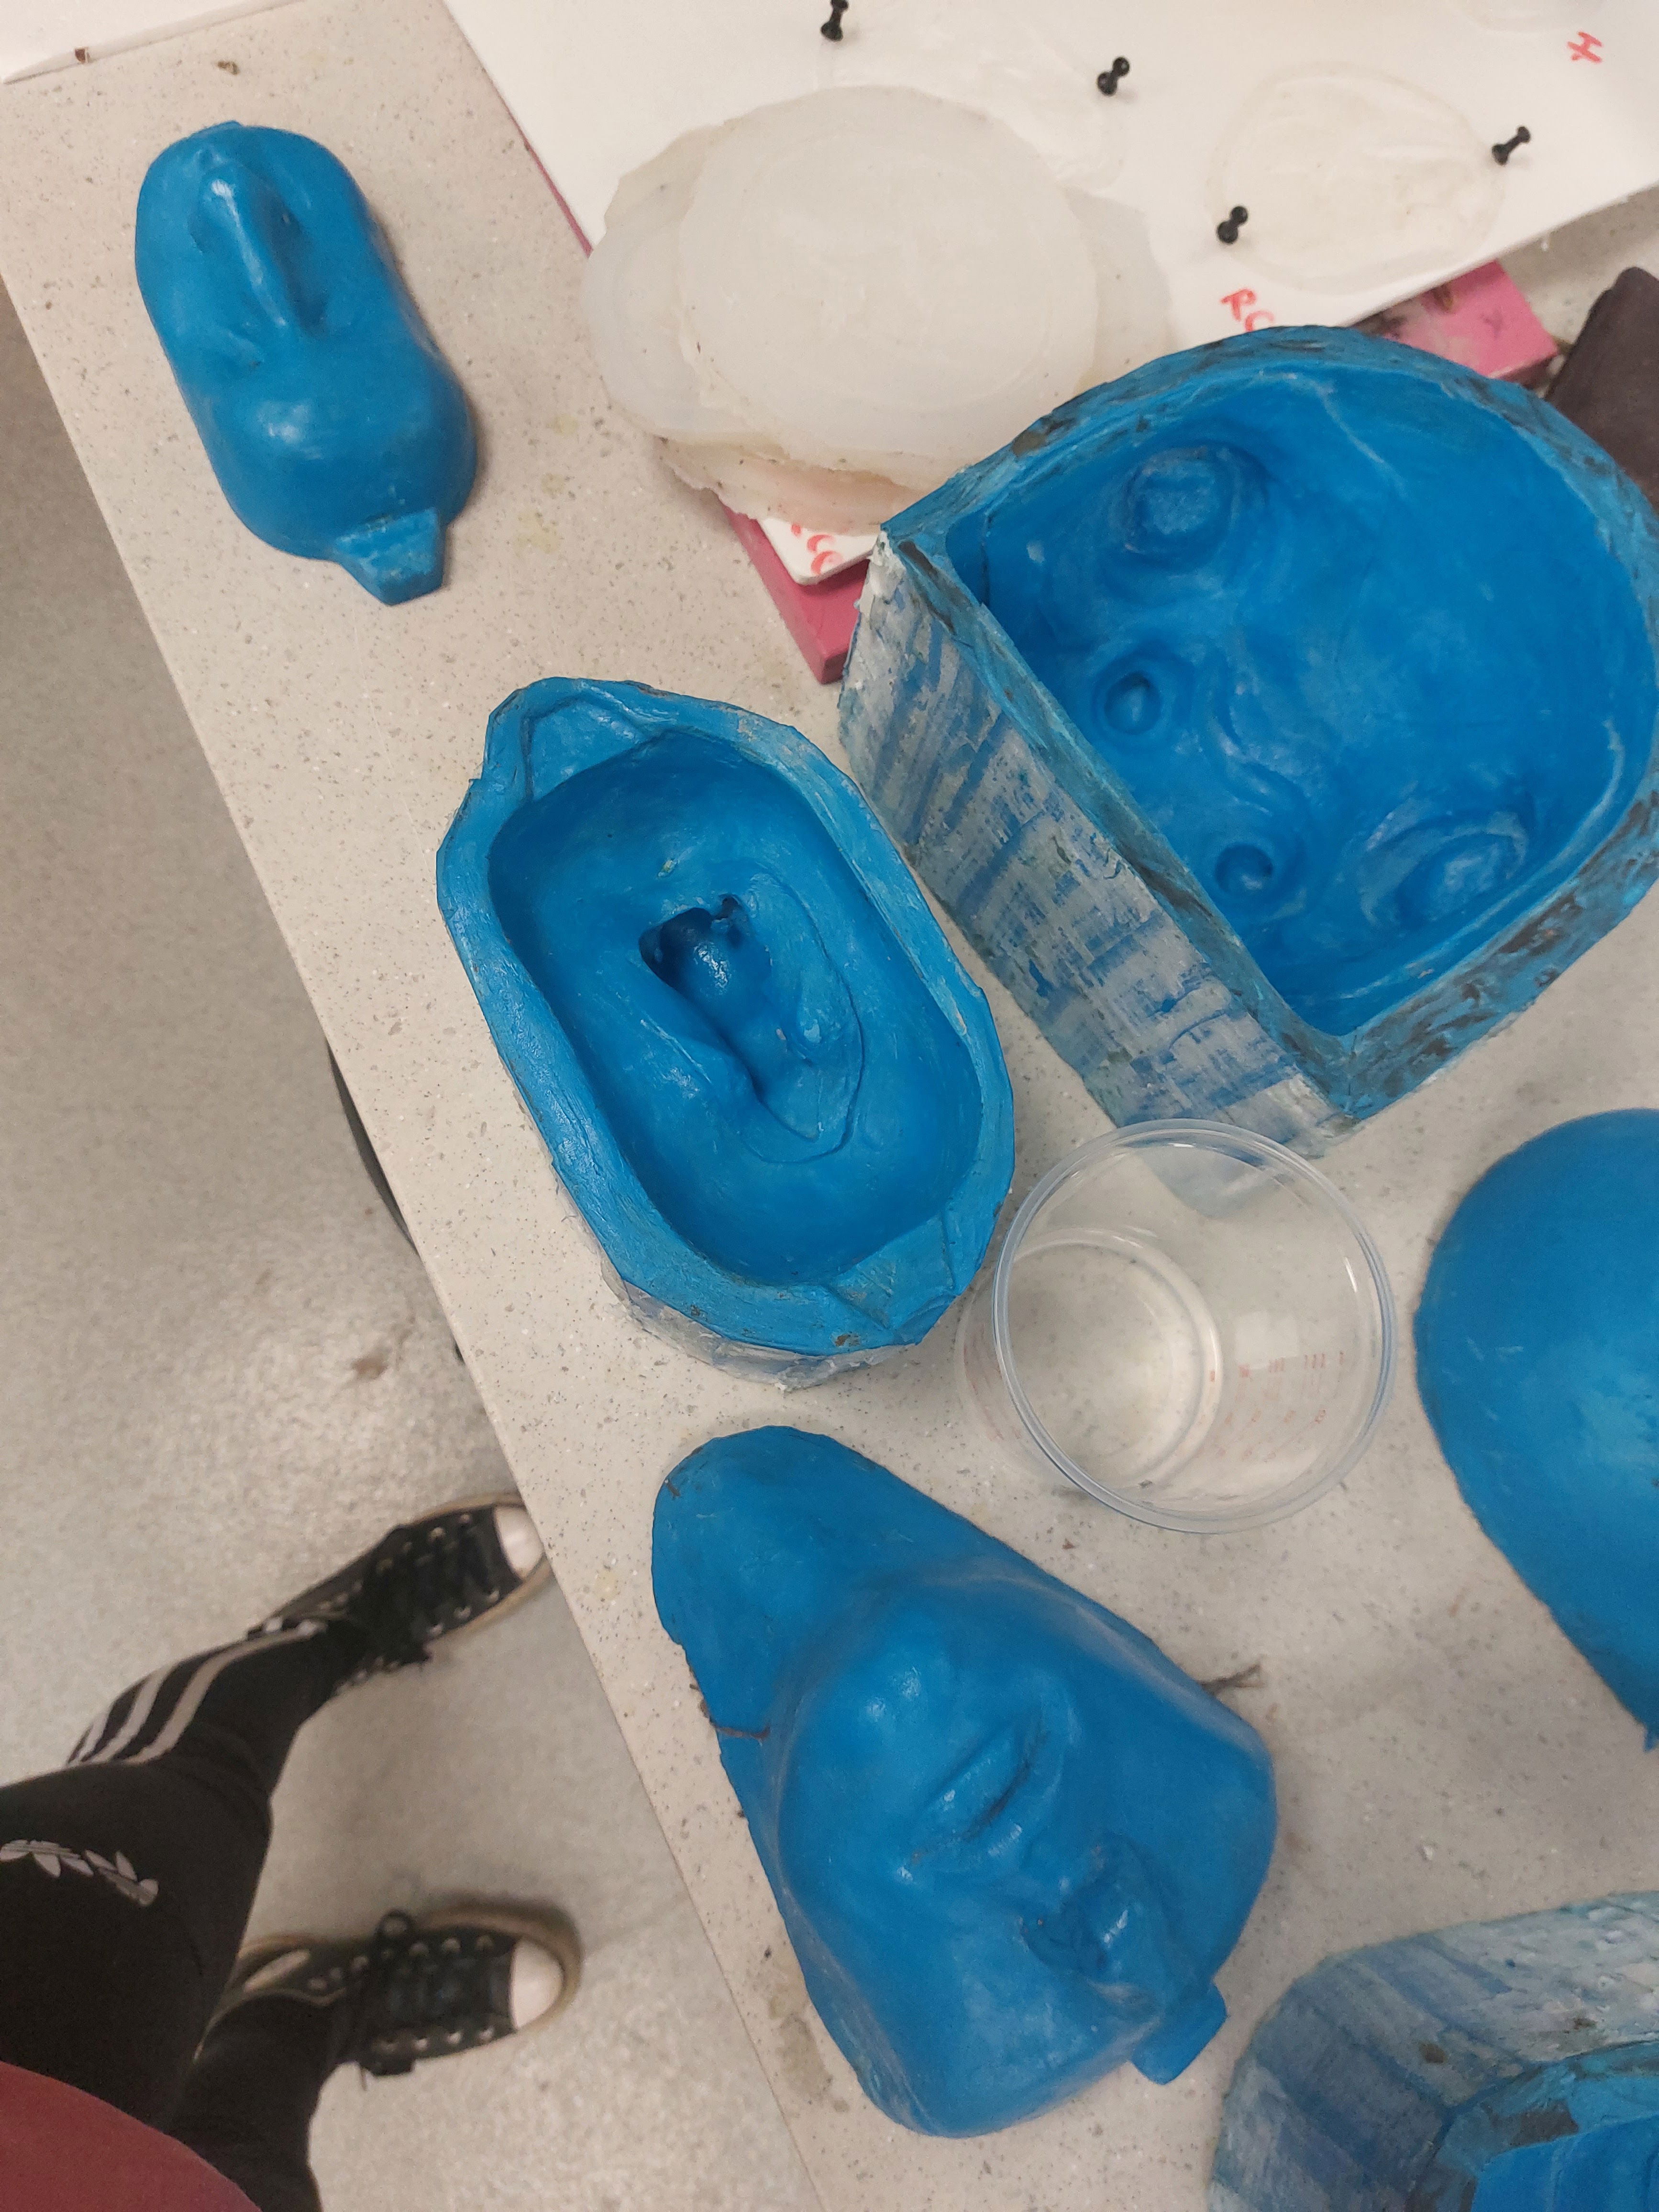
Figure 1: Prep for Running (Keites-Gorman, 2024)
Why silicone?
There are many different materials that we could use and there are good reasons why I choose silicone compared to foam latex
Silicone:
Pros:
- Translucency: Silicone provides a realistic, skin-like appearance due to its translucency.
- Customizable Properties: You can control elasticity and other material properties by adding additives.
- Durability: Silicone prosthetics are long-lasting and can withstand wear and tear.
- Latex Allergy-Free: No concerns about latex allergies.
- Internal Pigmentation: You can add depth using internal pigmentation (like flocking).
Cons:
- Heavy: Silicone can be weighty, especially for larger pieces. - Lack of Breathability: It doesn’t allow the skin to breathe. - Painting Challenges: If not encapsulated, silicone can be tricky to paint. (Hepworth, 2019).
Foam Latex:
Pros: - Lightweight: Foam latex is light and comfortable to wear. - Highly Flexible: Ideal for large pieces that need to move with the skin.
- Easy to Paint: Its porous surface takes paint well.
Cons:
- Not Translucent: Foam latex lacks the natural translucency of silicone.
- Less Durable: It’s not as robust as silicone.
- Reuse Difficulty: Foam latex is harder to reuse.
- Latex Allergy Concern: Some people may be allergic to latex. In summary, neither material has the upper hand, as they excel in different situations. (Kerrington, 2024)
In summary, neither material has the upper hand, as they excel in different situations. (Hepworth, 2019). Silicone offers realism and durability, while foam latex is lightweight and flexible. (Kerrington, 2024)
So with all that silicone was the best choice as I could get the pigment and the flexibility needed for these pieces.
Side note: I would love to use foam latex at some point just to get a feel of the material and so I can truly compare the two, so hopefully next year I have a project that means I can make it in foam latex!
Running pieces
Now this was a process that nearly broke me. It really got to me how difficult it was and how discouraging it got with each failed attempt and the impending deadline. I lost a bit of passion for special effects and questioned if I was good at it and if I couldn’t do it now how would I do it in the industry? Luckily I proved this mindset wrong and gained my confidence back and in the end running pieces was one of my strongest skills in all of the steps. I’m glad I preserved and pushed through and slowly with trial and error I got workable pieces.
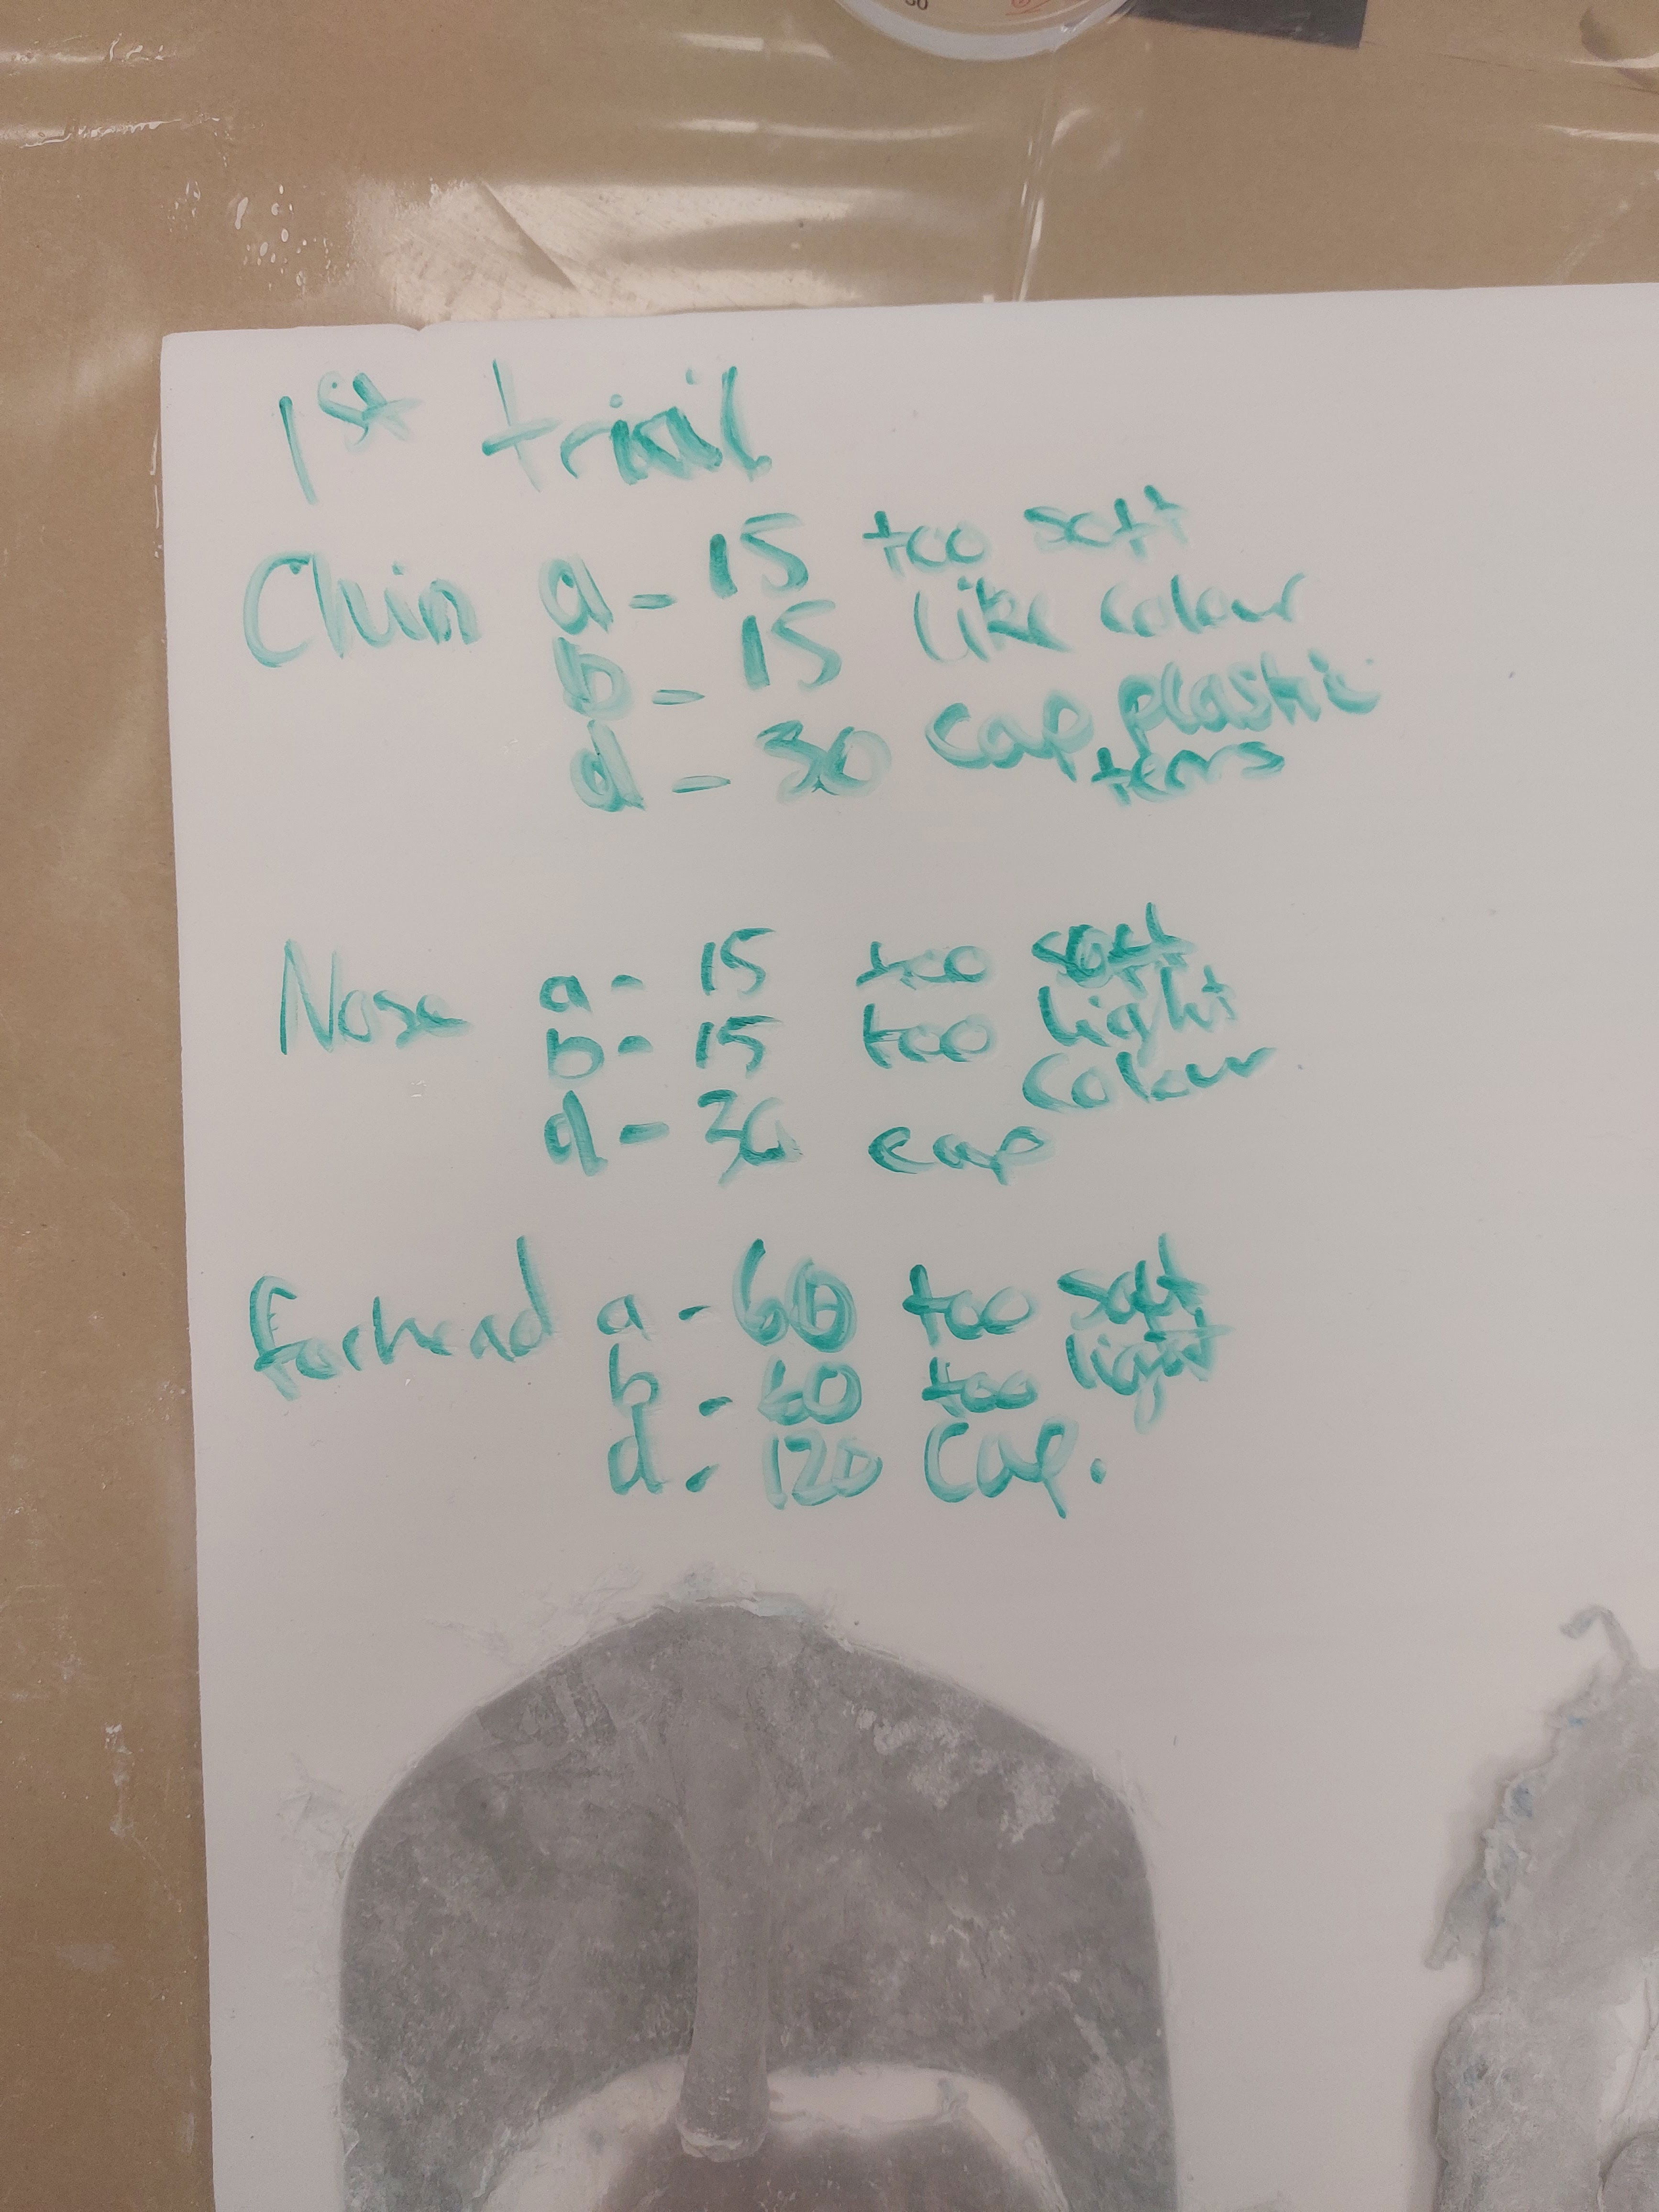
Figure 2: Measurements trial 1 (Keites-Gorman, 2024)
The first run (We are working with Platsil FS25 A & B with LV deadener) Measurements are on figure 2. Cap plastic was a 1:2 ratio. Now this run is never the one you use so hoping it would come out perfect is unrealistic. Yeah my first one was just silicone and almost disintegrated. A bit disheartening but it was my first run so I though not much of it.
Figure 3: Bad run (Keites-Gorman, 2024)
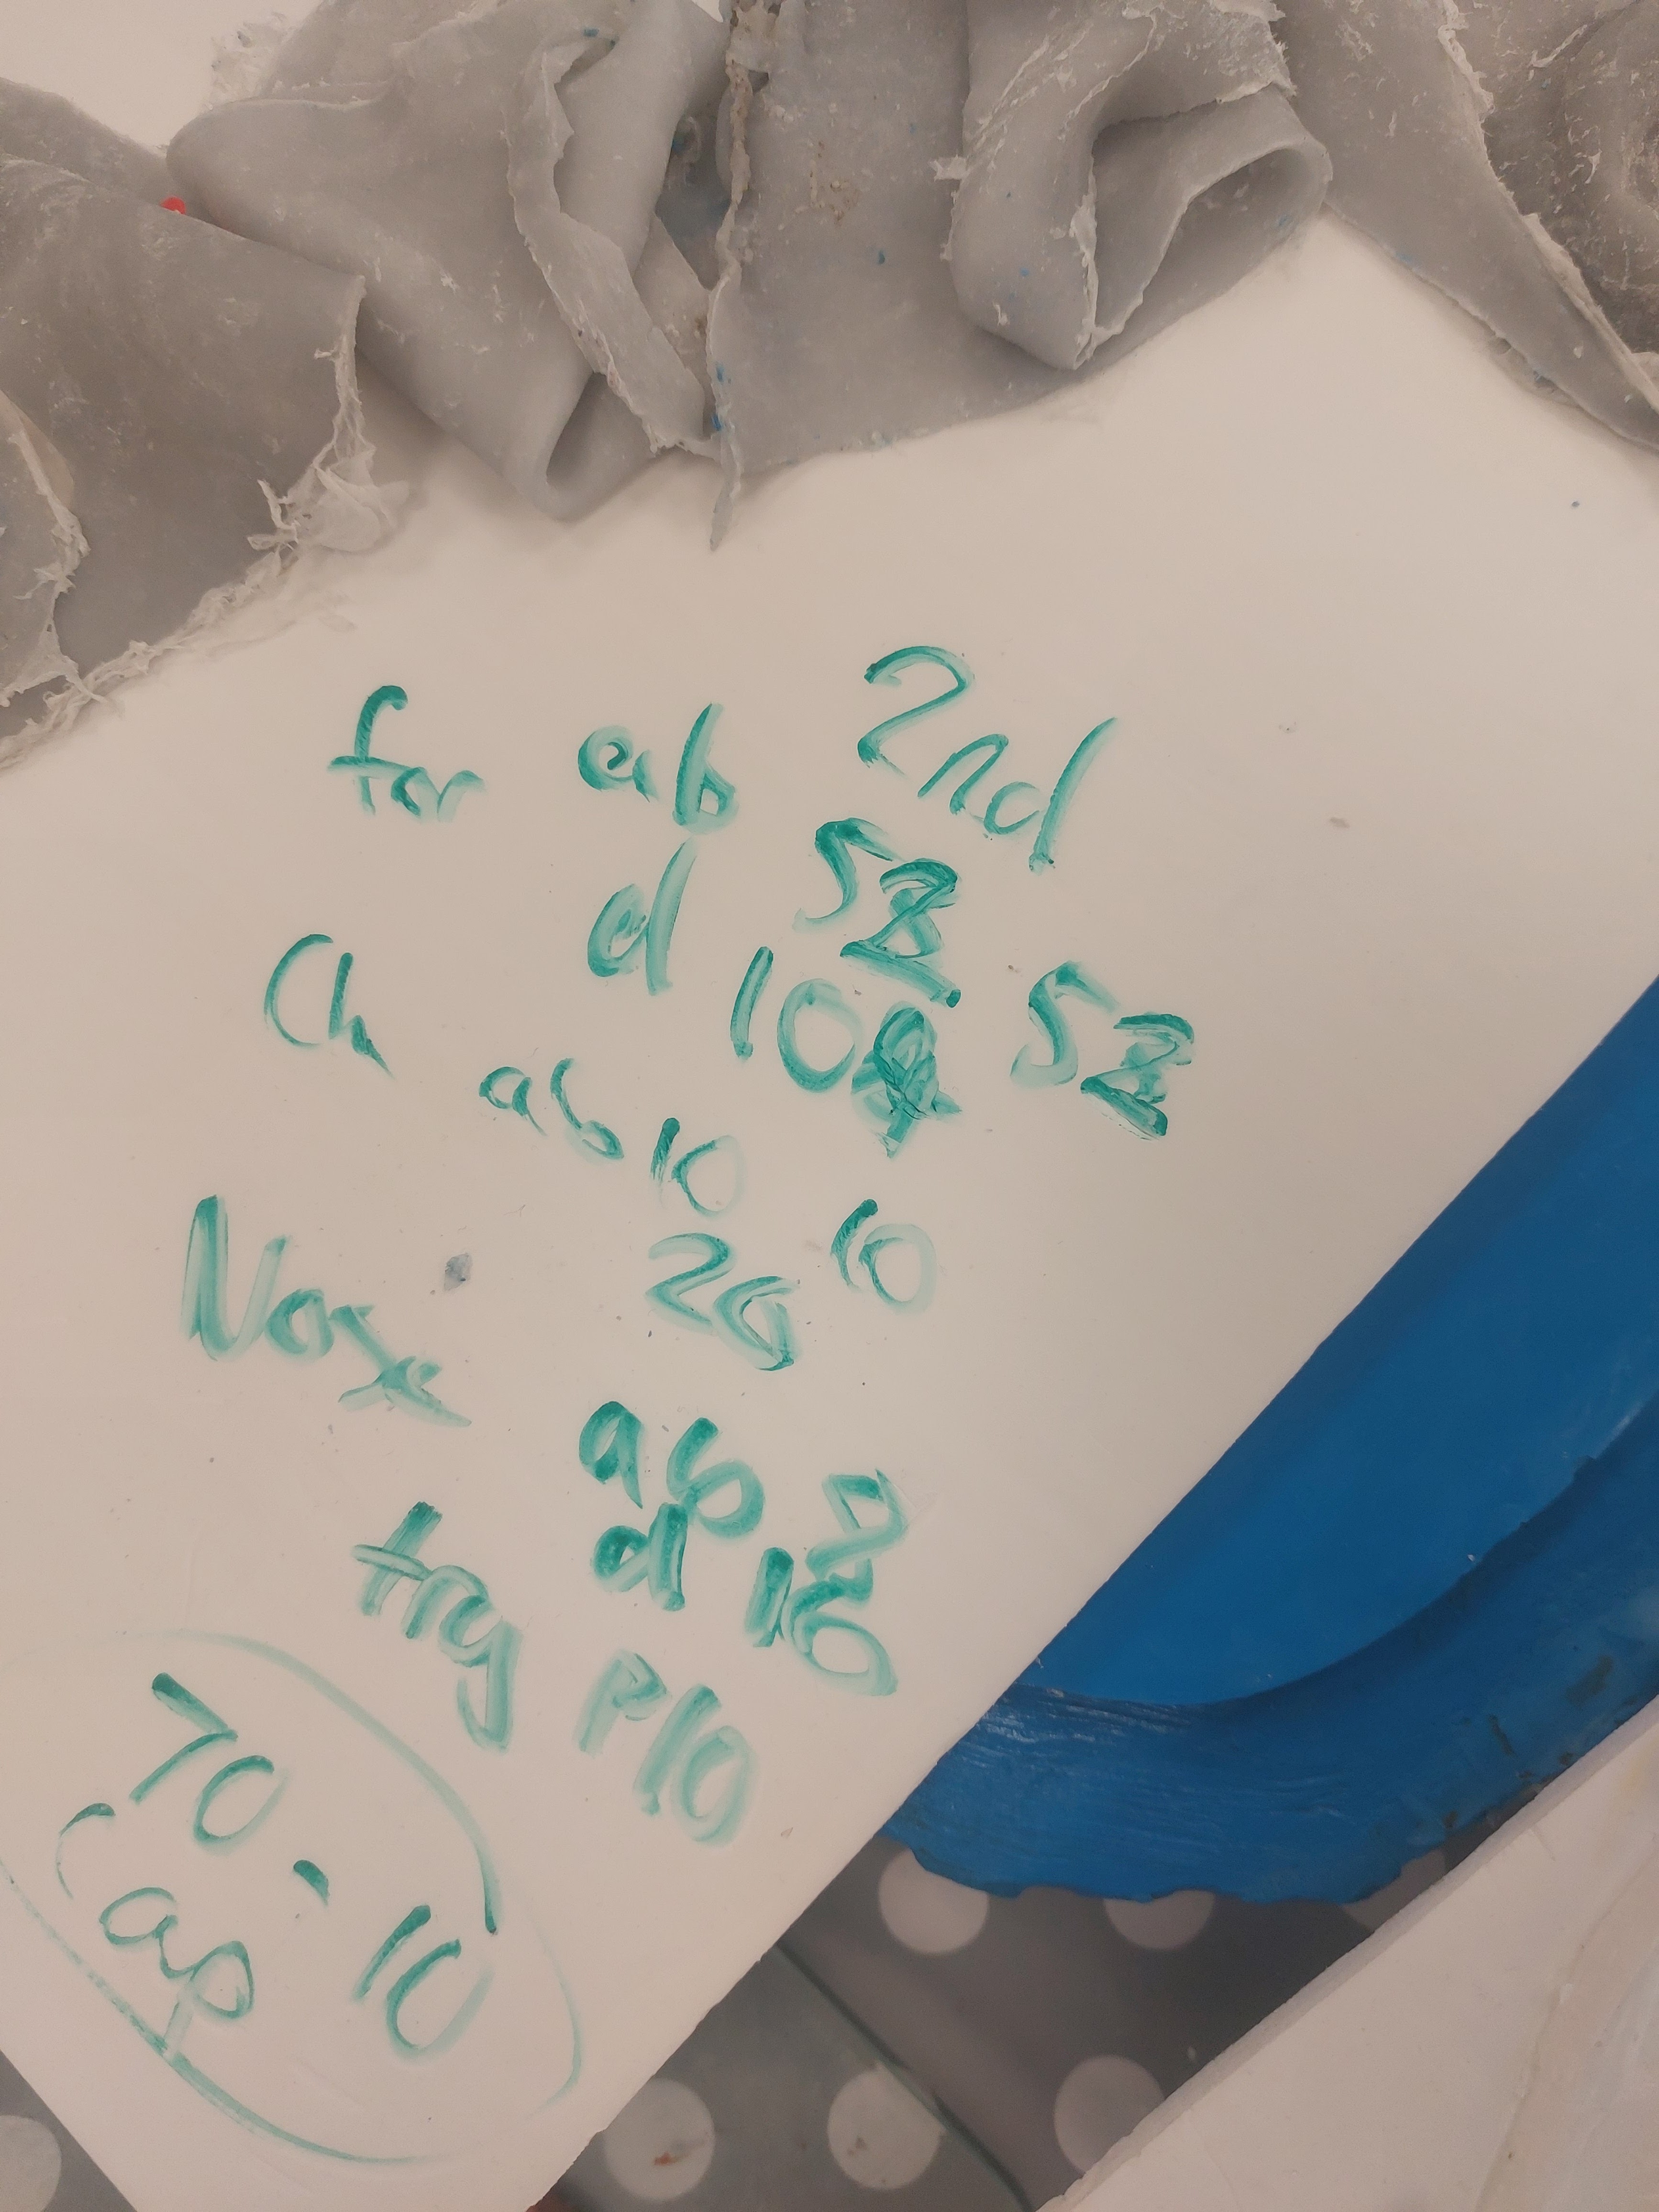
Figure 4: Second trail (Keites-Gorman, 2024)
Second run
I didn't need as much silicone as the first run, so we reduced the measurements quite a bit. However, the same issue happened - I believed I had to throw out this run as the cap plastic just did not stick. After a few more runs with a few tweaks in measurements or cap plastic ratios, I finally got somewhere on my 5th attempt.
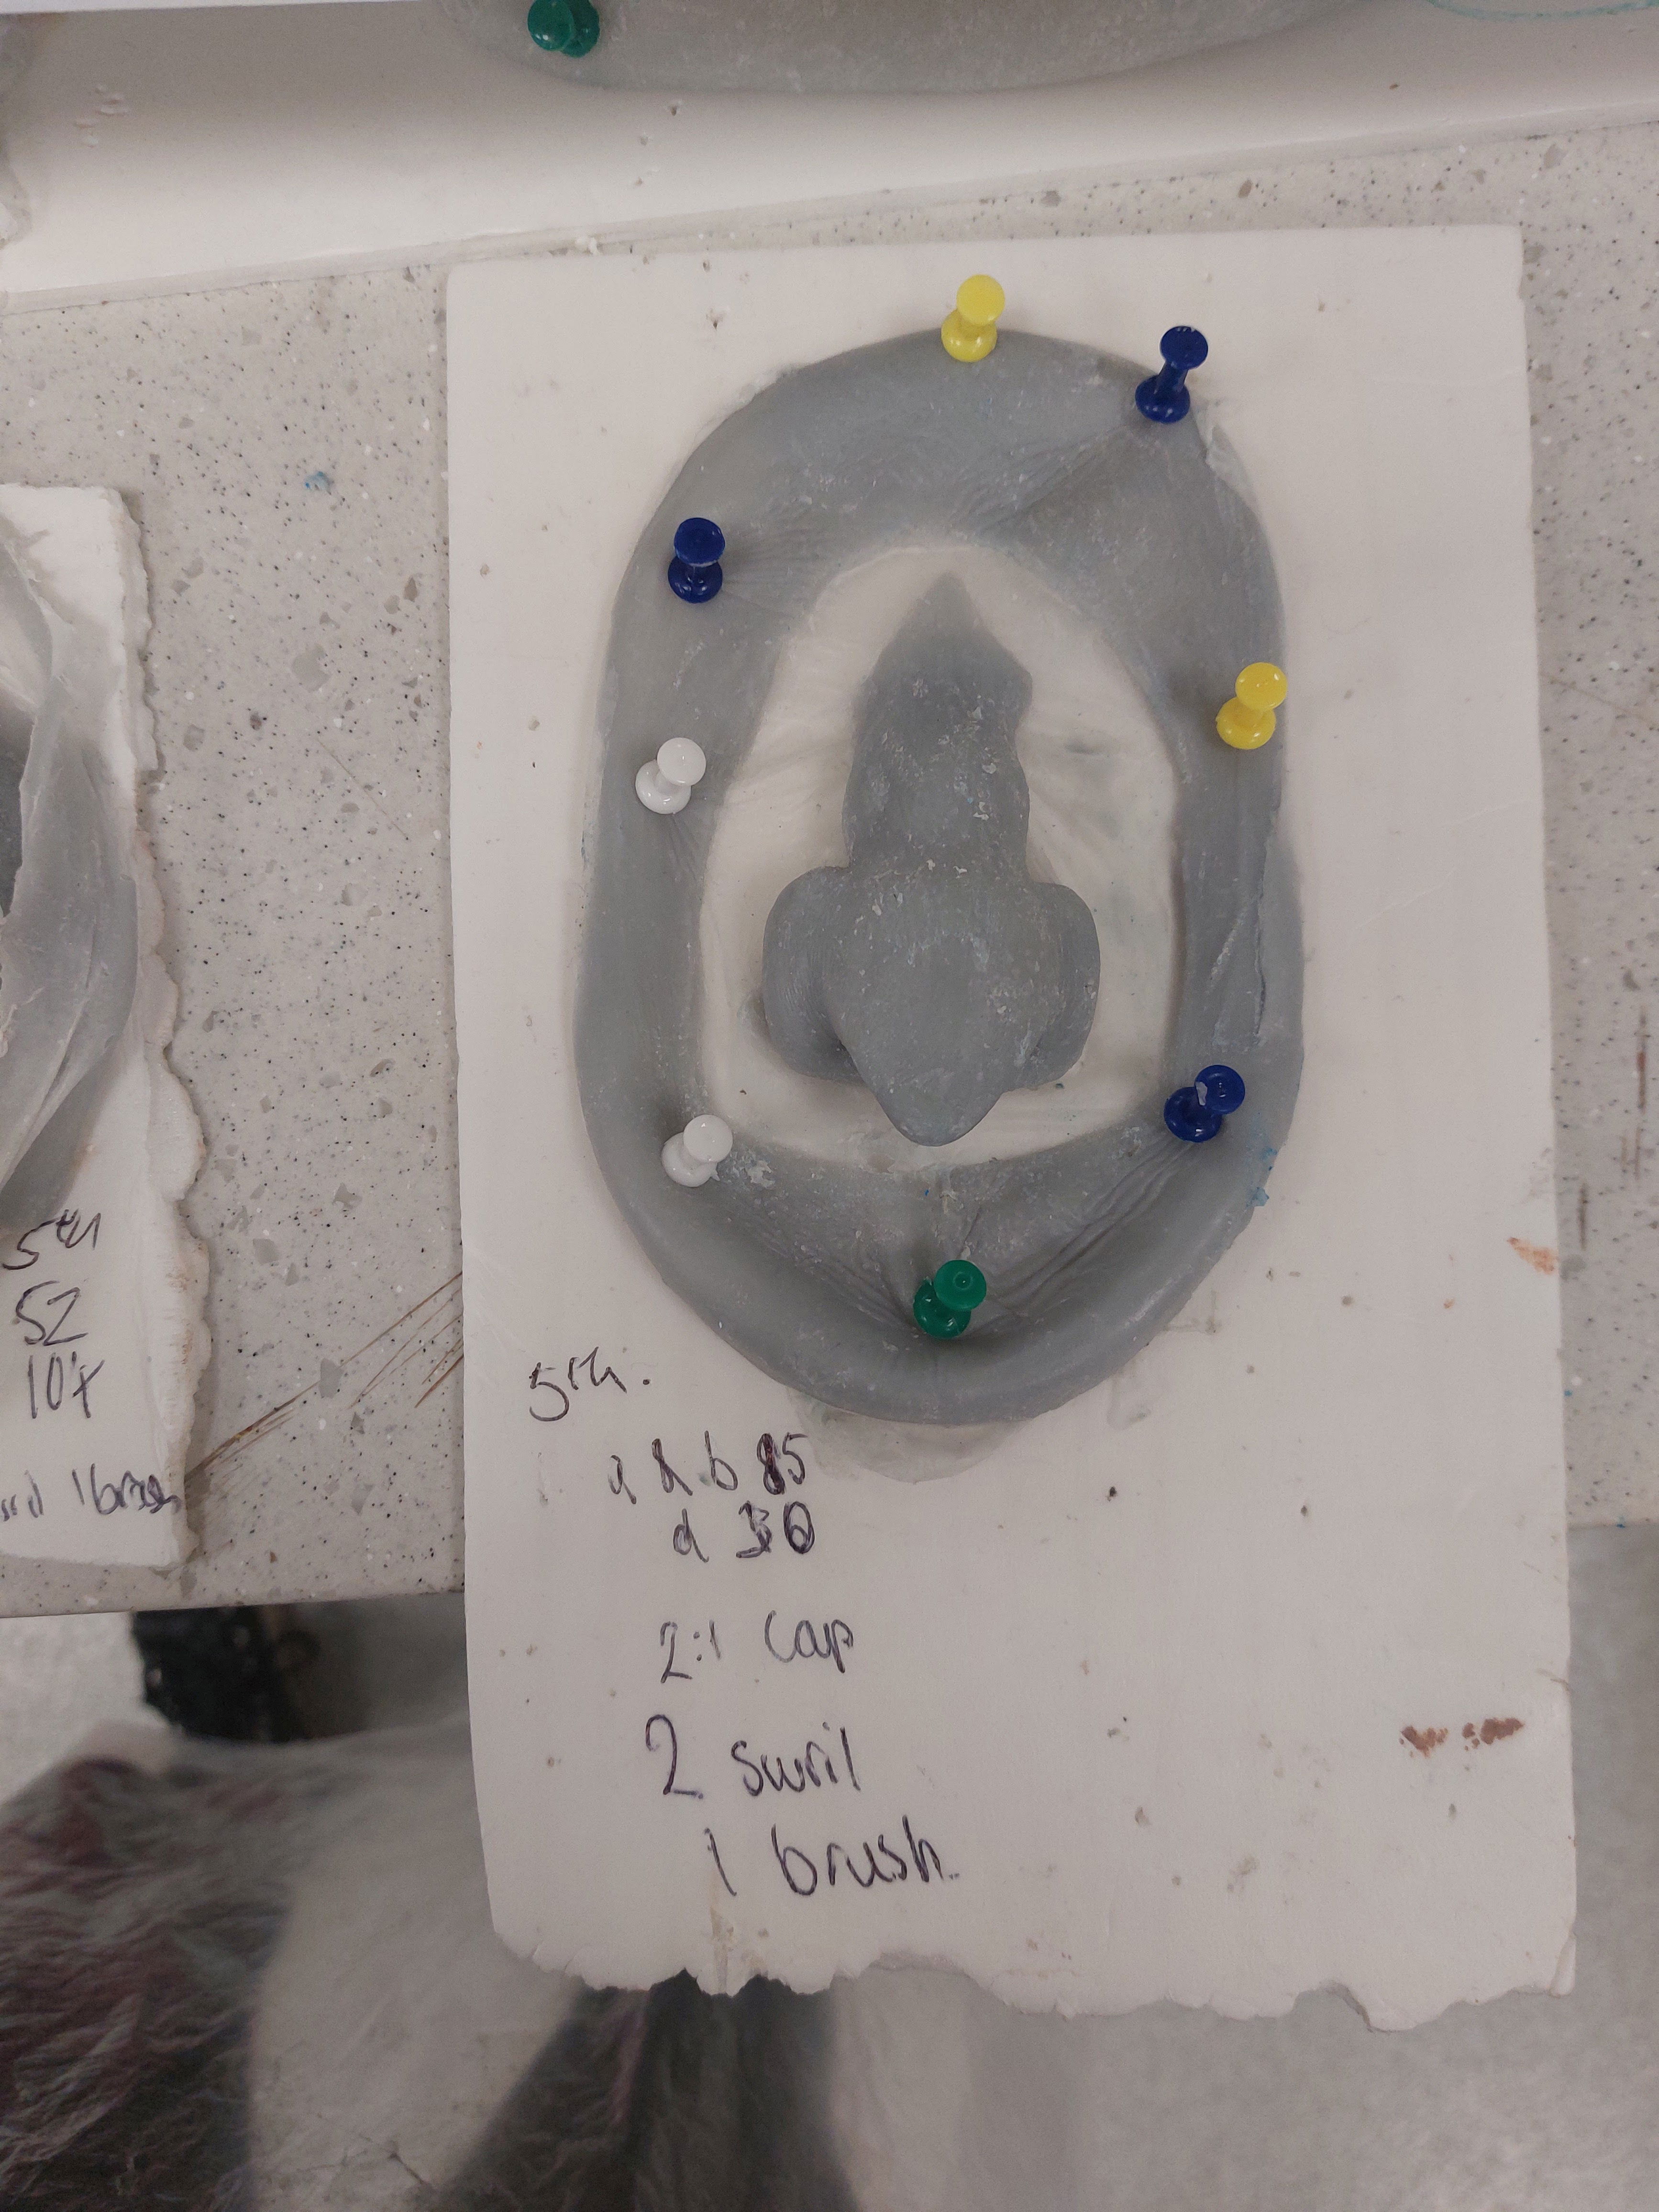
Figure 5: Fifth trial (Keites-Gorman, 2024)
Now I did not need as much silicone as the first run as a lot was poring out and we don’t need to waste silicone with how expensive it can be. During my fifth attempt, we were making progress. I found that using a 2:1 ratio of cap plastic was crucial for the cap plastic to stick properly. However, it was too thick and too plasticky, but I was relieved that the pieces were coming out intact. I also tried something called a swirl layer, where I poured a large amount and swirled it around before pouring out the excess. This technique really helped improve the results and became a method I used from then on.
These were the clamps we used on each conform mold. this helps push the silicone to where we want it to go.
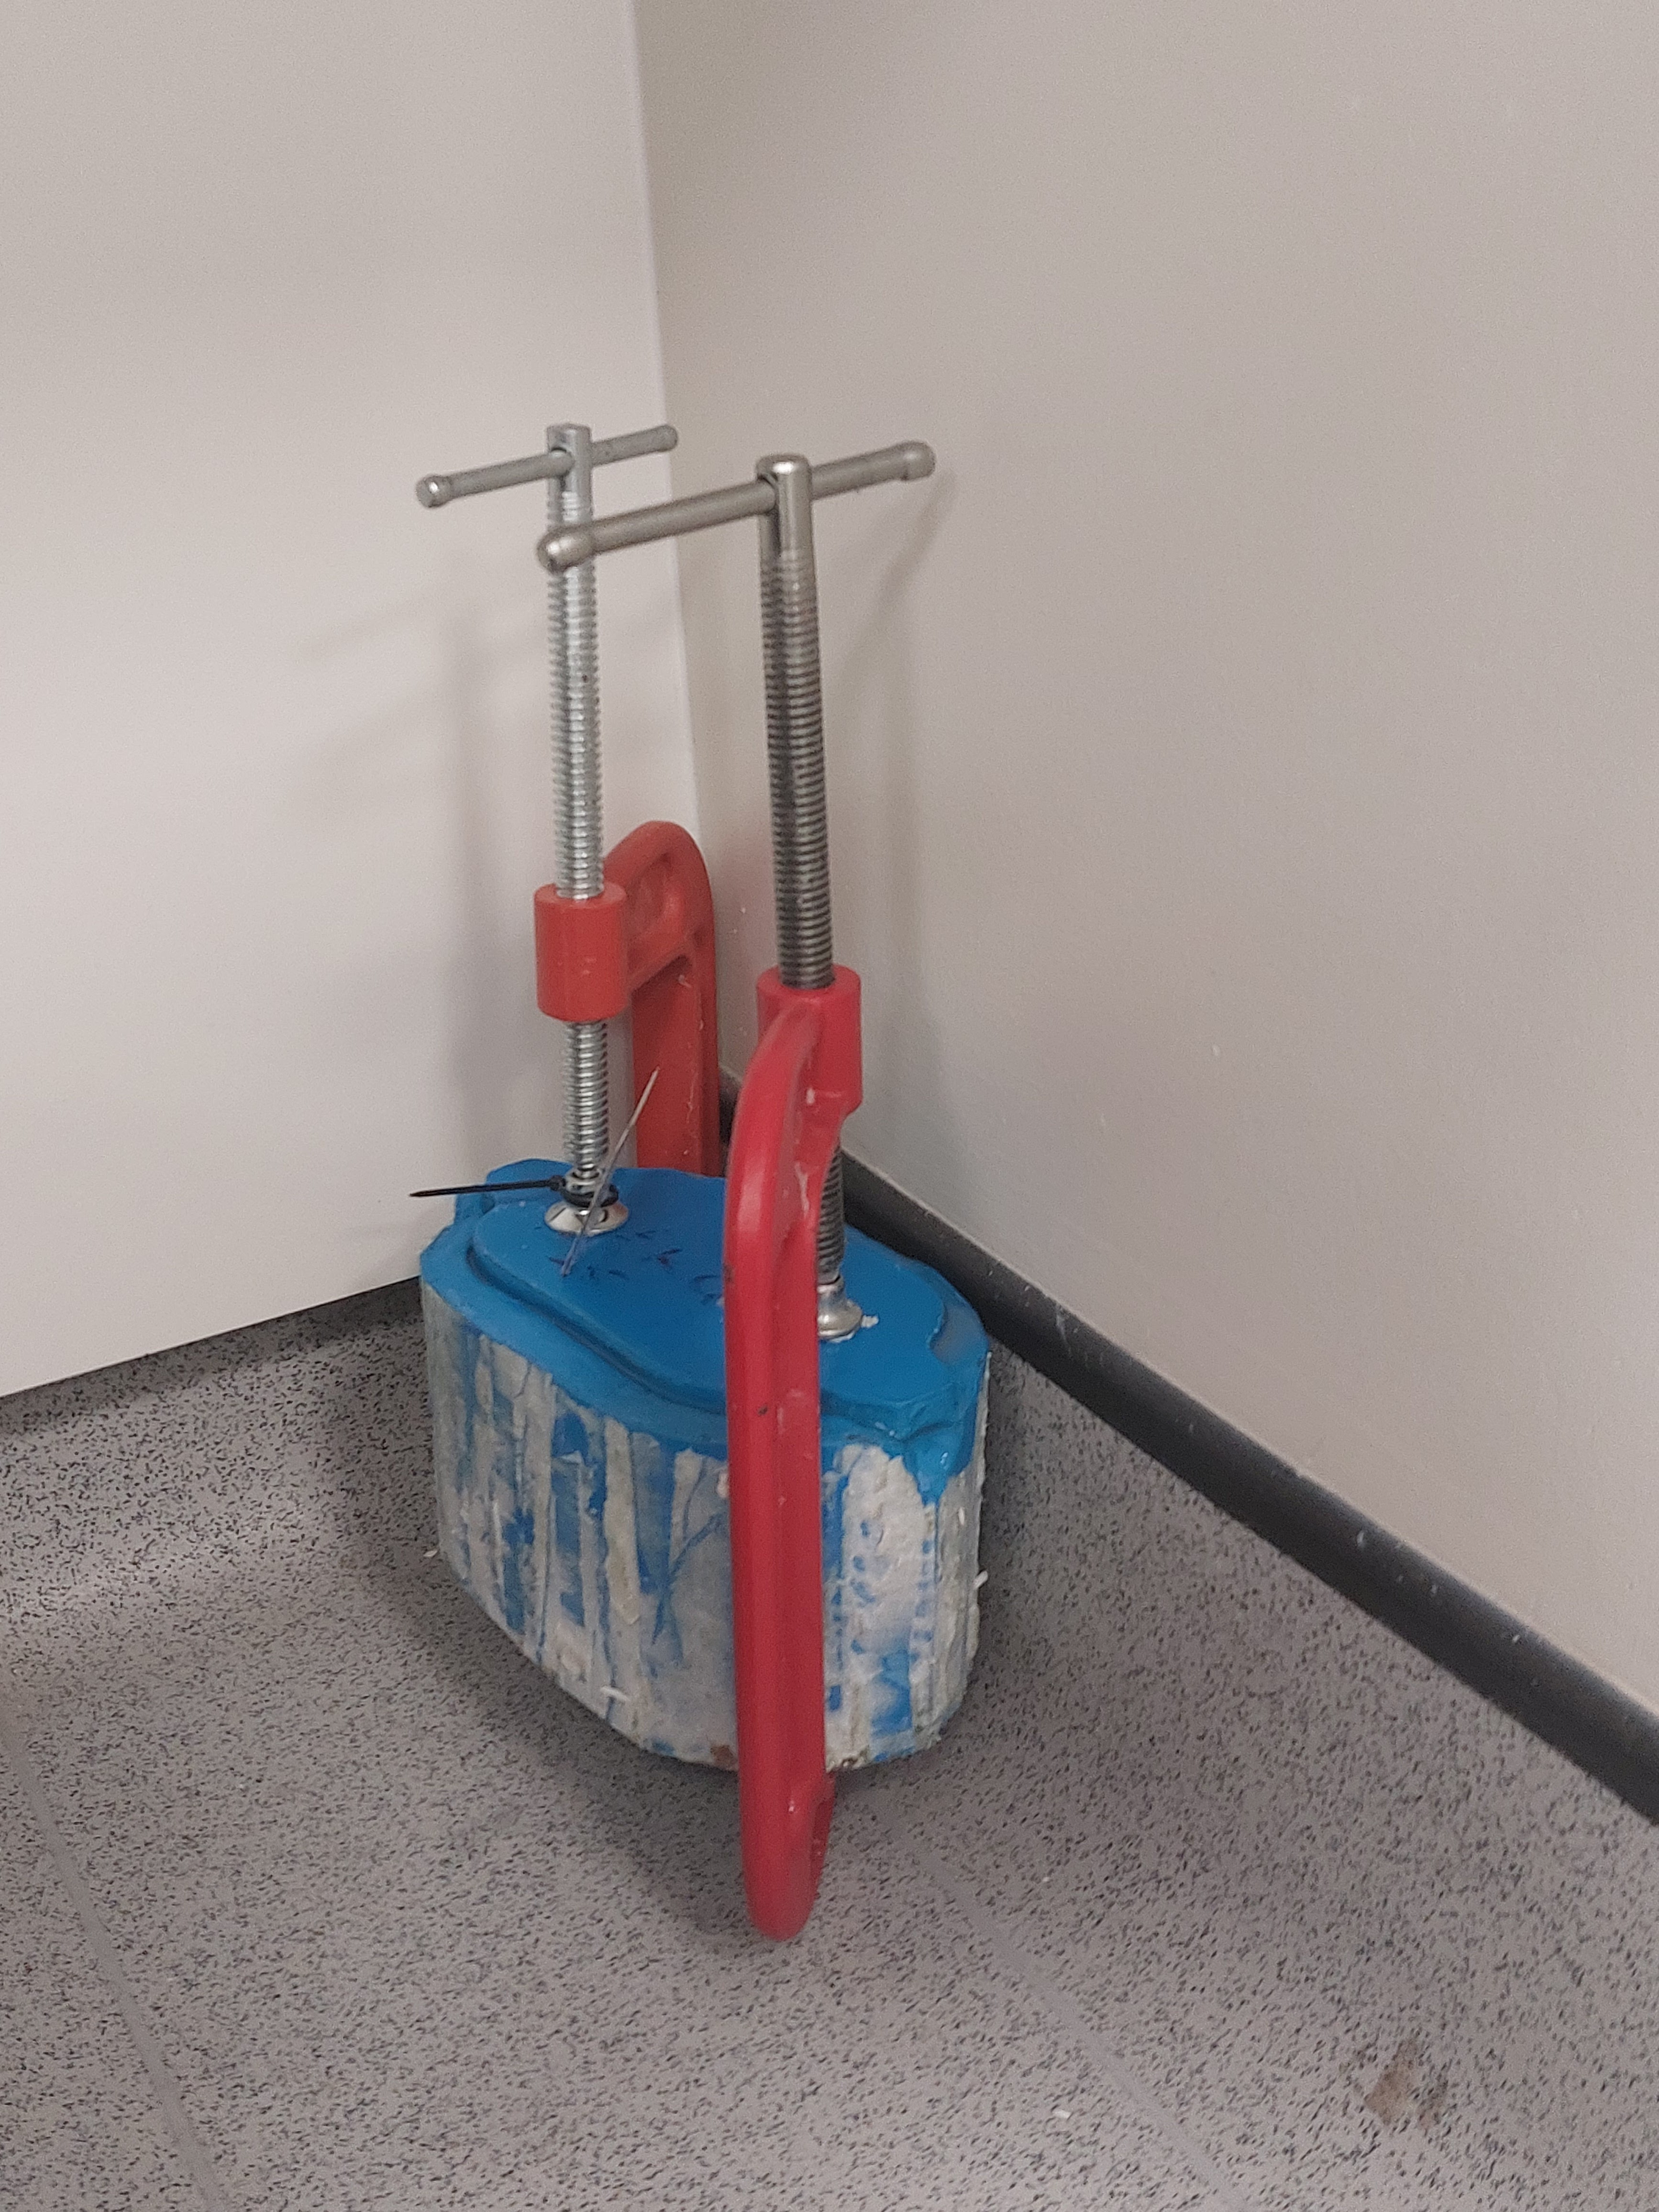
Figure 6: Clamps (Keites-Gorman, 2024)
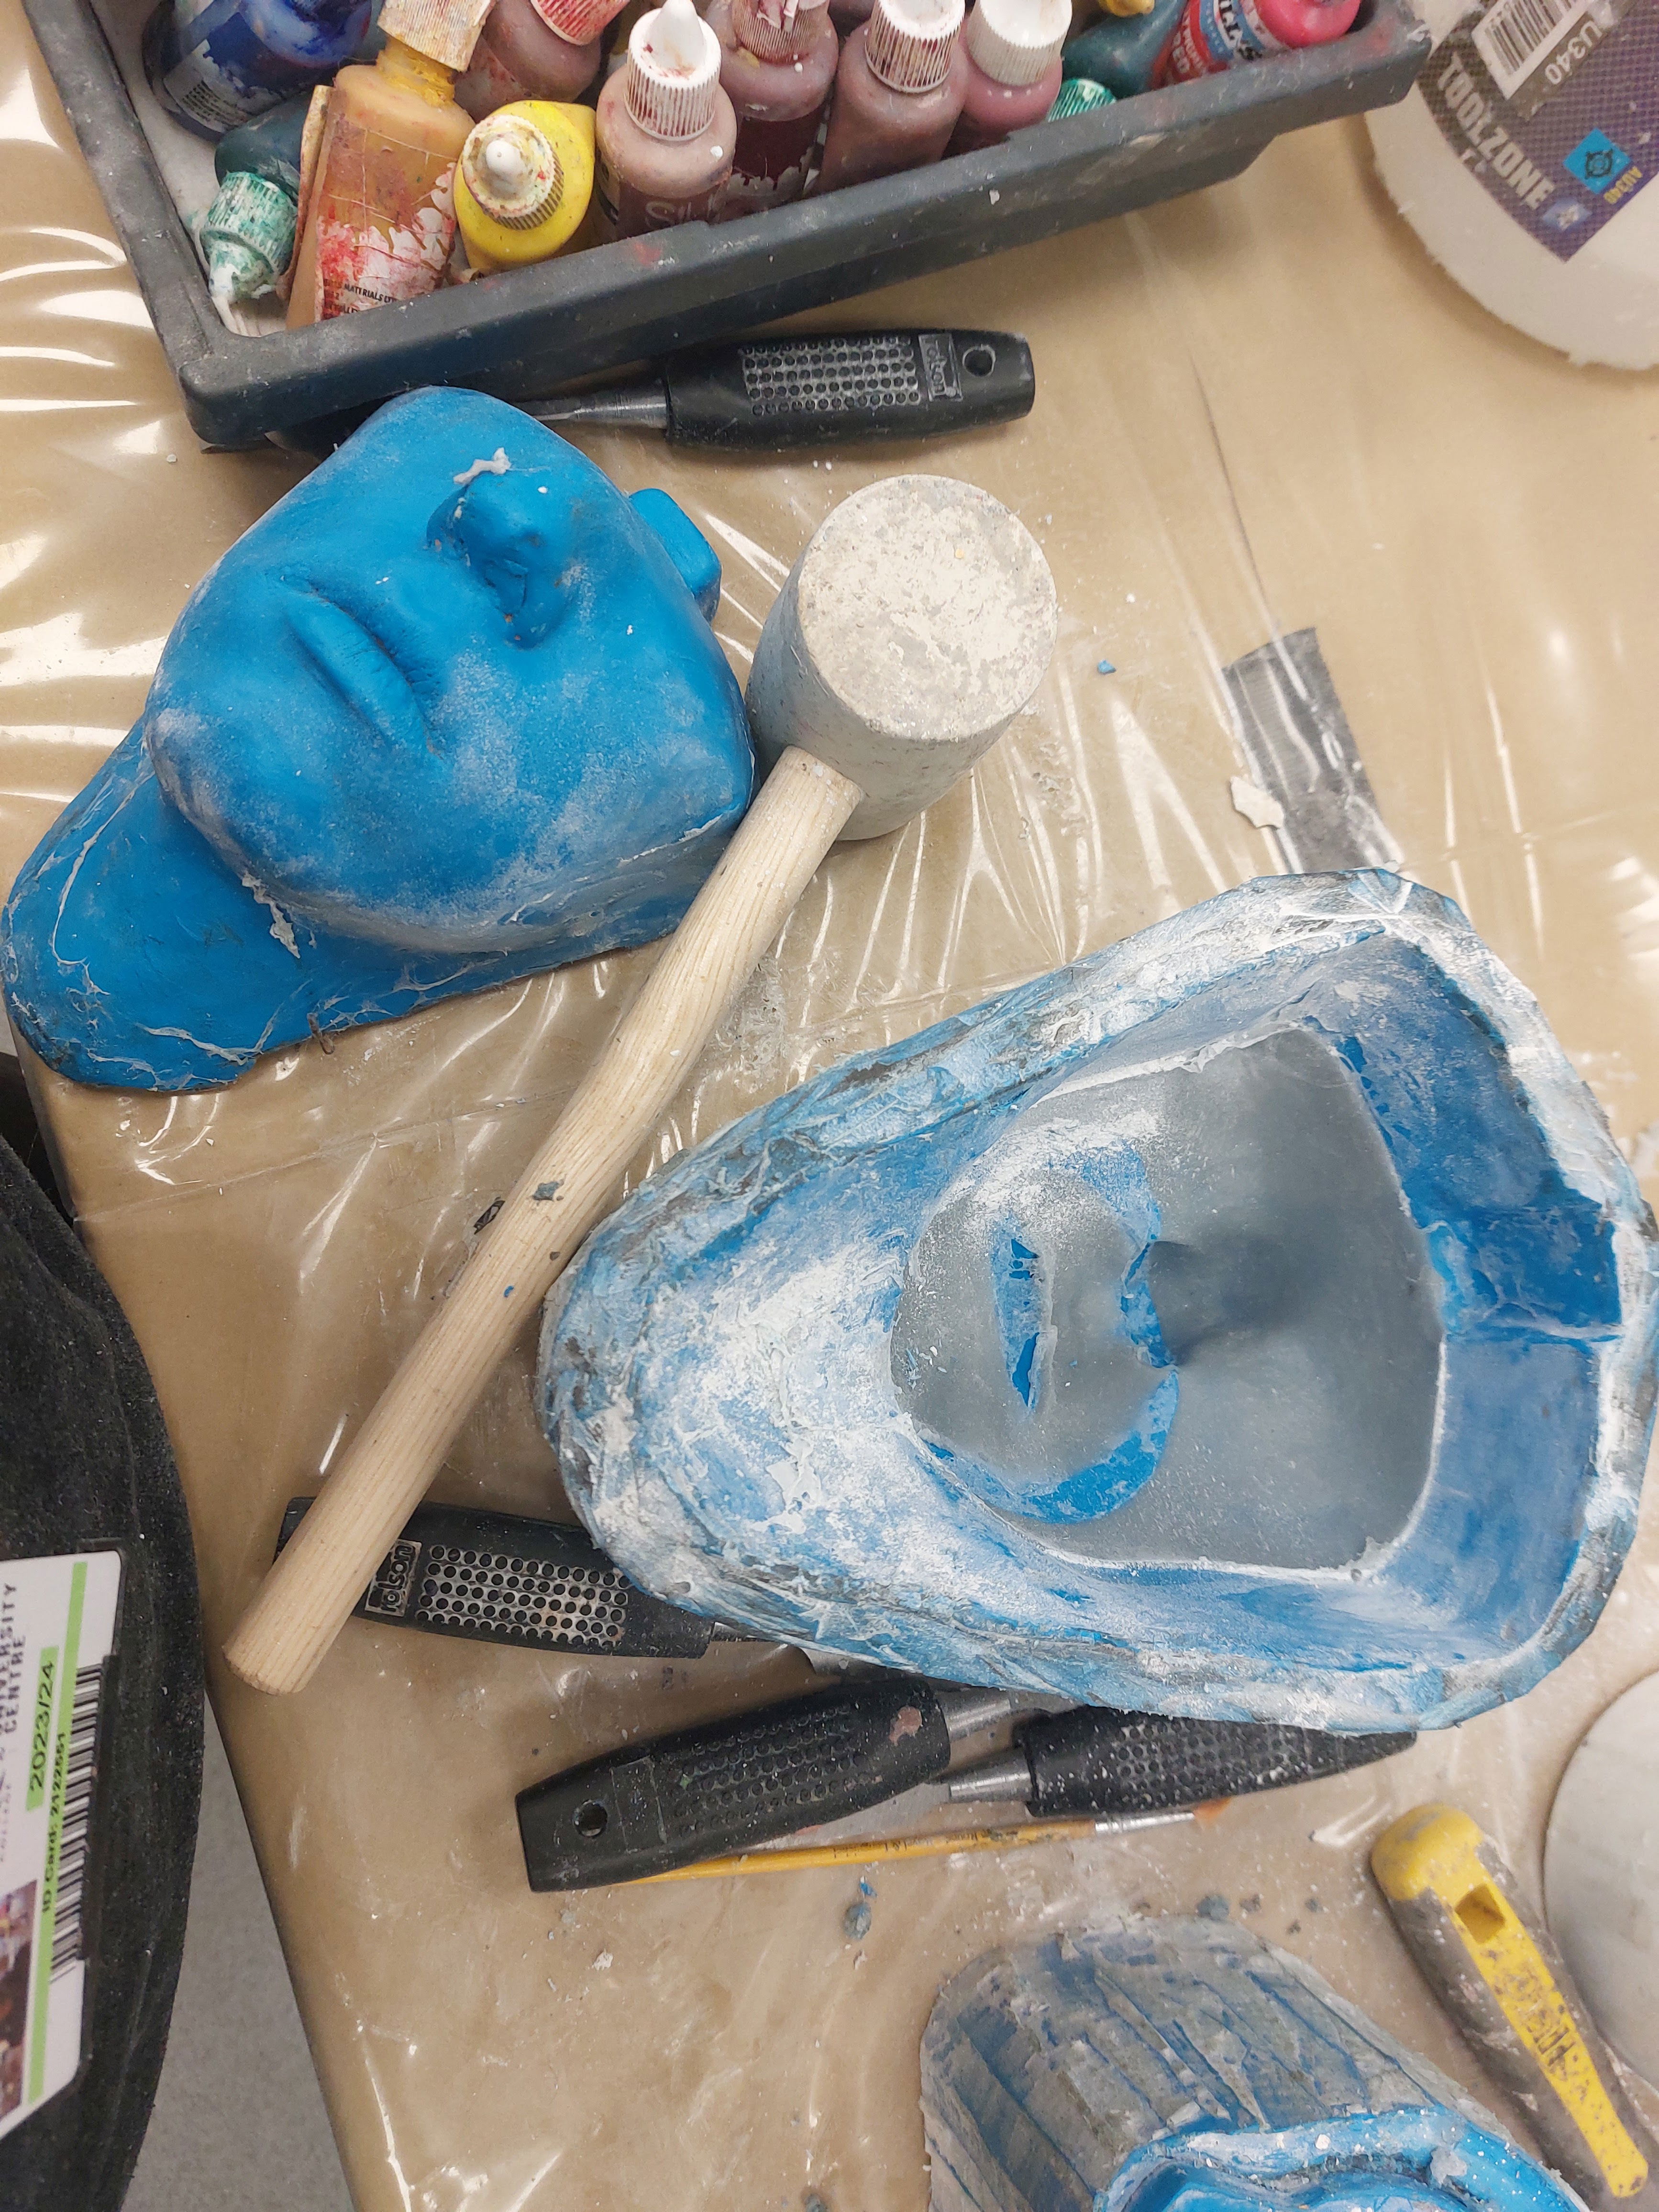
Figure 7: Removing pieces (Keites-Gorman, 2024)
Cheek pieces
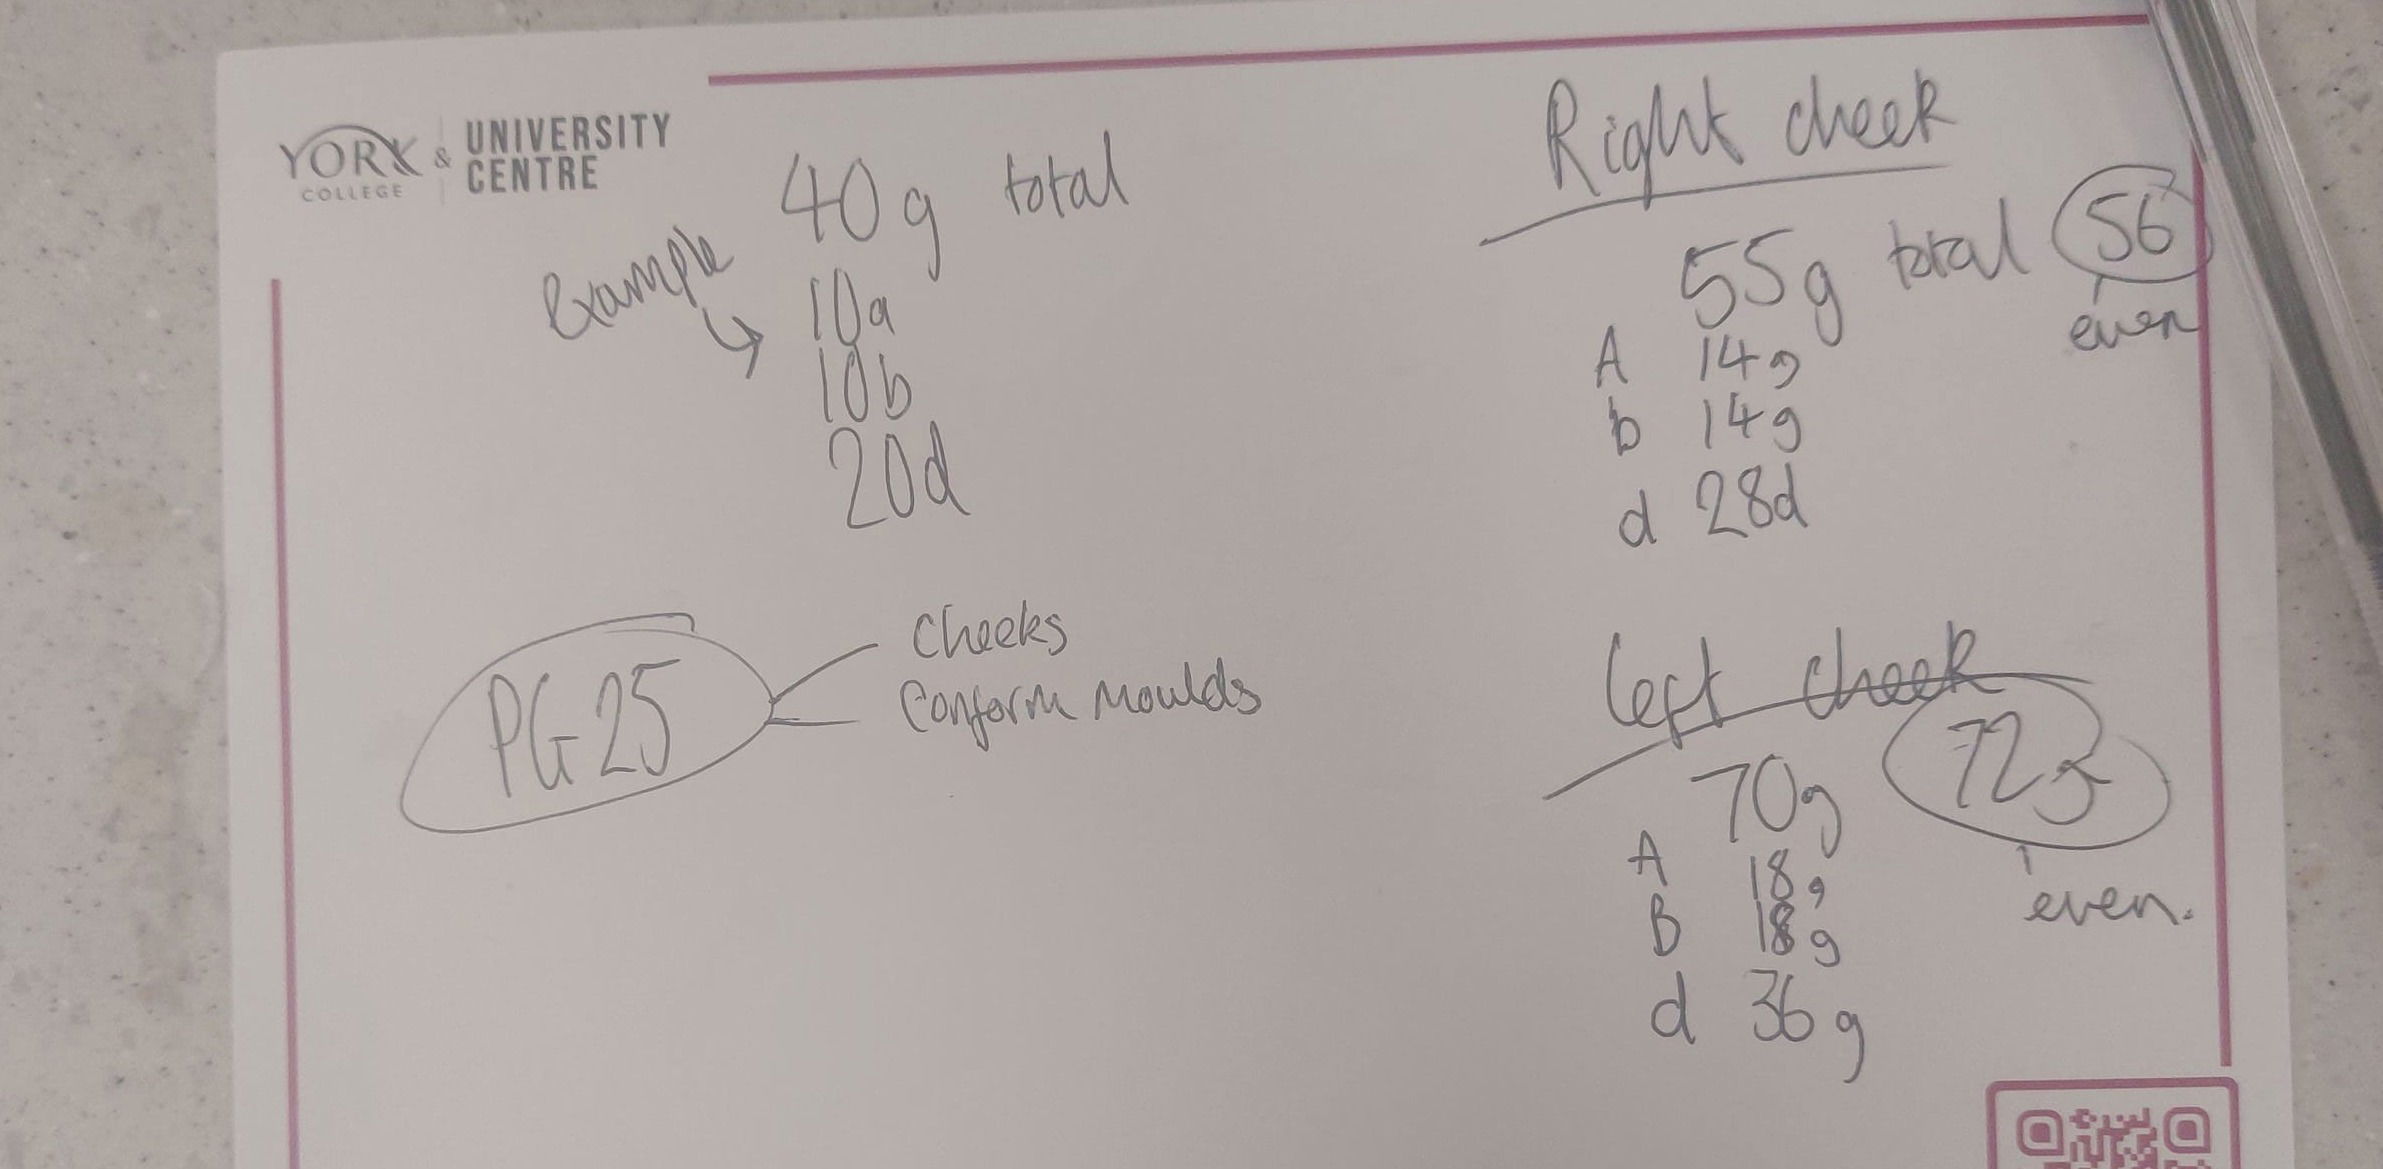
Figure 8: Cheek Measurements (Keites-Gorman, 2024)

Figure 9: Cheek sculpt (Keites-Gorman, 2024)
This process was different because these are flat molds. We made these at level 4, so I felt more confident about these. Once they were ready and greased, I put a border around one cheek because I couldn't do both at the same time since they were too close. Then I used SF20 and mixed A and B. I actually remember that on one of the cheeks I started pouring silicone without applying Vaseline first, but I quickly corrected it, applied Vaseline, and then everything went well with no issues. Once set, I had two cheek flat molds. Running these was slightly easier, thank goodness.
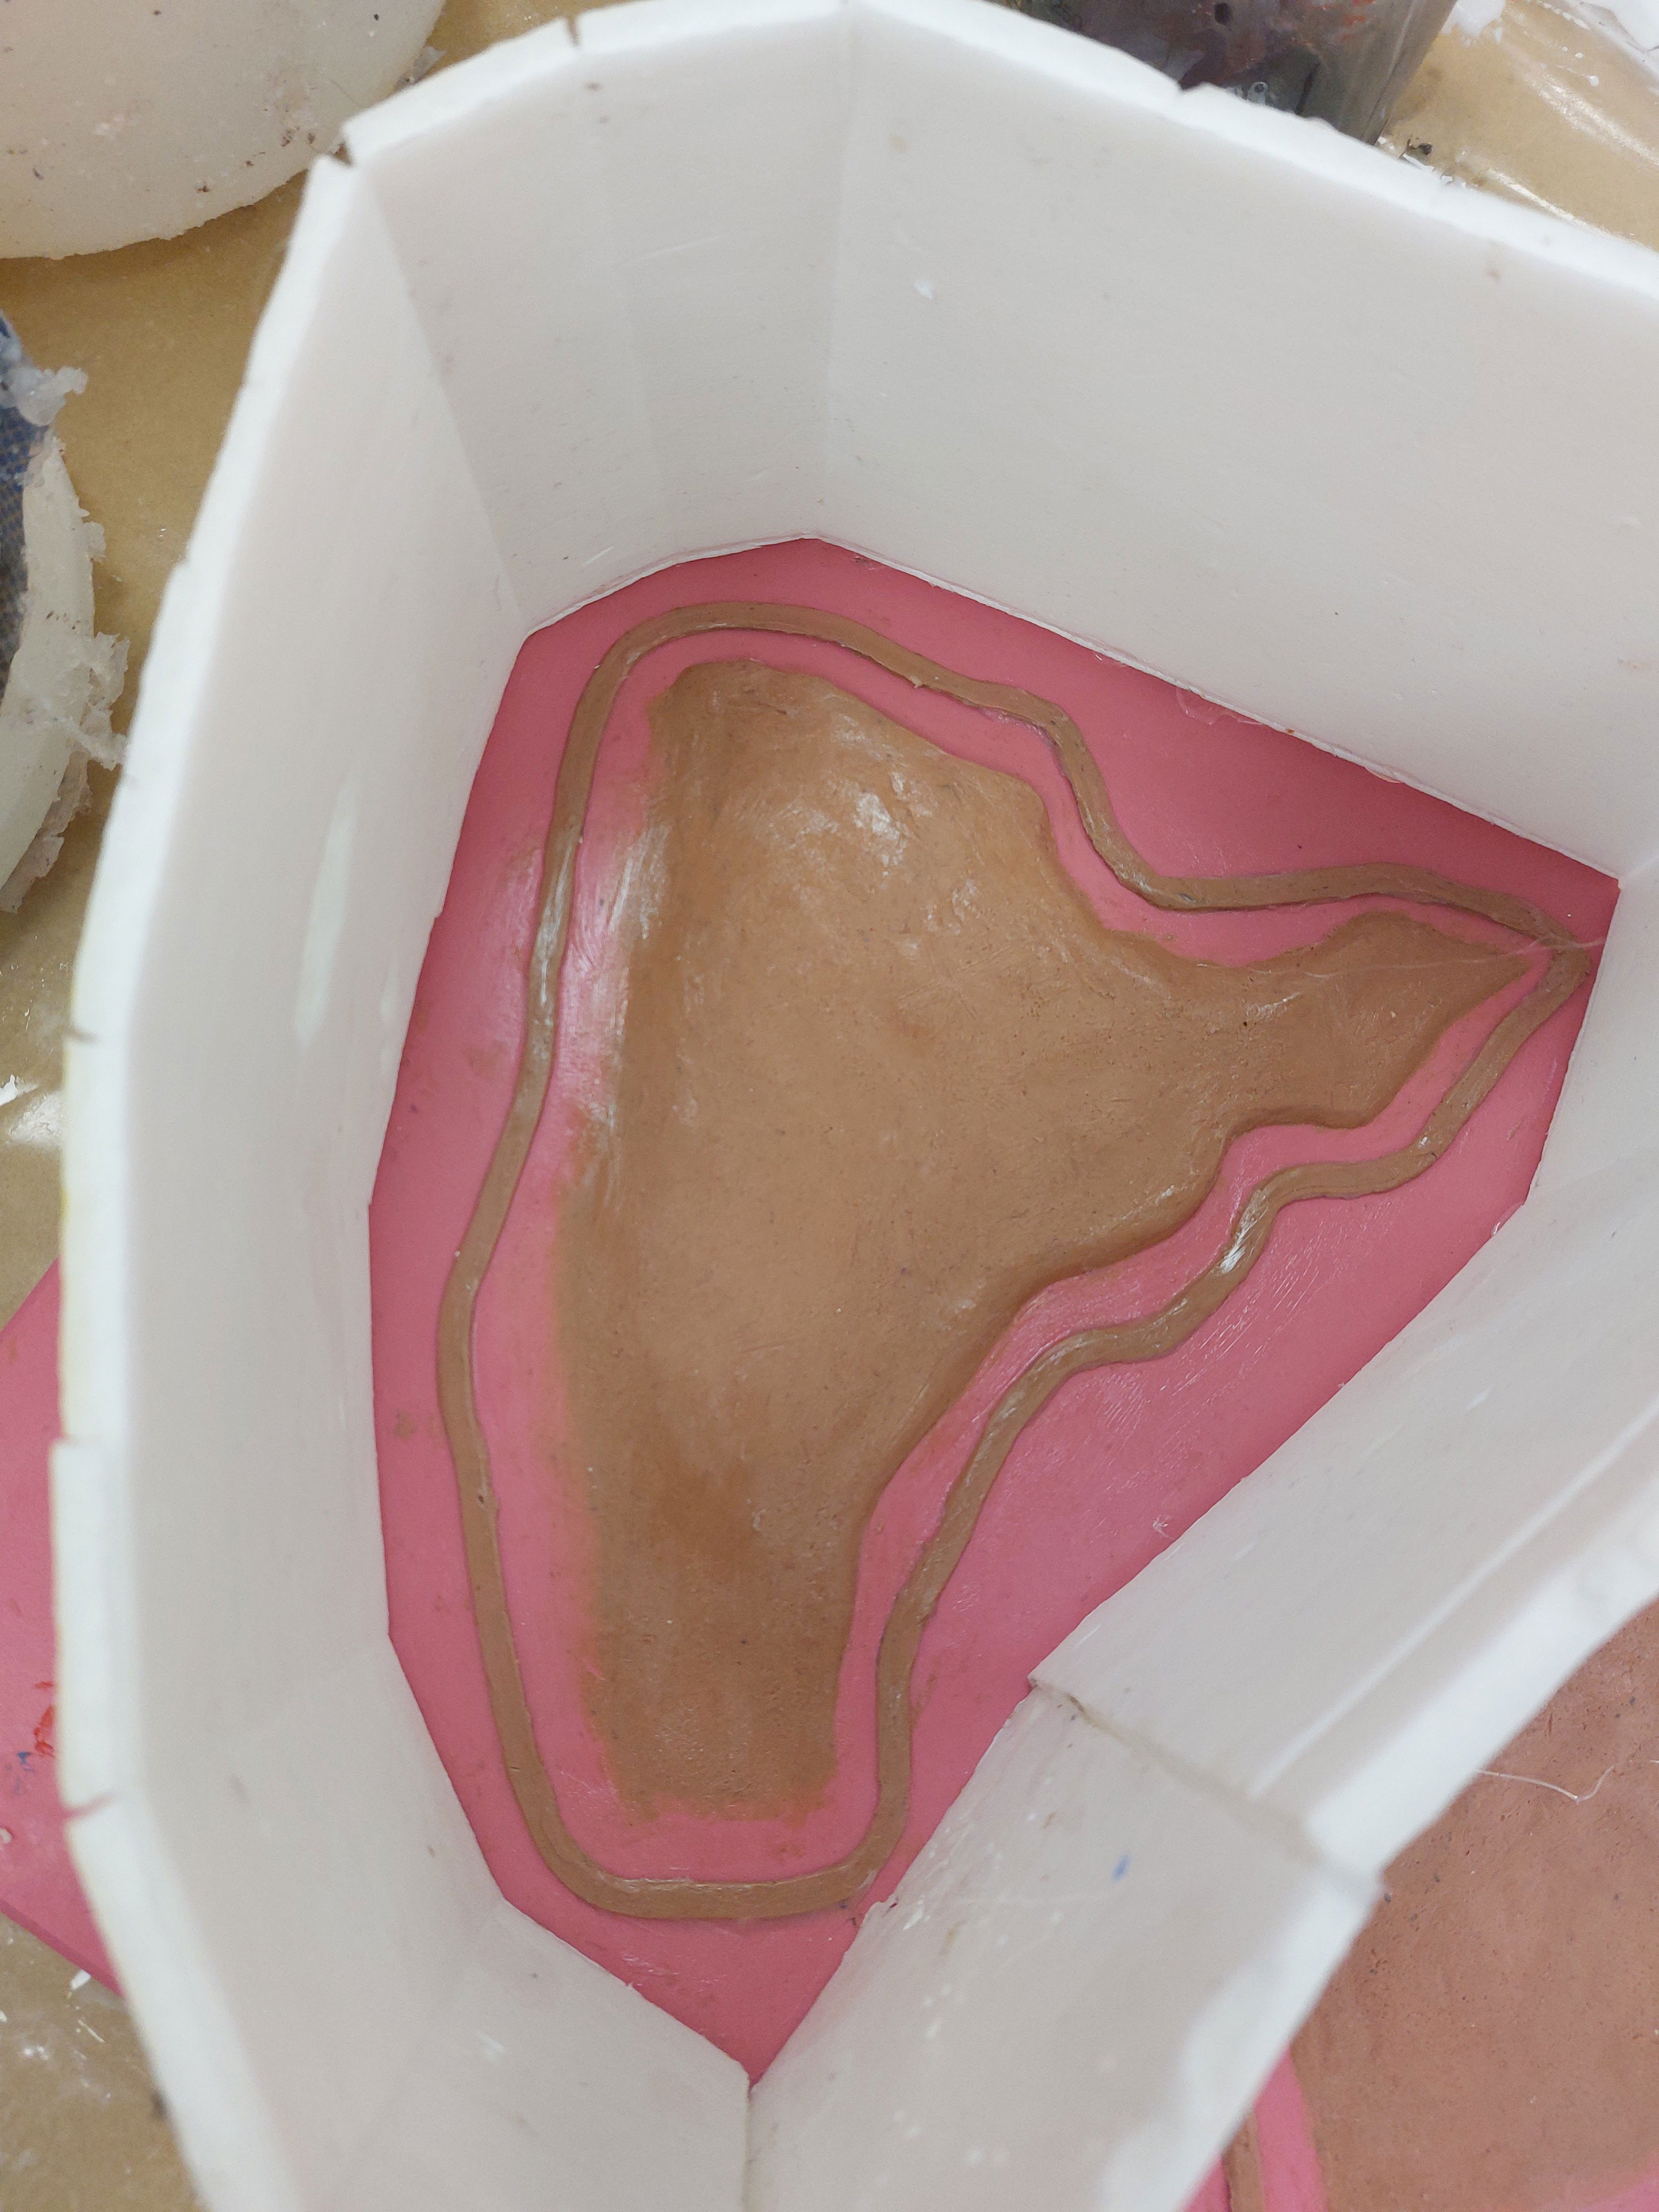
Figure 10: Cheek molding (Keites-Gorman, 2024)
I used a 1:2 ratio of cap plastic and did 3 brush layers. Then I mixed my silicone (SF25) according to the measurements in figure 6. I poured it into the molds and scraped the excess with a metal ruler. After it set, I did another 2 layers of cap plastic, and then I was able to take them out. I ran about 4 sets of cheeks in total, and each of them turned out nicely, so I didn't have to make many adjustments. It was nice that something went right, especially since I was pushing the deadline while waiting for the conform molds to set.
Horns
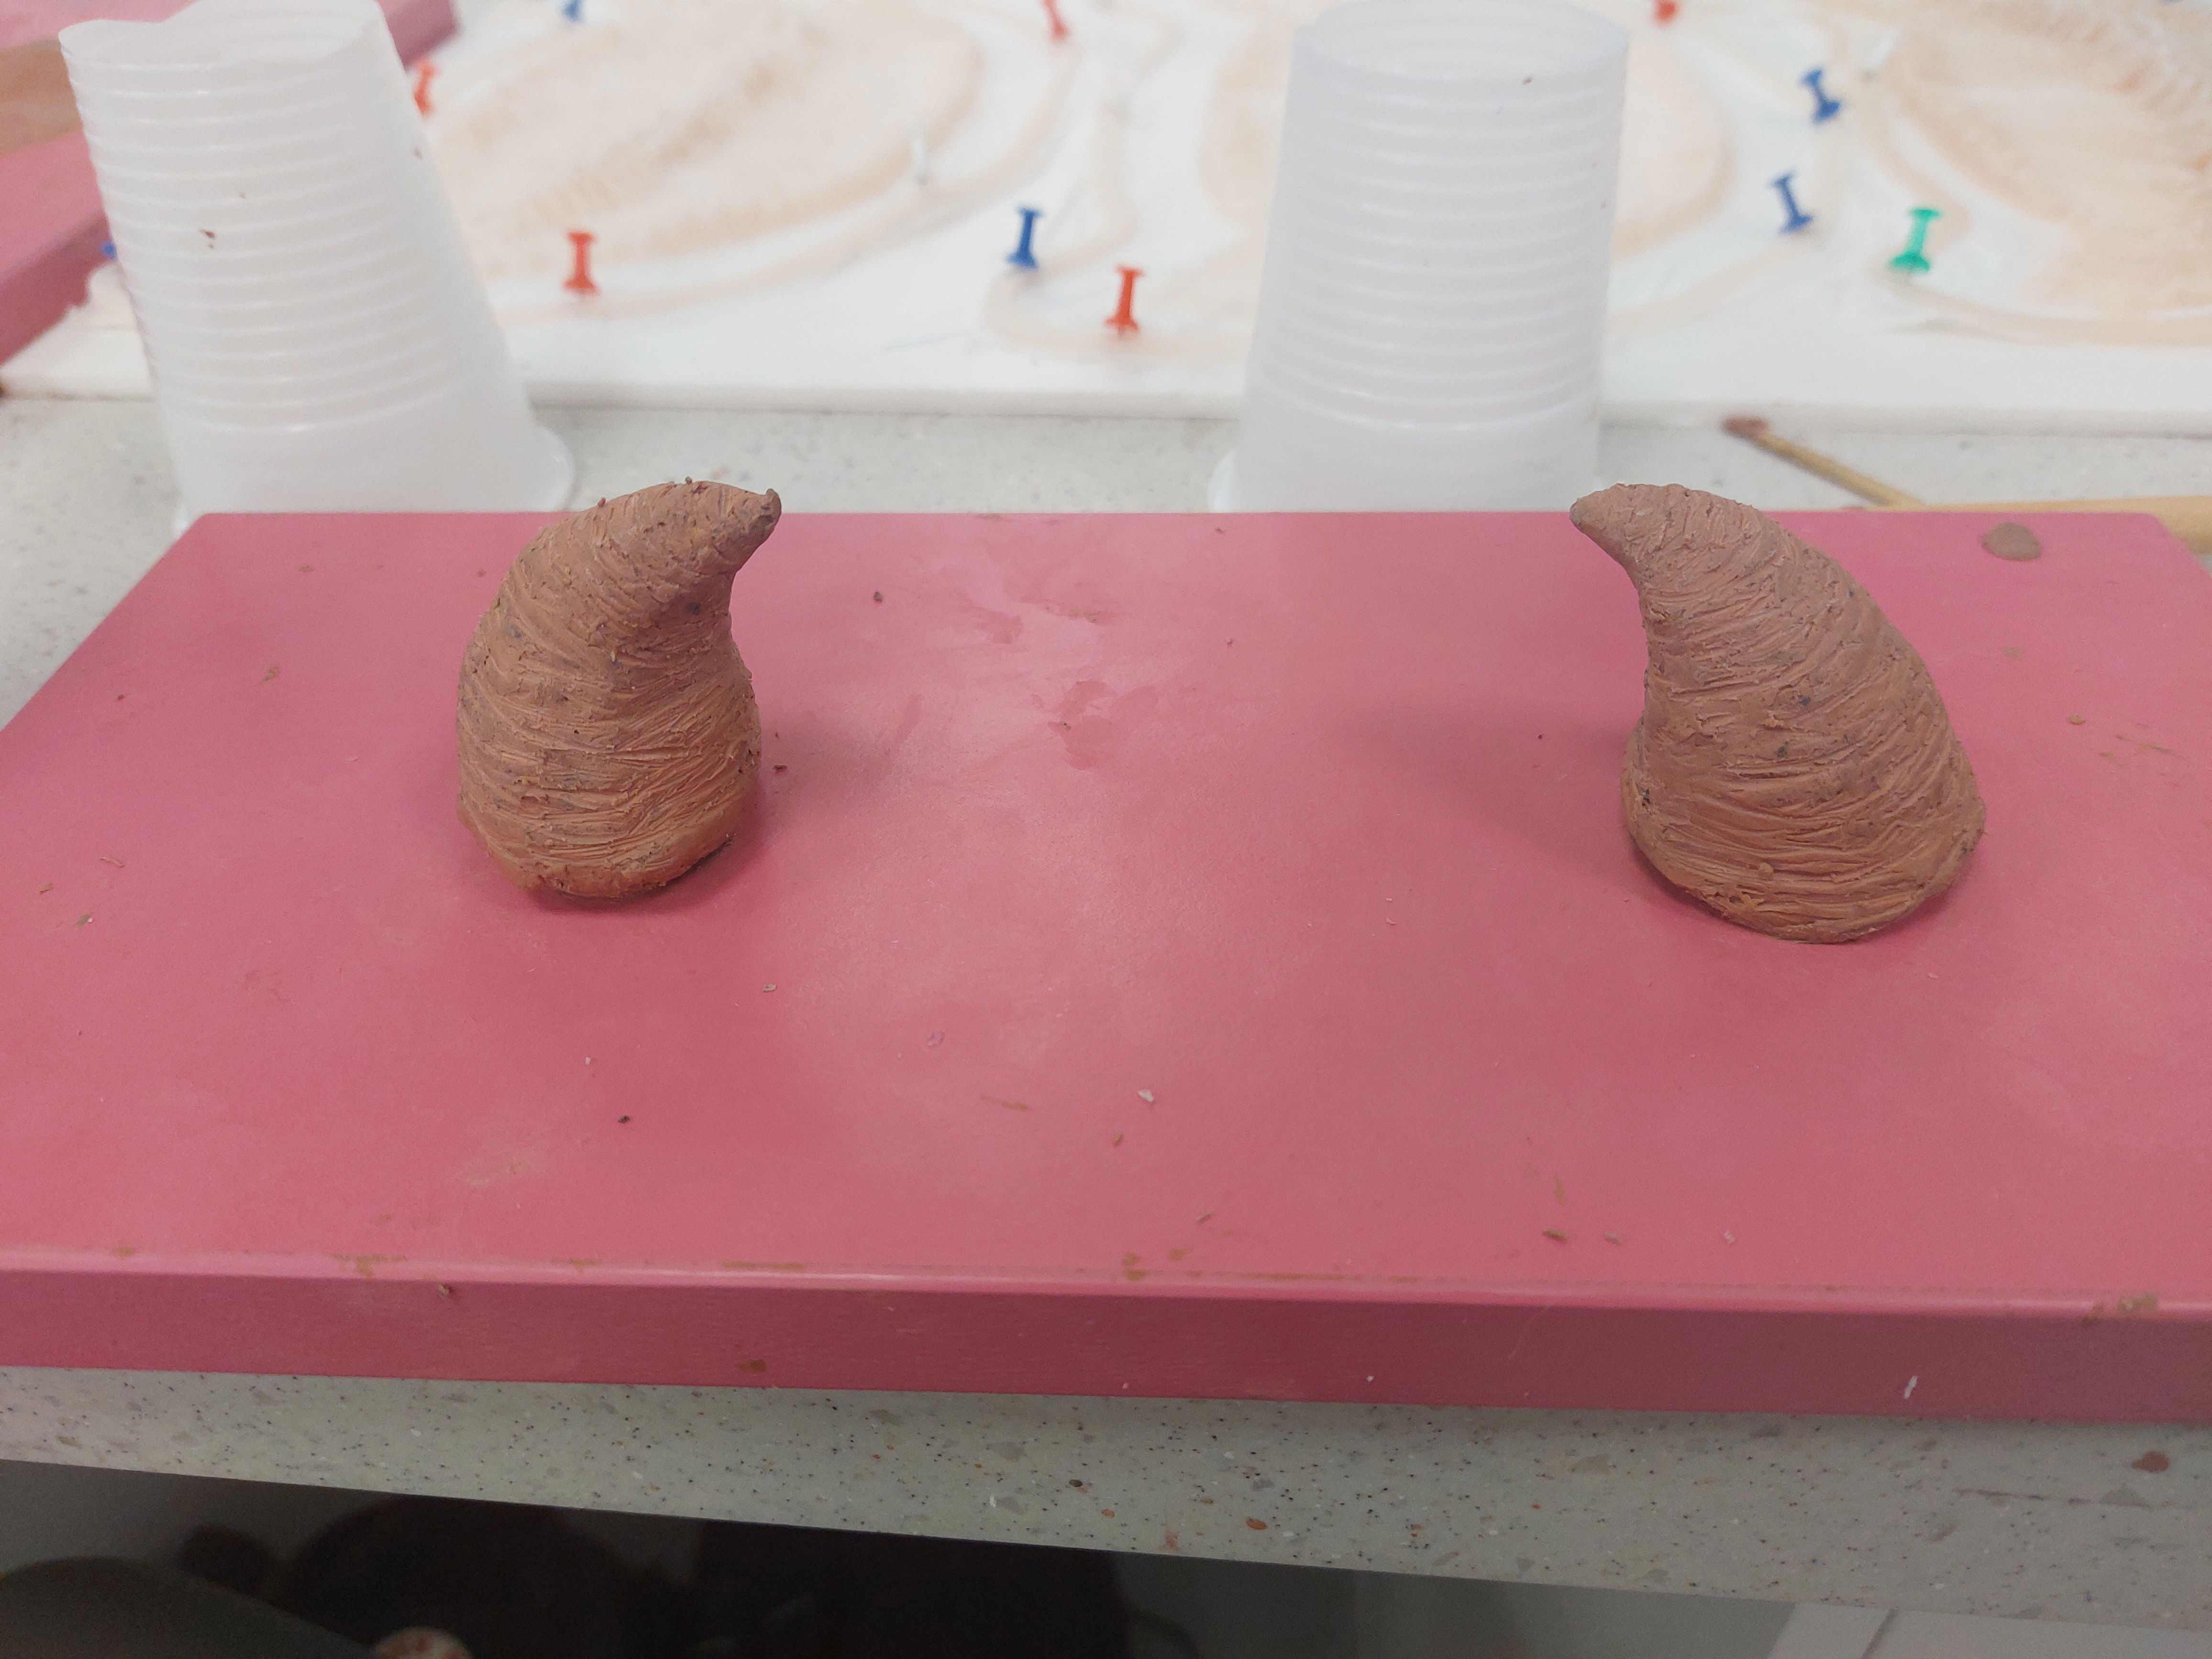
Figure 11: Horn sculpt (Keites-Gorman, 2024)
These tasks were relatively easy compared to everything else. All I had to do was attach them to a board and ensure there were no caps that could cause an undercut. I then applied Vaseline, cut out plastic cups, and placed them in the middle, getting them ready for FS 20 parts A&B. I mixed 40g of each and poured it in. After they had set, I had my molds - a lot easier than many other tasks. It was nice for once. Then, I weighed the horns and cleaned the mold out. In the end, I made two pairs of horns. The first pair turned out better than the second. I used Platsil gel 10 A & B as I did not need these to be flexible. I then colored them with a mixture of black and white pigments to get a nice gray color. Once I had my horns, I painted cap plastic over them so I would be able to color them, as the alcohol-activated paint will not stick if it is just silicone.
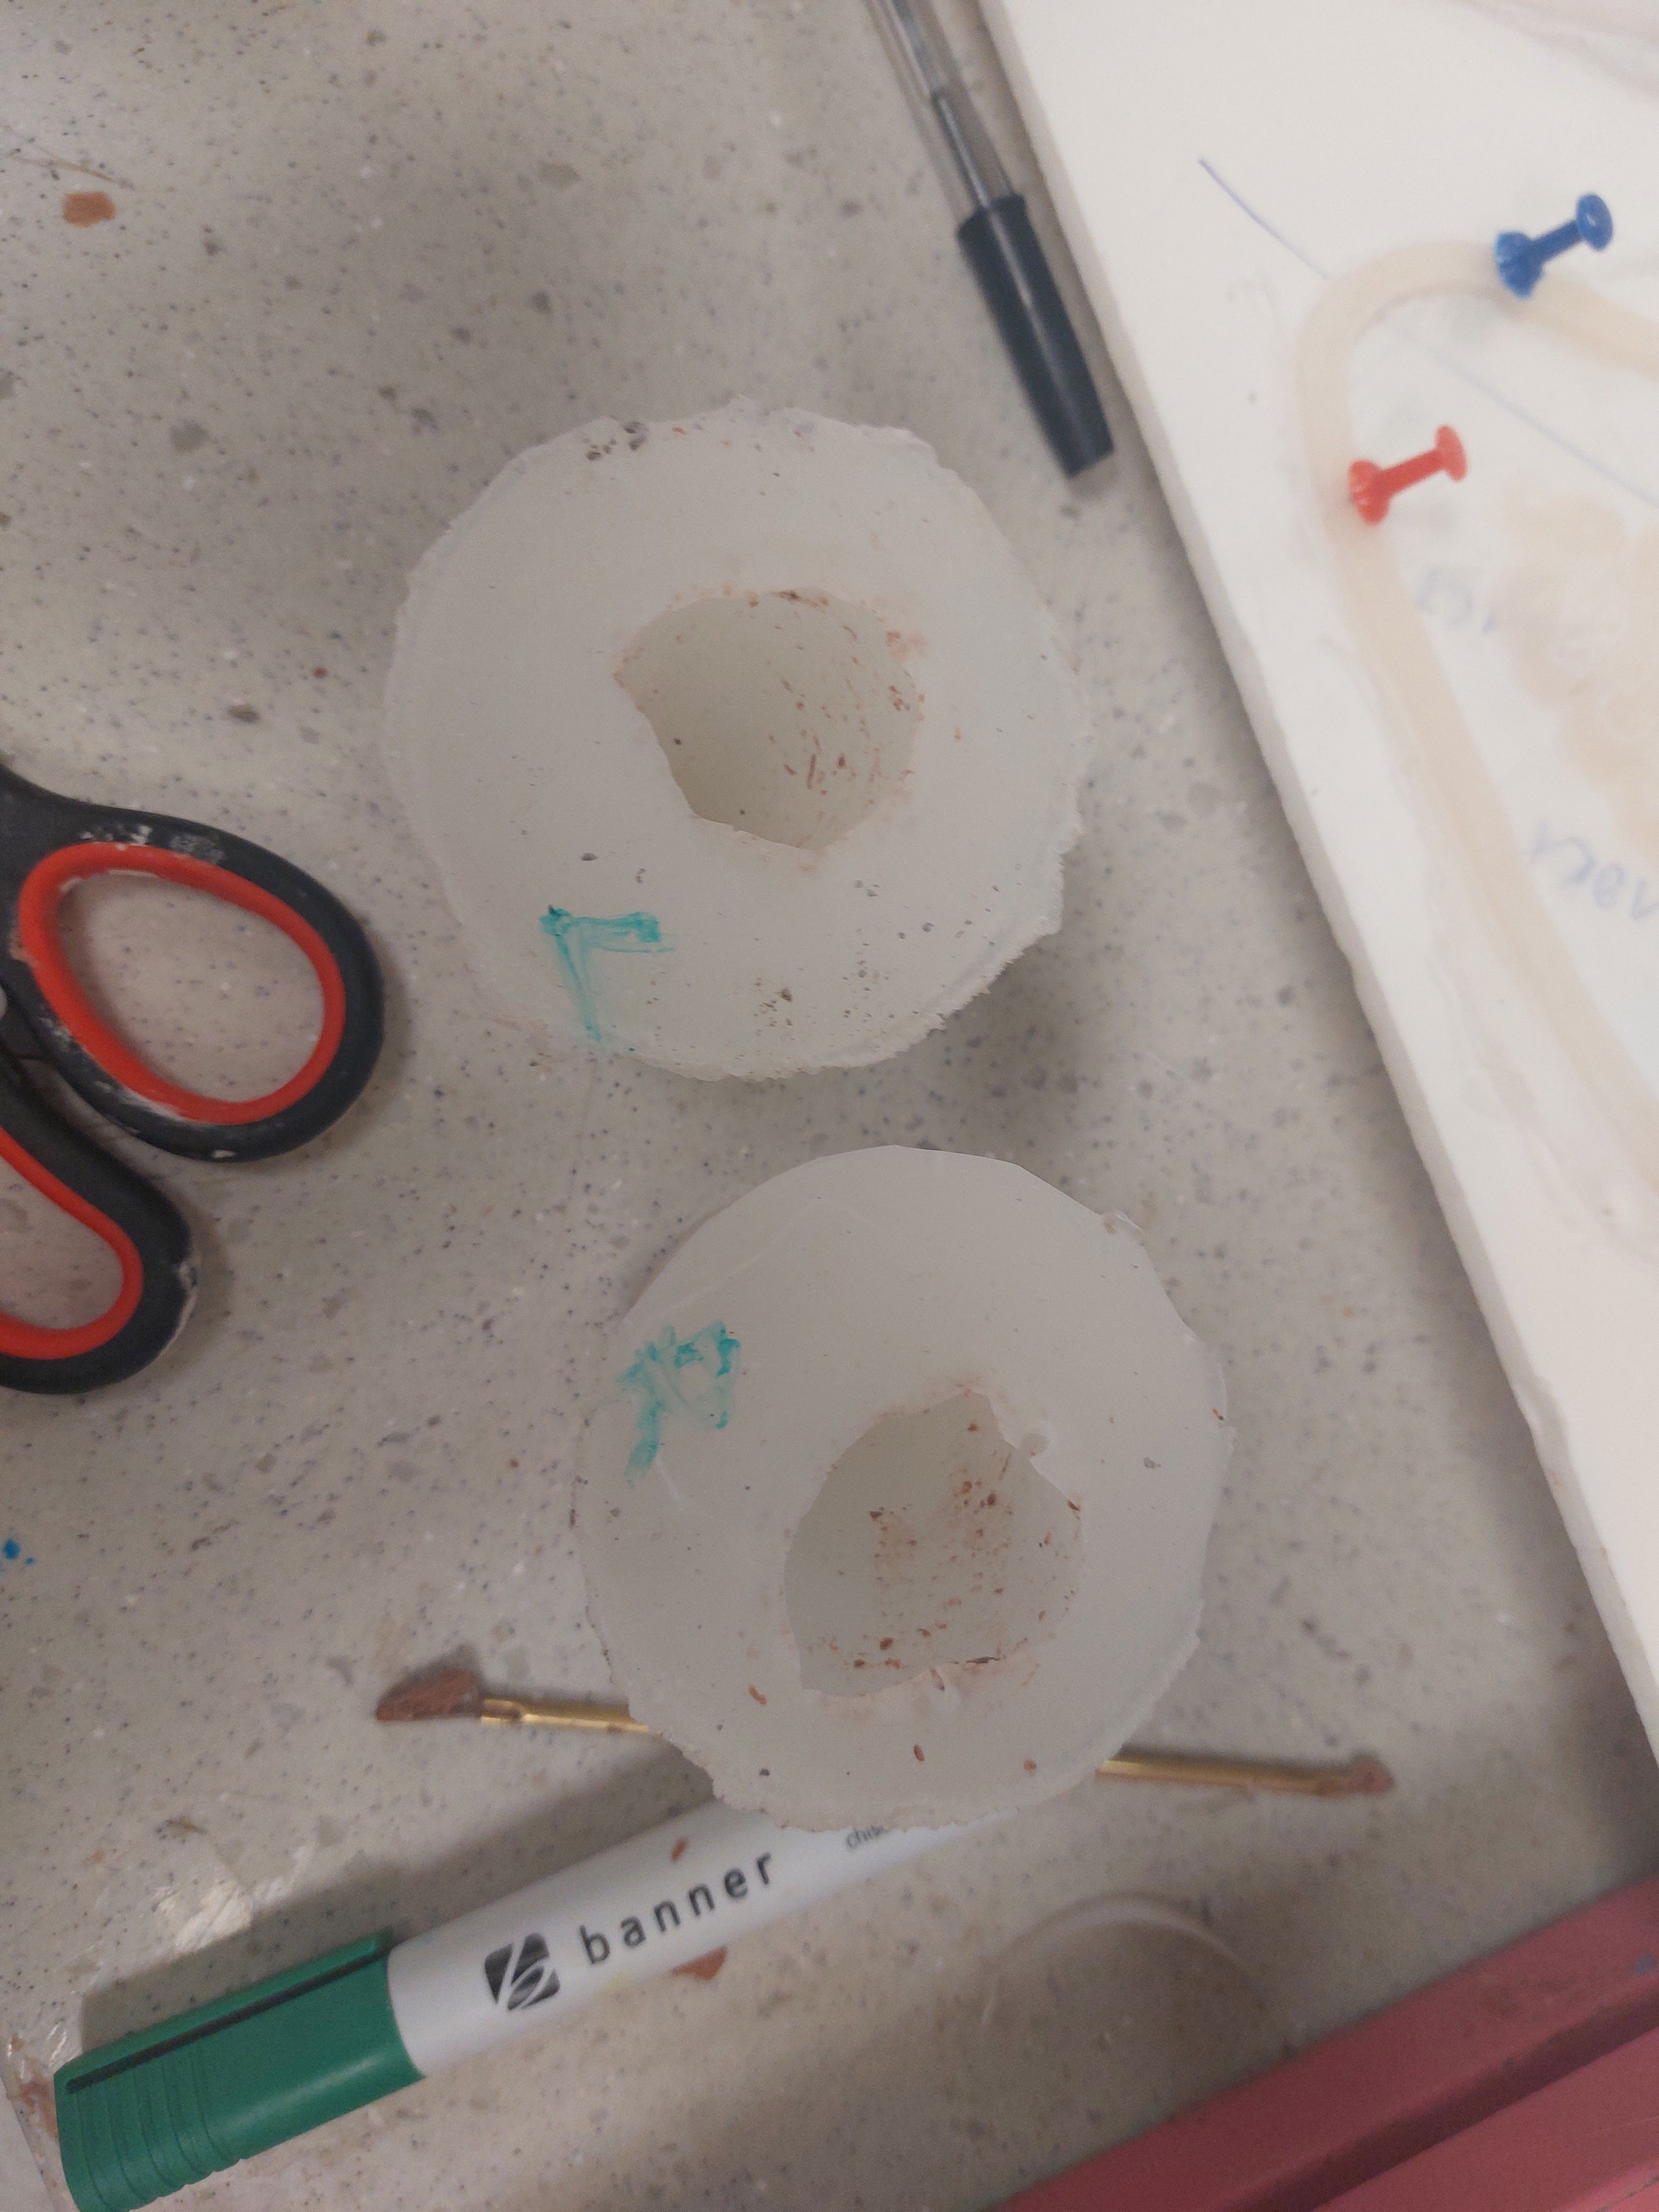
Figure 12: Horn molds (Keites-Gorman, 2024
Ears
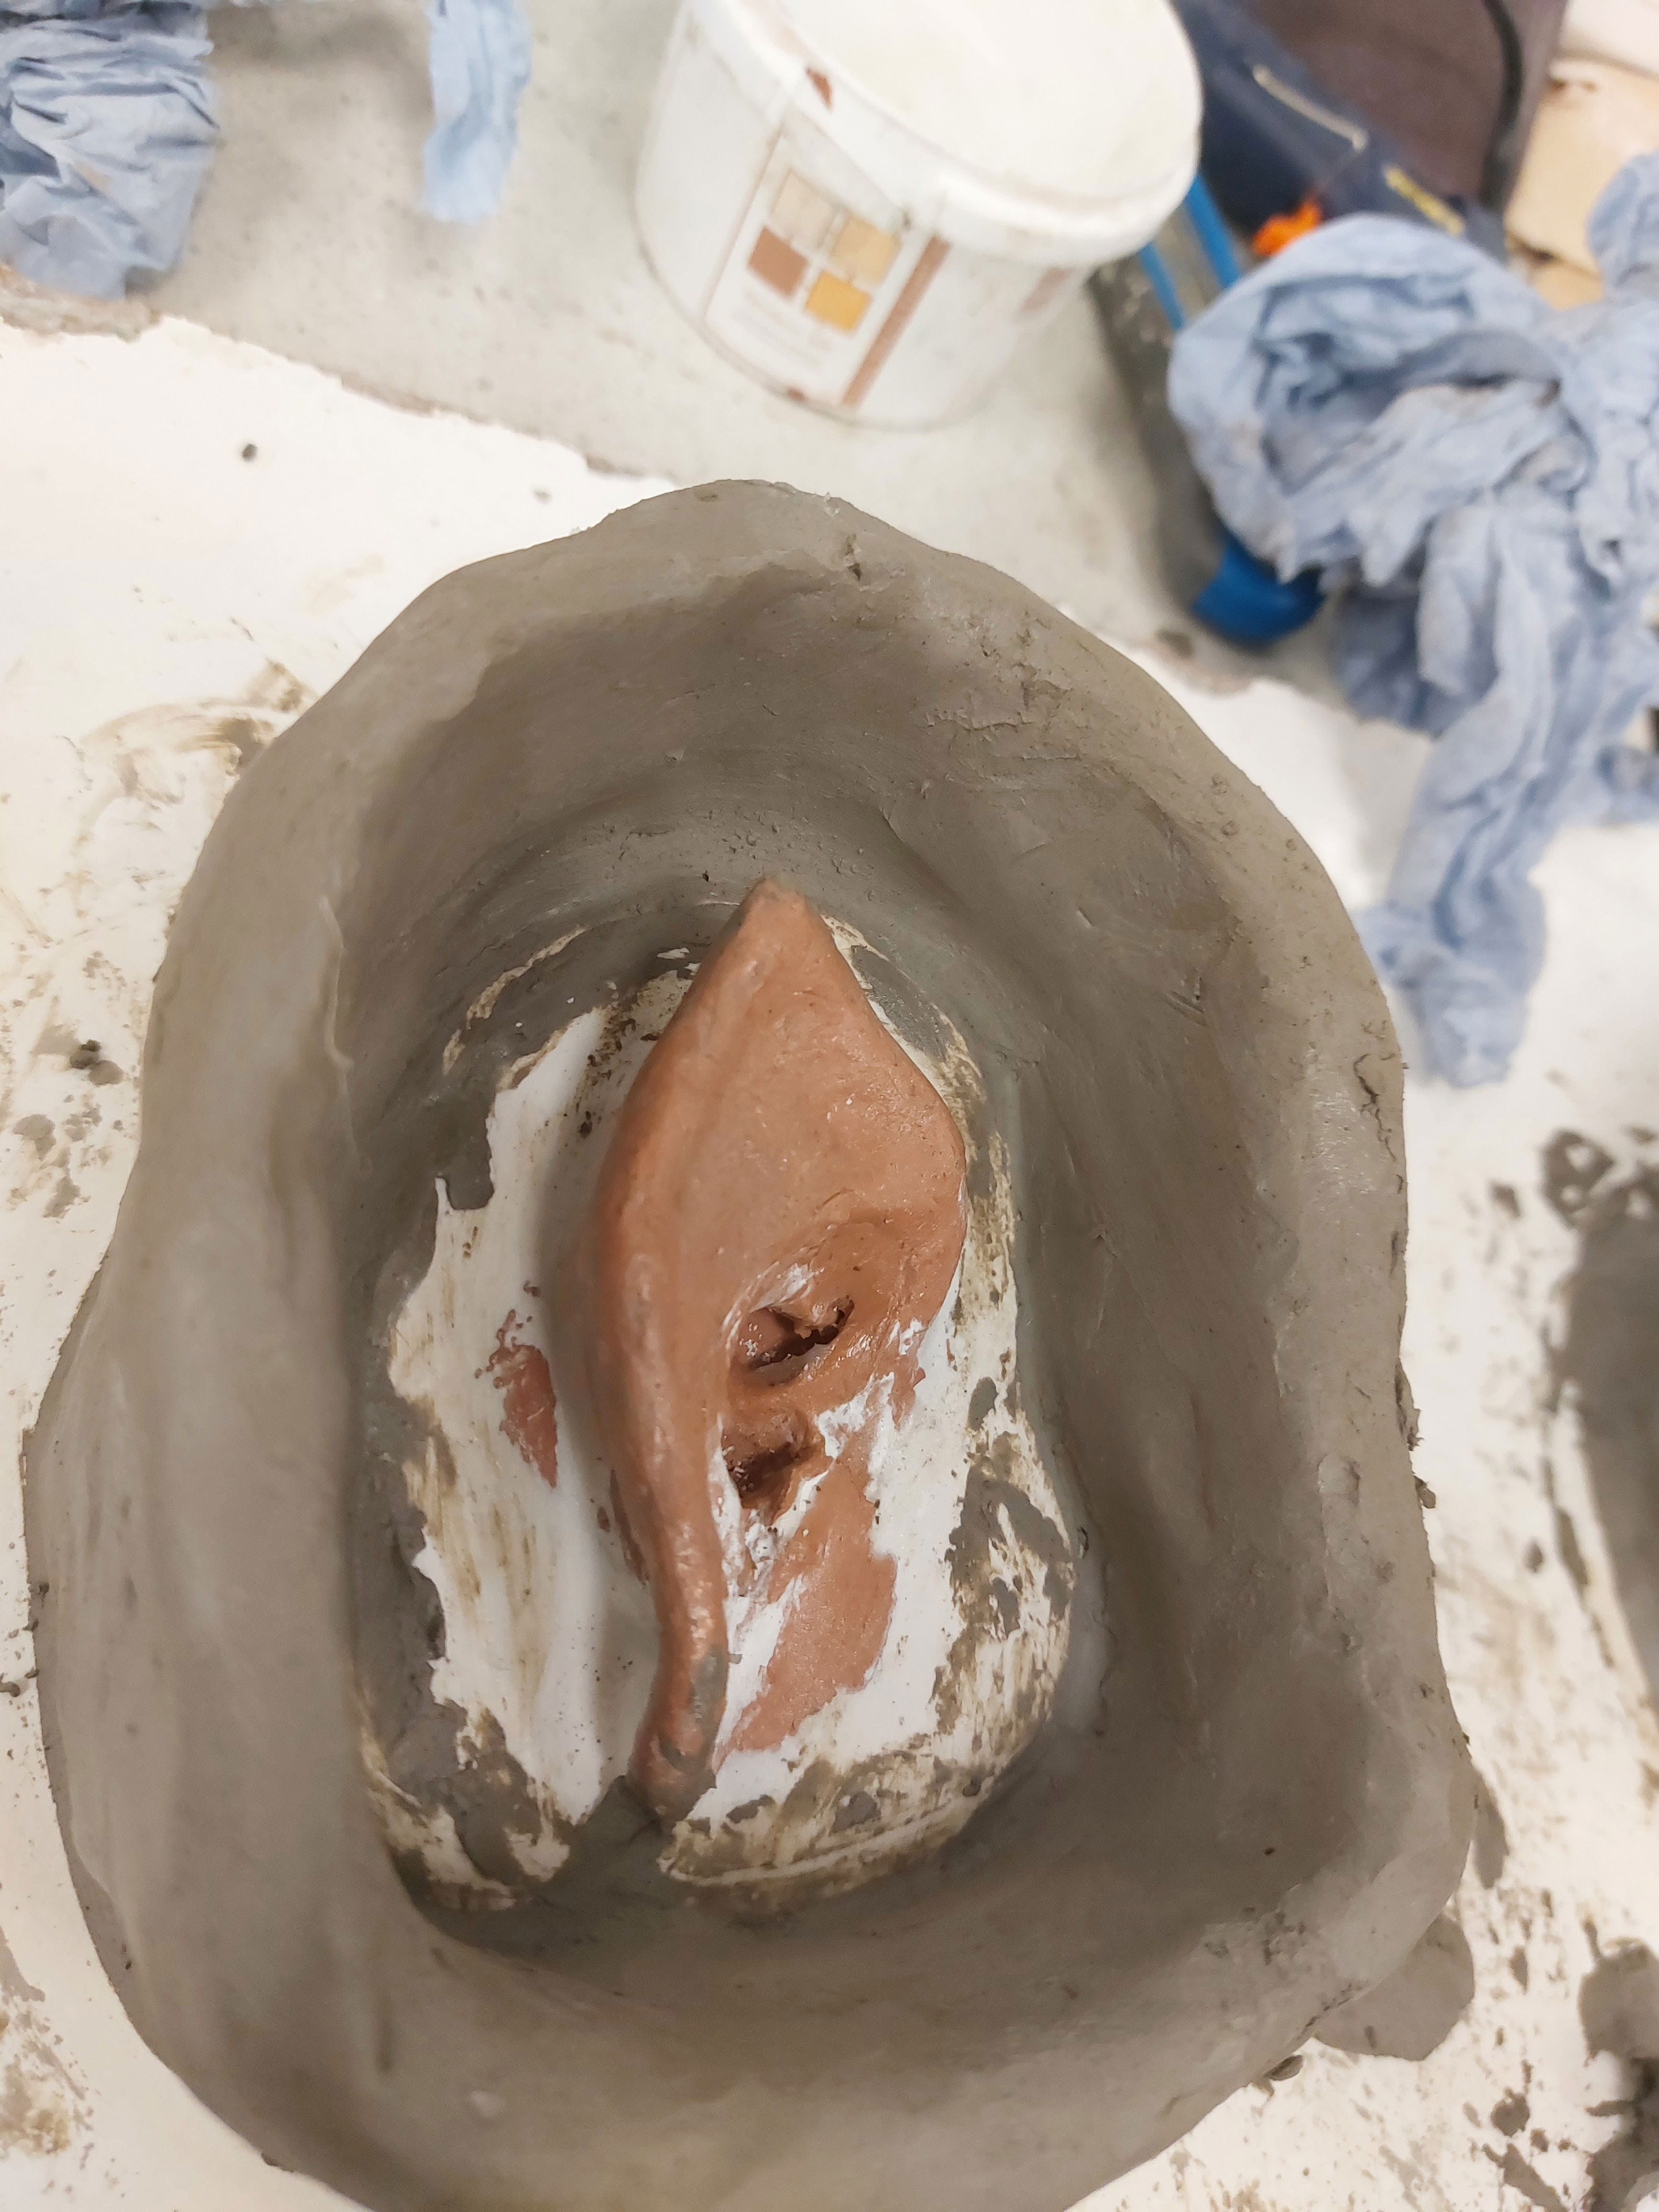
Figure 13: Making negative ear (Keites-Gorman, 2024)
I had some trouble with making the ears. Unfortunately, the negative broke when I didn't put enough release on it. I managed to save the negative side by chipping away at it. Next, I had to force the silicone into place instead of using a negative mold. I used a 2:1 ratio of cap plastic and swirled it around for 2 layers and 1 brush coat. Then, I used FS 25 A&B, mixed the pigments, and poured it. I had to shape the silicone around the mold to create a lip to curve around the ear. After doing this a few times, I got the hang of it. Ultimately, I wish I had more time to perfect the ears, but they did help transform the look, and I learned good techniques for covering problem areas, such as using fake moss.
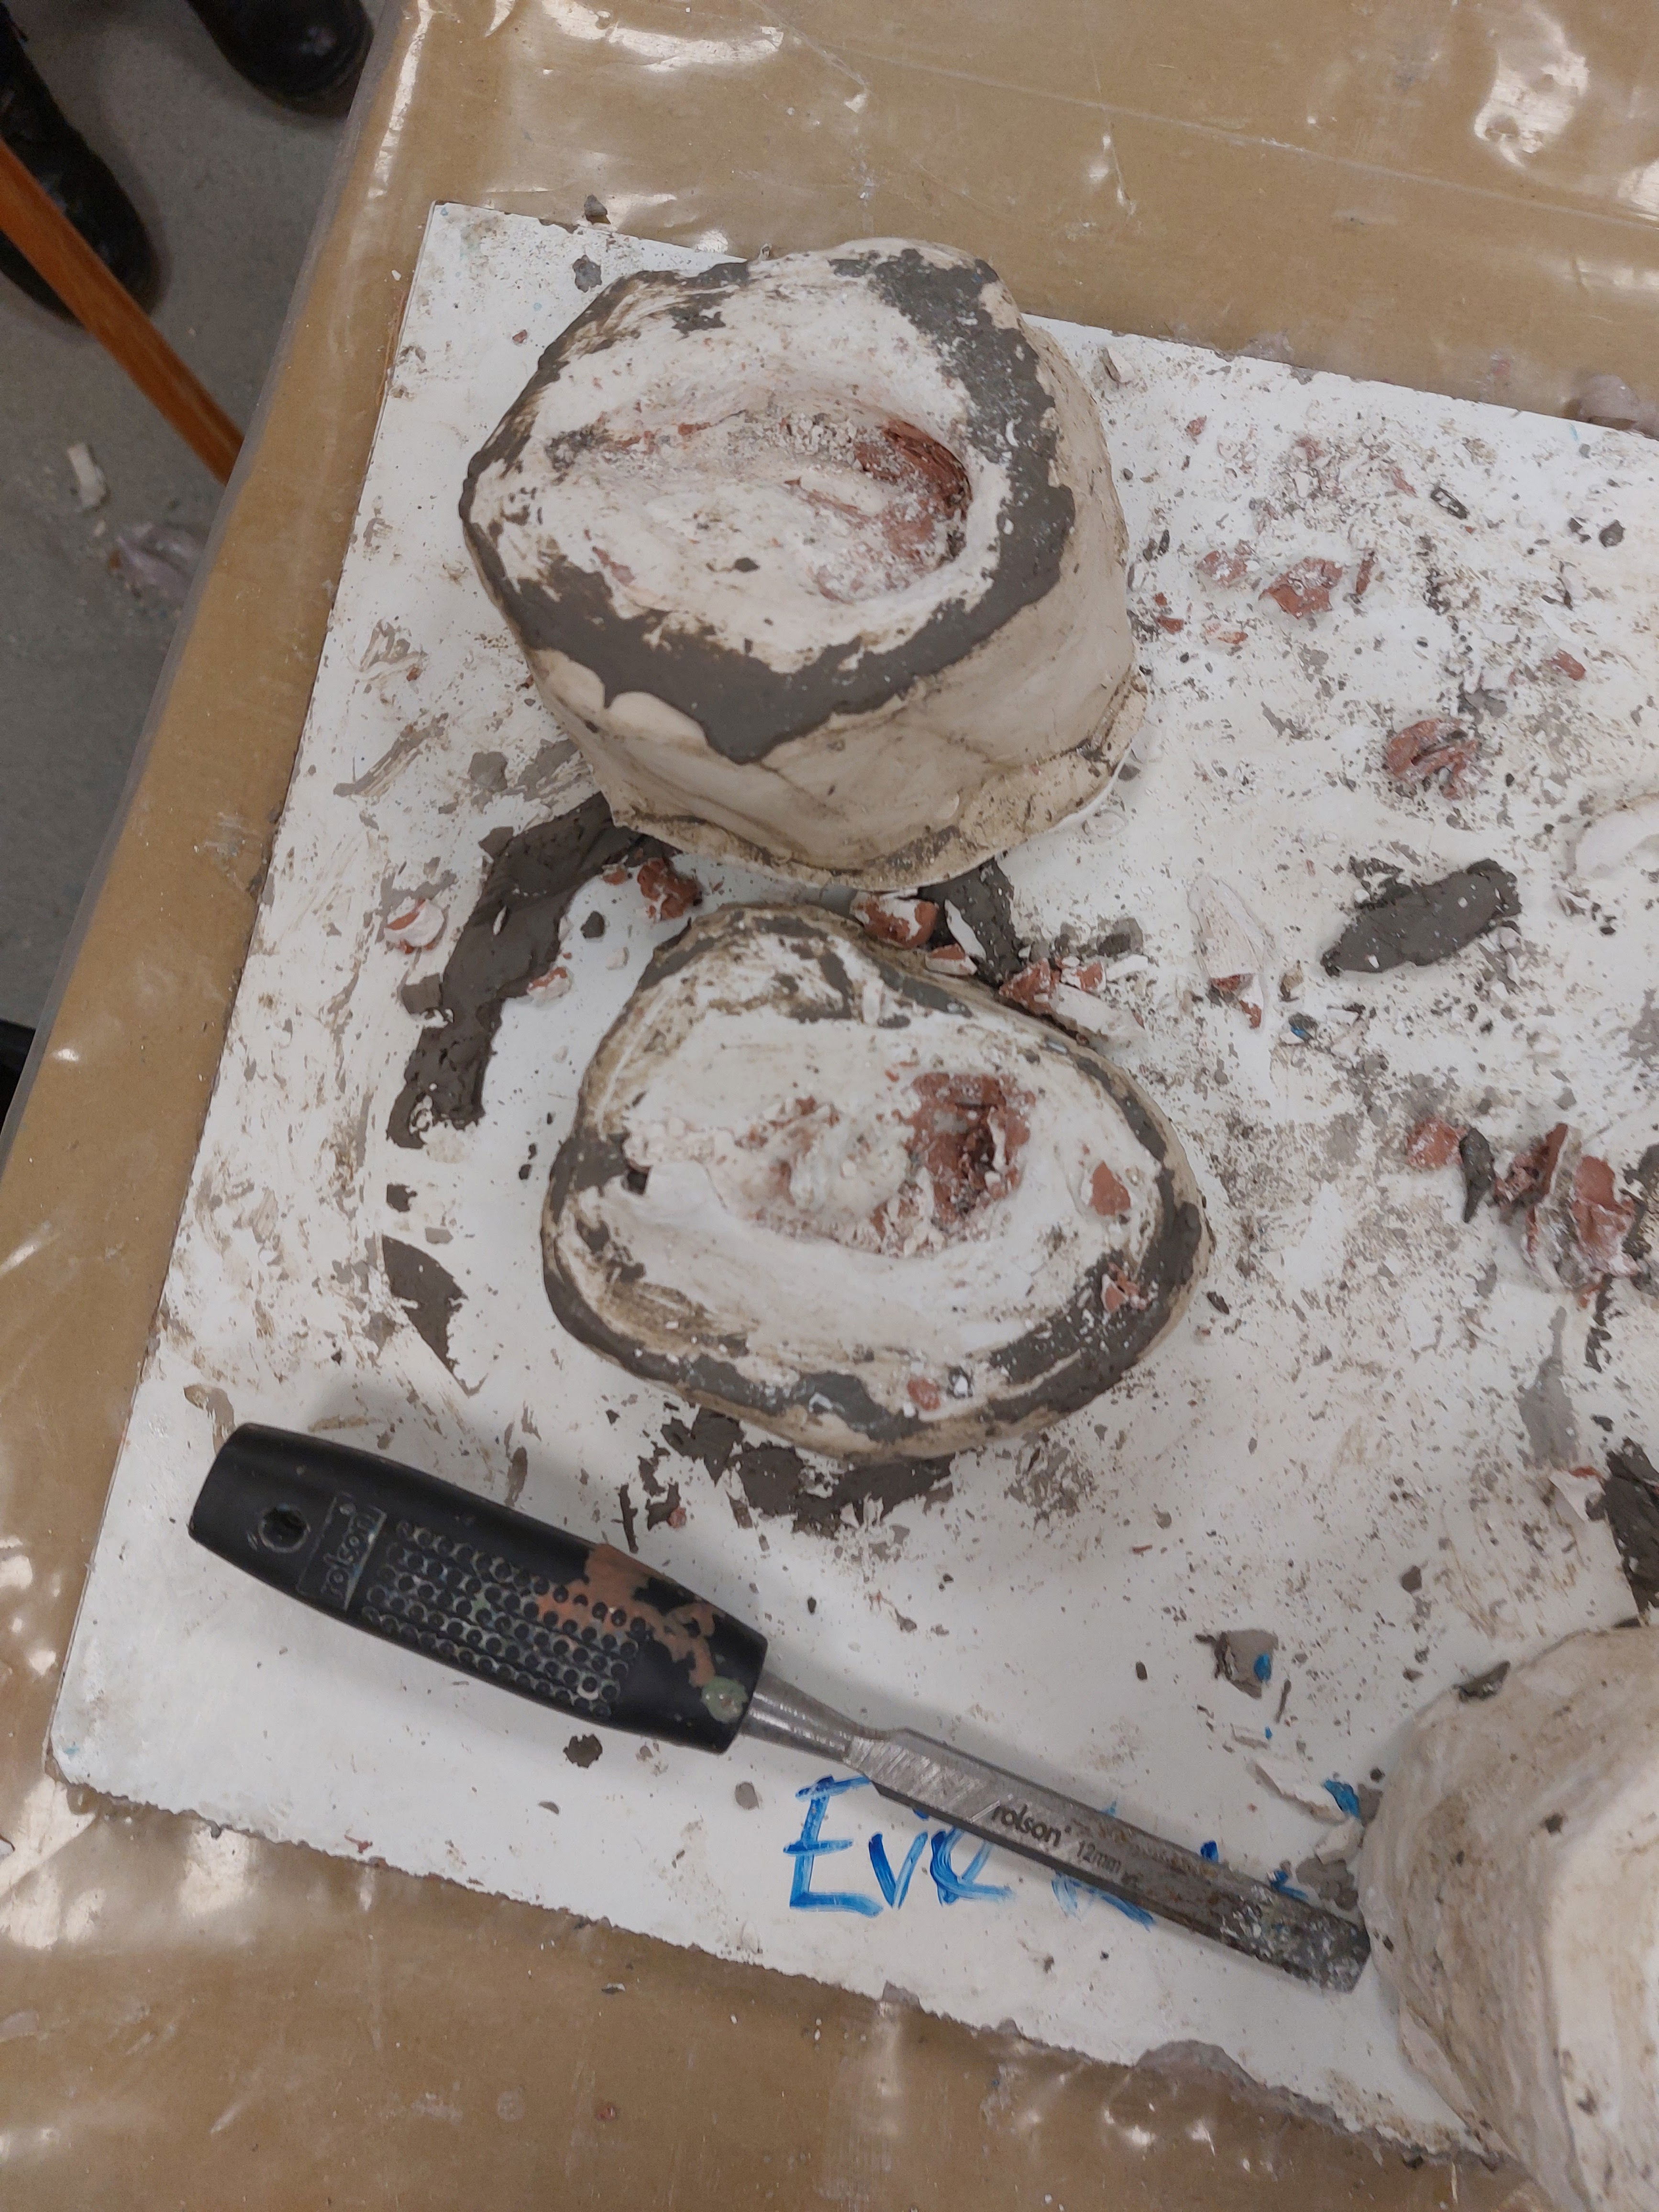
Figure 14: Failed negative (Keites-Gorman, 2024)
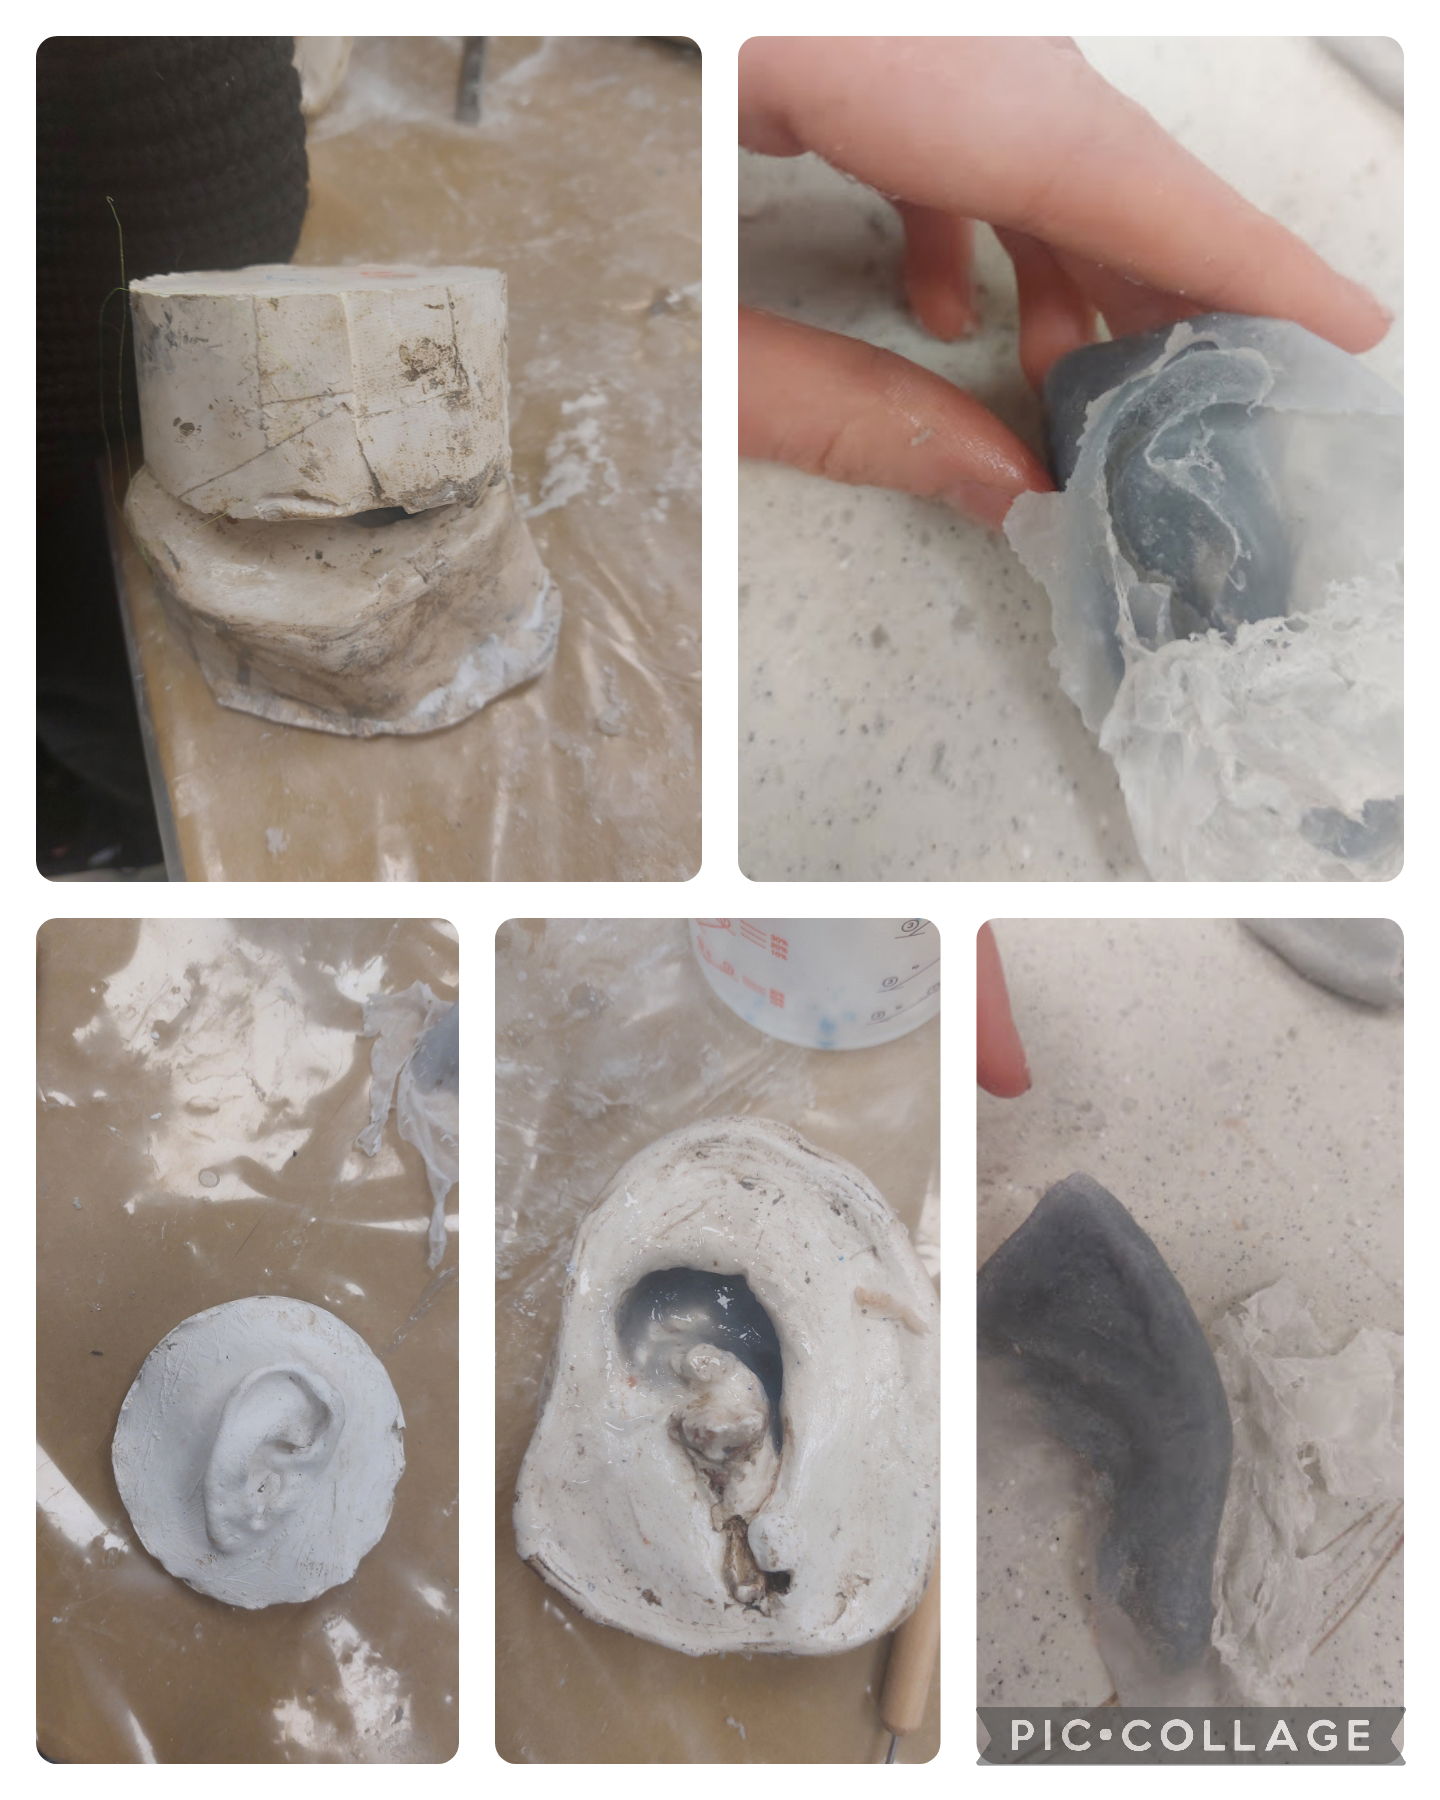
Figure 15: Positive and negative ear cast (Keites-Gorman, 2024)
Figure 16: Silicone ear (Keites-Gorman, 2024)
Figure 17: Ear cast spare (Keites-Gorman, 2024)
Figure 18: silicone running ear (Keites-Gorman, 2024)
Figure 19: Final ear piece (Keites-Gorman, 2024)
Reflection
In this video, you can see all the failed attempts and where the plastic cap just didn't grab. It was frustrating because I wanted good pieces, and every time until the 5th attempt, it would not work. Plus, making conform molds takes 2 hours to do, mainly because I had three of them. It is time-consuming, and seeing it fail is not fun. However, I did enjoy solving it. It was like a puzzle and using my knowledge of what I could change so I would get good pieces. In the end, I got some great pieces that were nice to blend, and I feel like my hard work did pay off despite it being frustrating and making me feel like I couldn't do this at some points.
Figure 20: Video of pieces (Keites-Gorman, 2024)
Reference list
Hepworth, S. (2019) 'Silicone vs Foam latex?,' Stan Winston School of Character Arts Forums. Available at: https://forums.stanwinstonschool.com/discussion/5841/silicone-vs-foam-latex. (Accessed 8th July).
Kerrington, I. (2024) 'How to make SFX prosthetics for the face - Treasurehouse of Makeup,' Treasurehouse of Makeup, 26 June. Available at: https://www.treasurehouseofmakeup.co.uk/blog/how-to-make-sfx-face-prosthetics/.(Accessed 8th July).
Figure list
Figure 1: Keites-Gorman, E. (2024).Prep for Running. [Own Work]. York College, UK.
Figure 2: Keites-Gorman, E. (2024).Measurements trial 1. [Own Work]. York College, UK.
Figure 3: Keites-Gorman, E. (2024). Bad Run. [Own Work]. York College, UK.
Figure 4: Keites-Gorman, E. (2024).Second trial. [Own Work]. York College, UK.
Figure 5: Keites-Gorman, E. (2024).Fifth Trial. [Own Work]. York College, UK.
Figure 6: Keites-Gorman, E. (2024). Clamps. [Own Work]. York College, UK.
Figure 7: Keites-Gorman, E. (2024).Removing Pieces. [Own Work]. York College, UK.
Figure 8: Keites-Gorman, E. (2024). Cheek measurements. [Own Work]. York College, UK.
Figure 9: Keites-Gorman, E. (2024). Cheek Sculpt. [Own Work]. York College, UK.
Figure 10: Keites-Gorman, E. (2024). Cheek Molding. [Own Work]. York College, UK.
Figure 11: Keites-Gorman, E. (2024). Horn Sculpt. [Own Work]. York College, UK.
Figure 12: Keites-Gorman, E. (2024). Horn molds. [Own Work]. York College, UK.
Figure 13: Keites-Gorman, E. (2024). Making Negative ears. [Own Work]. York College, UK.
Figure 14: Keites-Gorman, E. (2024). Failed Negative. [Own Work]. York College, UK.
Figure 15: Keites-Gorman, E. (2024). Positive and negative ear cast. [Own Work]. York College, UK.
Figure 16: Keites-Gorman, E. (2024).Silicone ear. [Own Work]. York College, UK.
Figure 17: Keites-Gorman, E. (2024).Ear Cast spare. [Own Work]. York College, UK.
Figure 18: Keites-Gorman, E. (2024).Silicone running ear. [Own Work]. York College, UK.
Figure 19: Keites-Gorman, E. (2024). Final ear piece. [Own Work]. York College, UK.
Figure 20: Keites-Gorman, E. (2024). Video of pieces. [Own Work]. York College, UK.