5. Floating the Sculpt, Transferring, and Positive Cores
9th April 2024
Unfortunately, my sculpture ended up sitting in the water for 24 hours, causing it to crumple in front of my eyes. It was disheartening to see my work disintegrate, considering the amount of effort and hours I had put into it. I would have to re sculpt a significant portion of it. Separating the sculpture was quite a challenge. My tutor and I decided to divide the face into the forehead, cheeks, nose, and mouth/chin. While working on the sculpture, I had anticipated this issue, but the sides of the sculpture didn't have the necessary wrinkles that would allow me to cut and join the pieces back together without it being obvious. This meant I had to get back to sculpting.
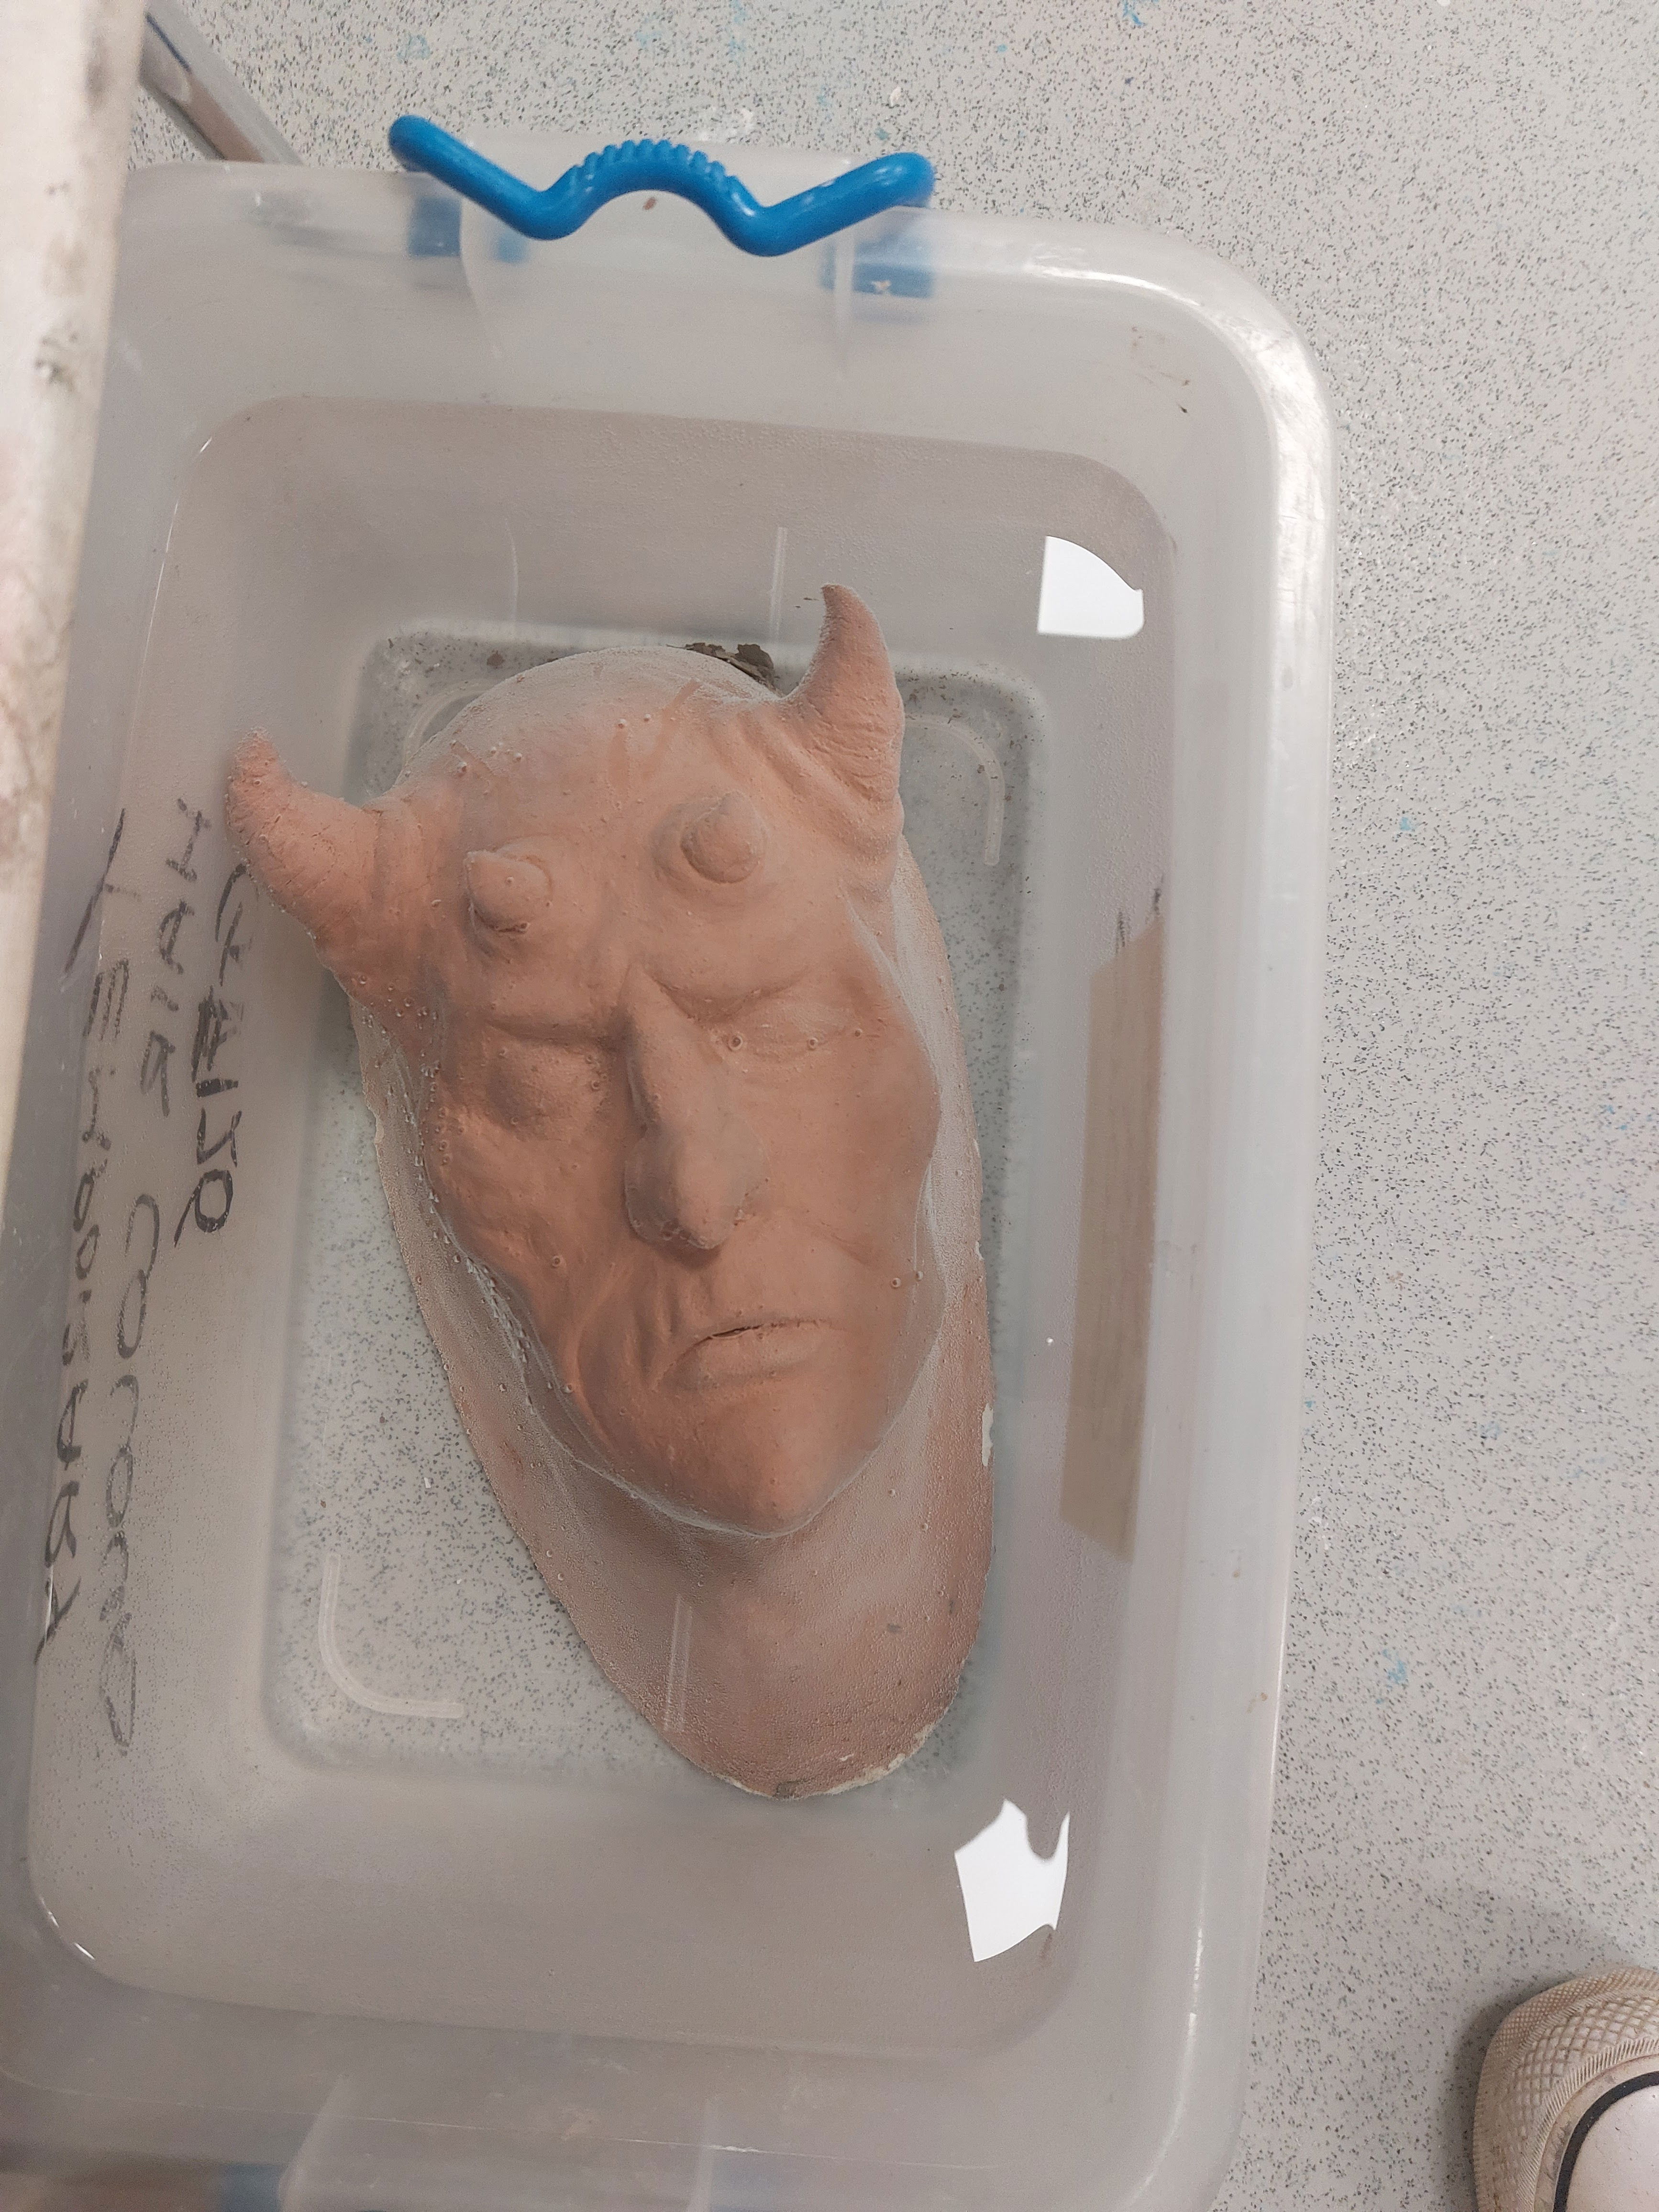
Figure 1: Sculpt in water (Keites-Gorman, 2024)
Having to revisit my sculpture after thinking I was done was certainly frustrating, but it was a necessary step, as I came to realize after completing my exam and assembling the pieces. Wrinkles proved to be essential, as they made it easier to join the pieces together.
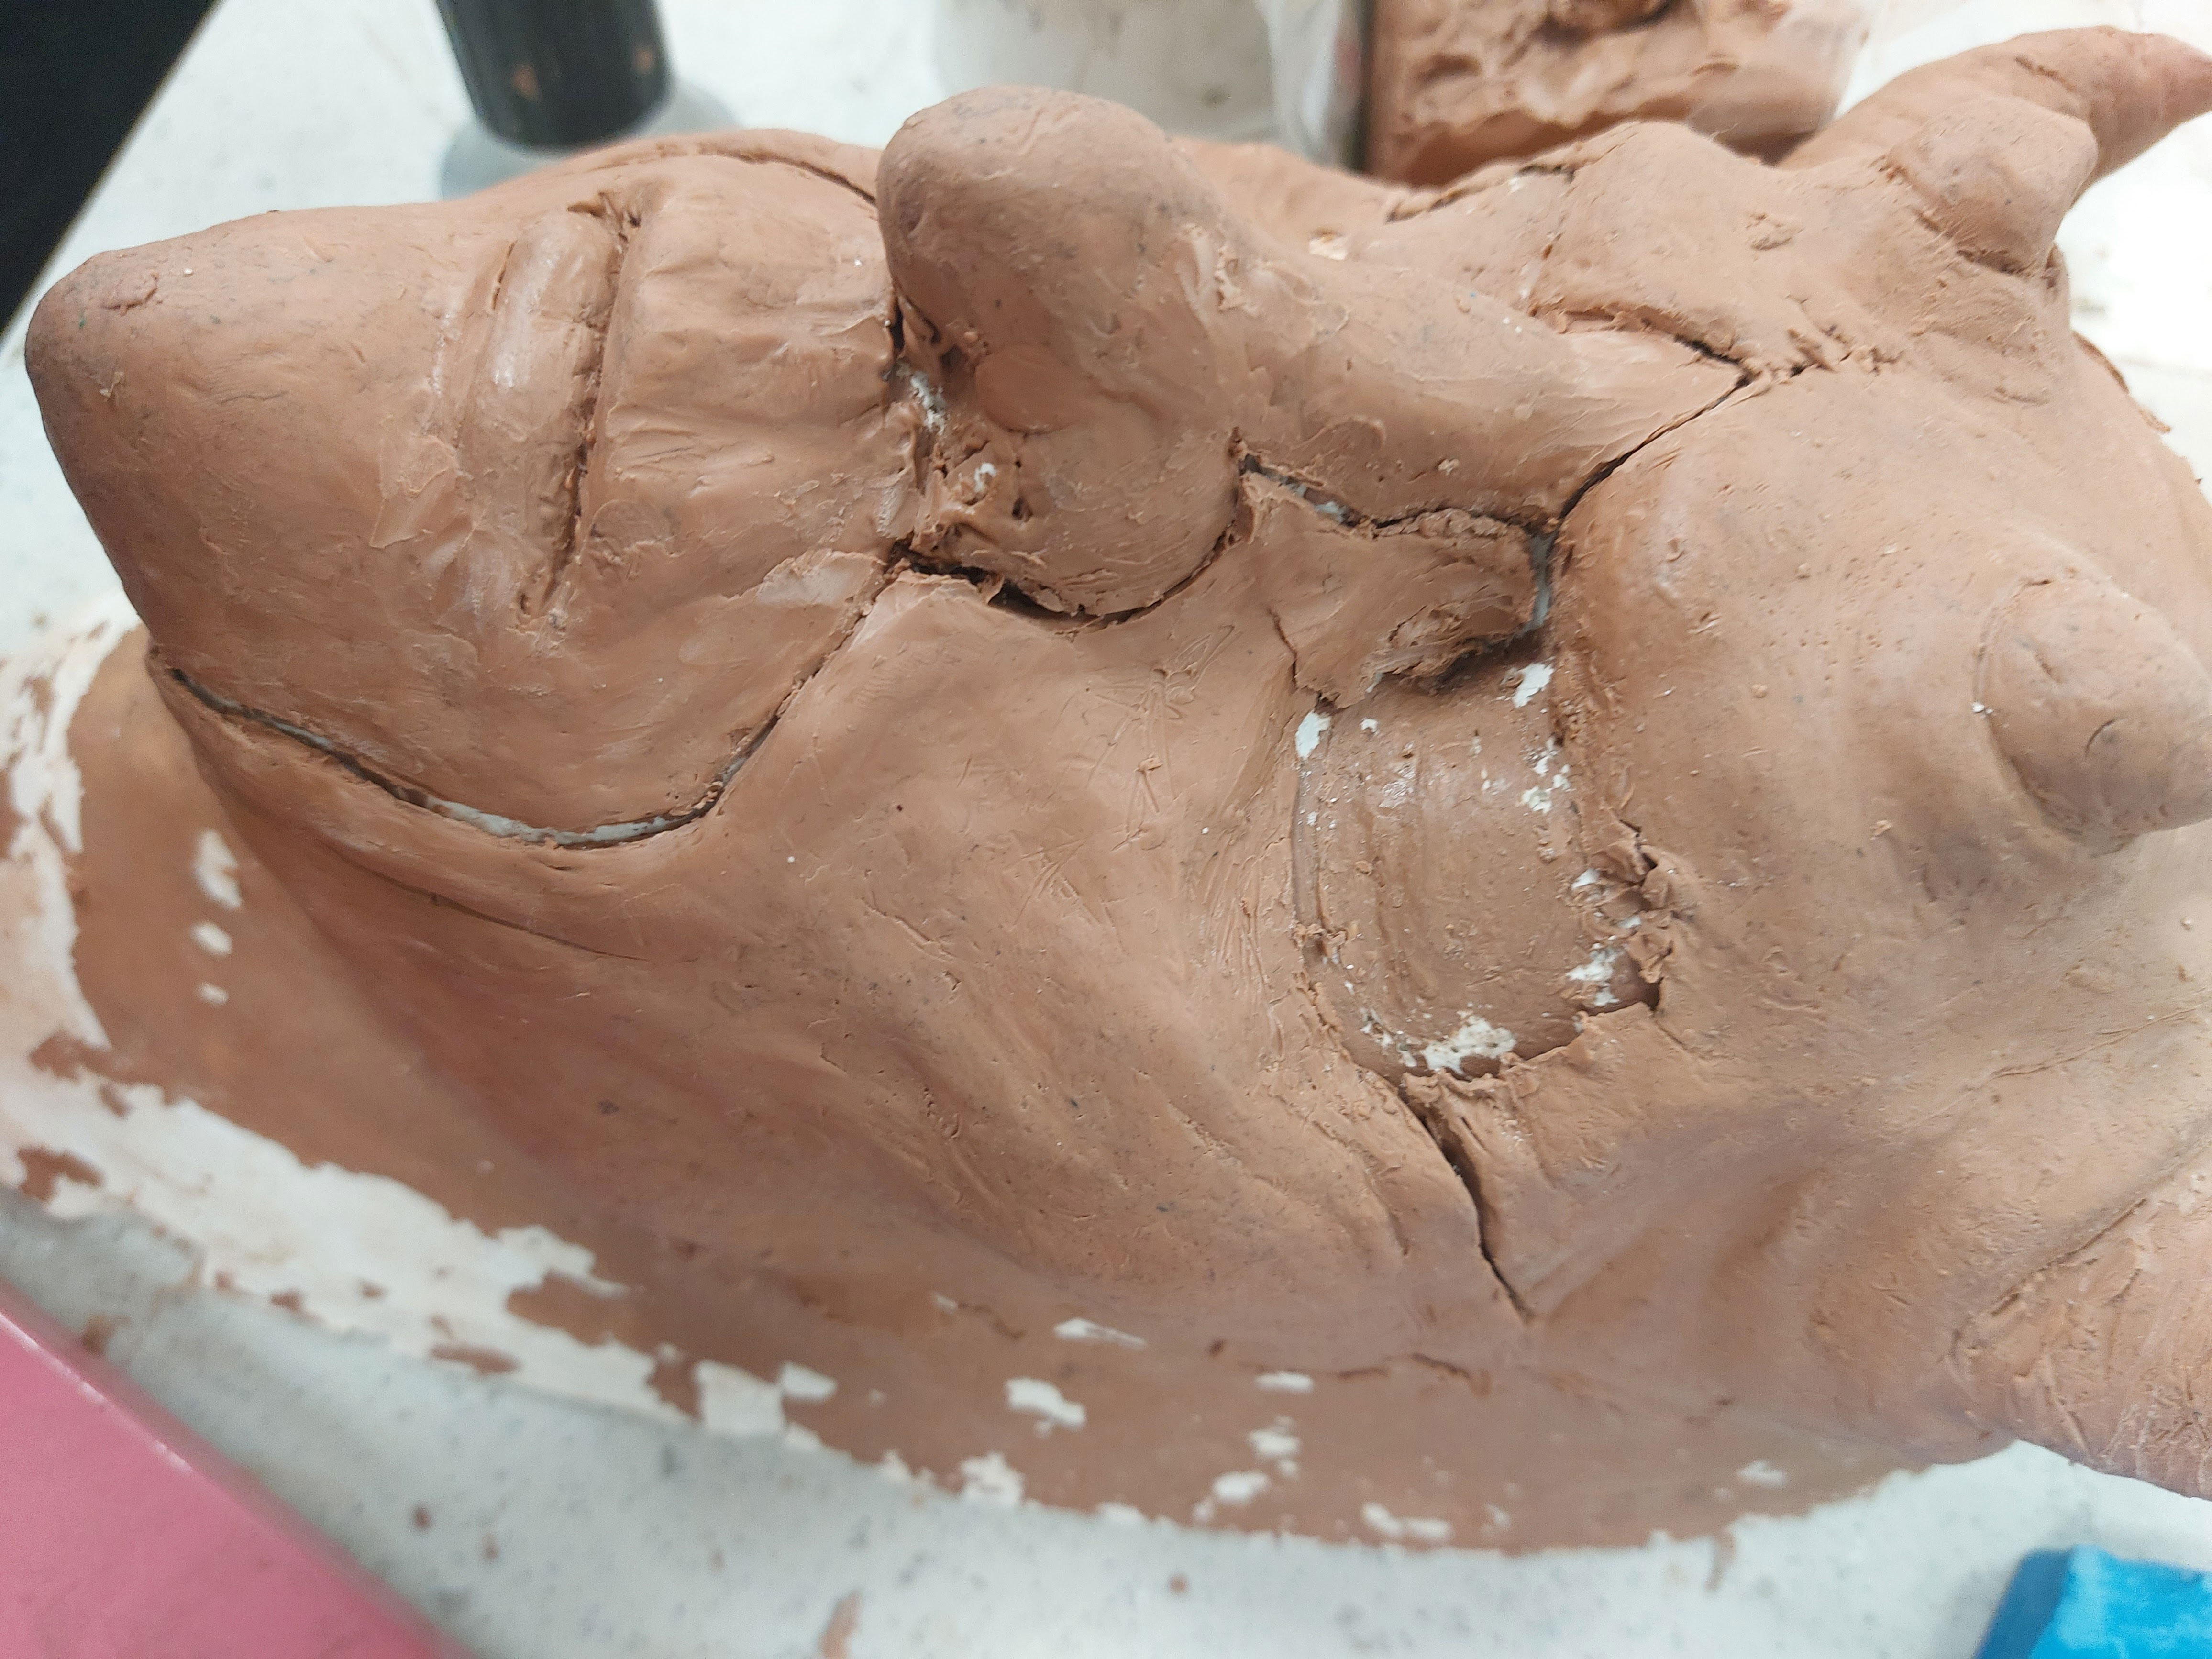
Figure 2: Sculpt sections (Keites-Gorman, 2024)
Making the positives
But first, we need to make positive cores !
This is the master mold all cleaned out and ready to use !
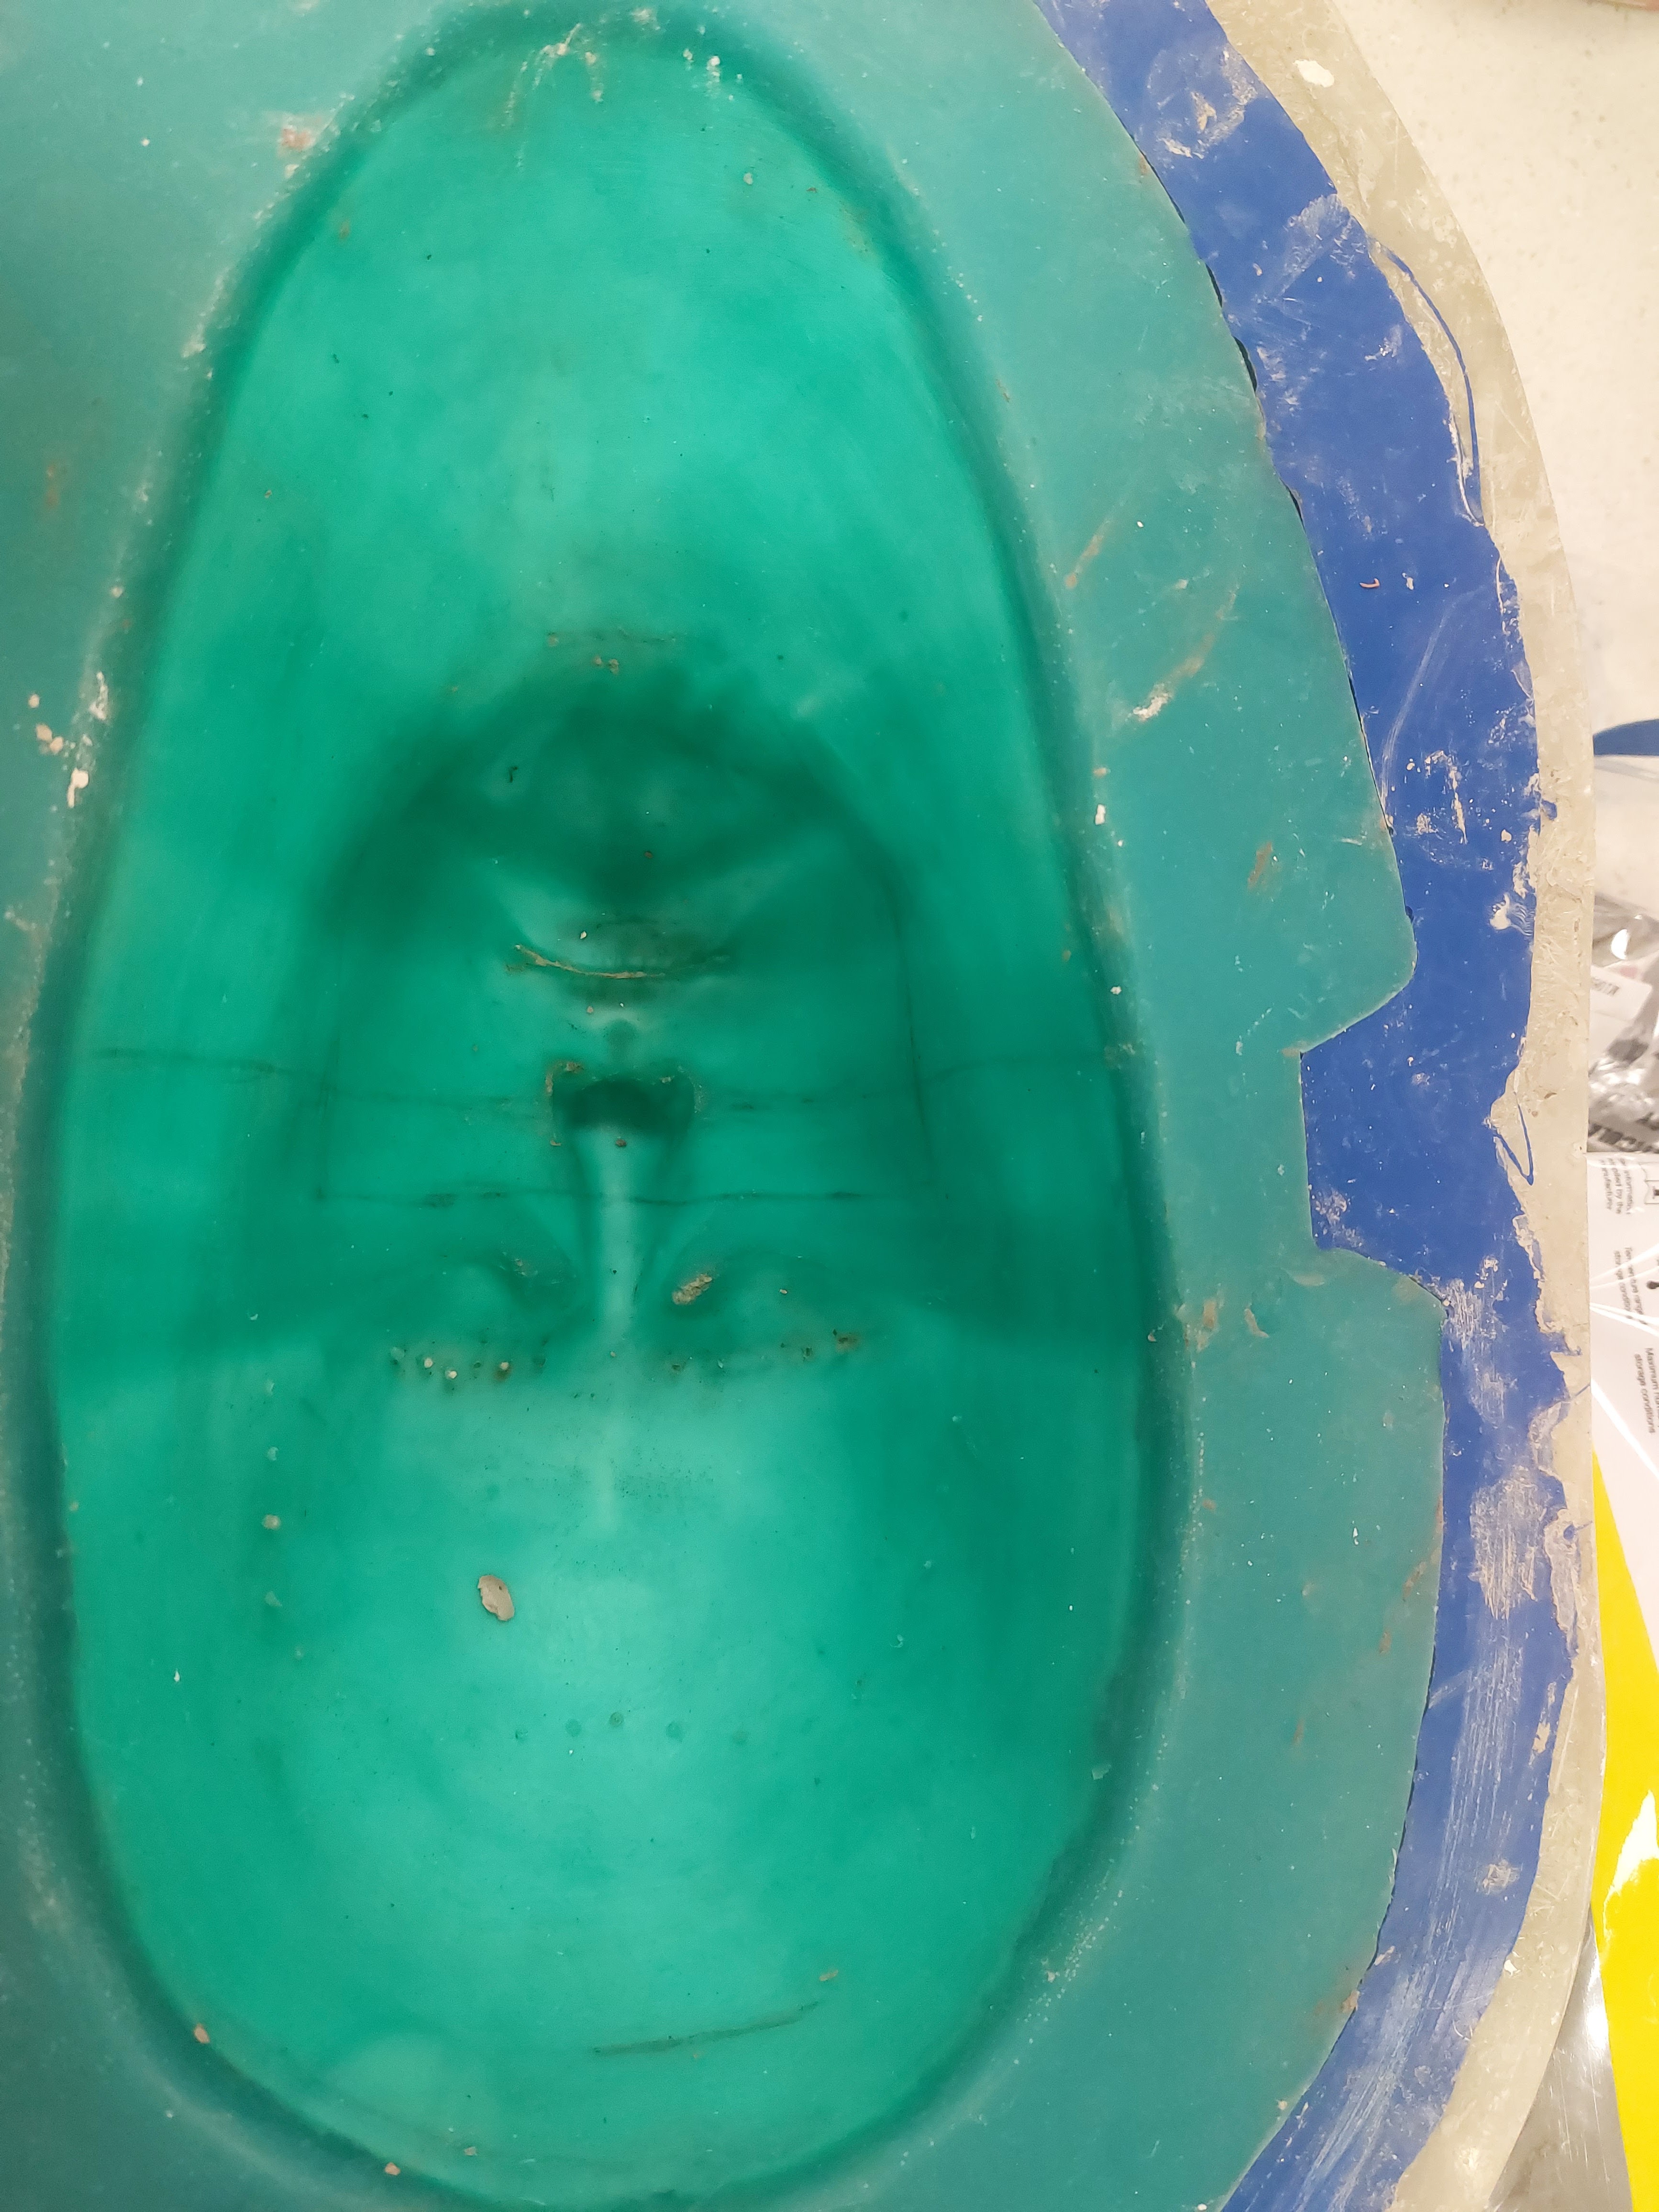
Figure 3: Master mold (Keites-Gorman, 2024)

Figure 4: Positive core making (Keites-Gorman, 2024)
To get the positive core we must first outline with buff clay the are that we have got a sculpt on. In my case, I needed a nose, chin and forehead piece, with the cheeks being flat moulds. So I used a wall of buff clay around the nose area and filled that up with plaster, let it set and now I have a plaster nose. This was repeated for the forehead and the chin.
Correcting
Once again, we have to correct the core. I really enjoy this part (I don't at all). So, for each core, I did the same thing as in blog number 4, just on a smaller scale this time. I won't go into too much detail like I did in blog 4 about correcting and why we do it. The only difference is the keys. I did forget to do them on the forehead pieces, and that did cause some trouble later down the line. Oops, won't be doing that again.
Here are the pictures of the positive core process!
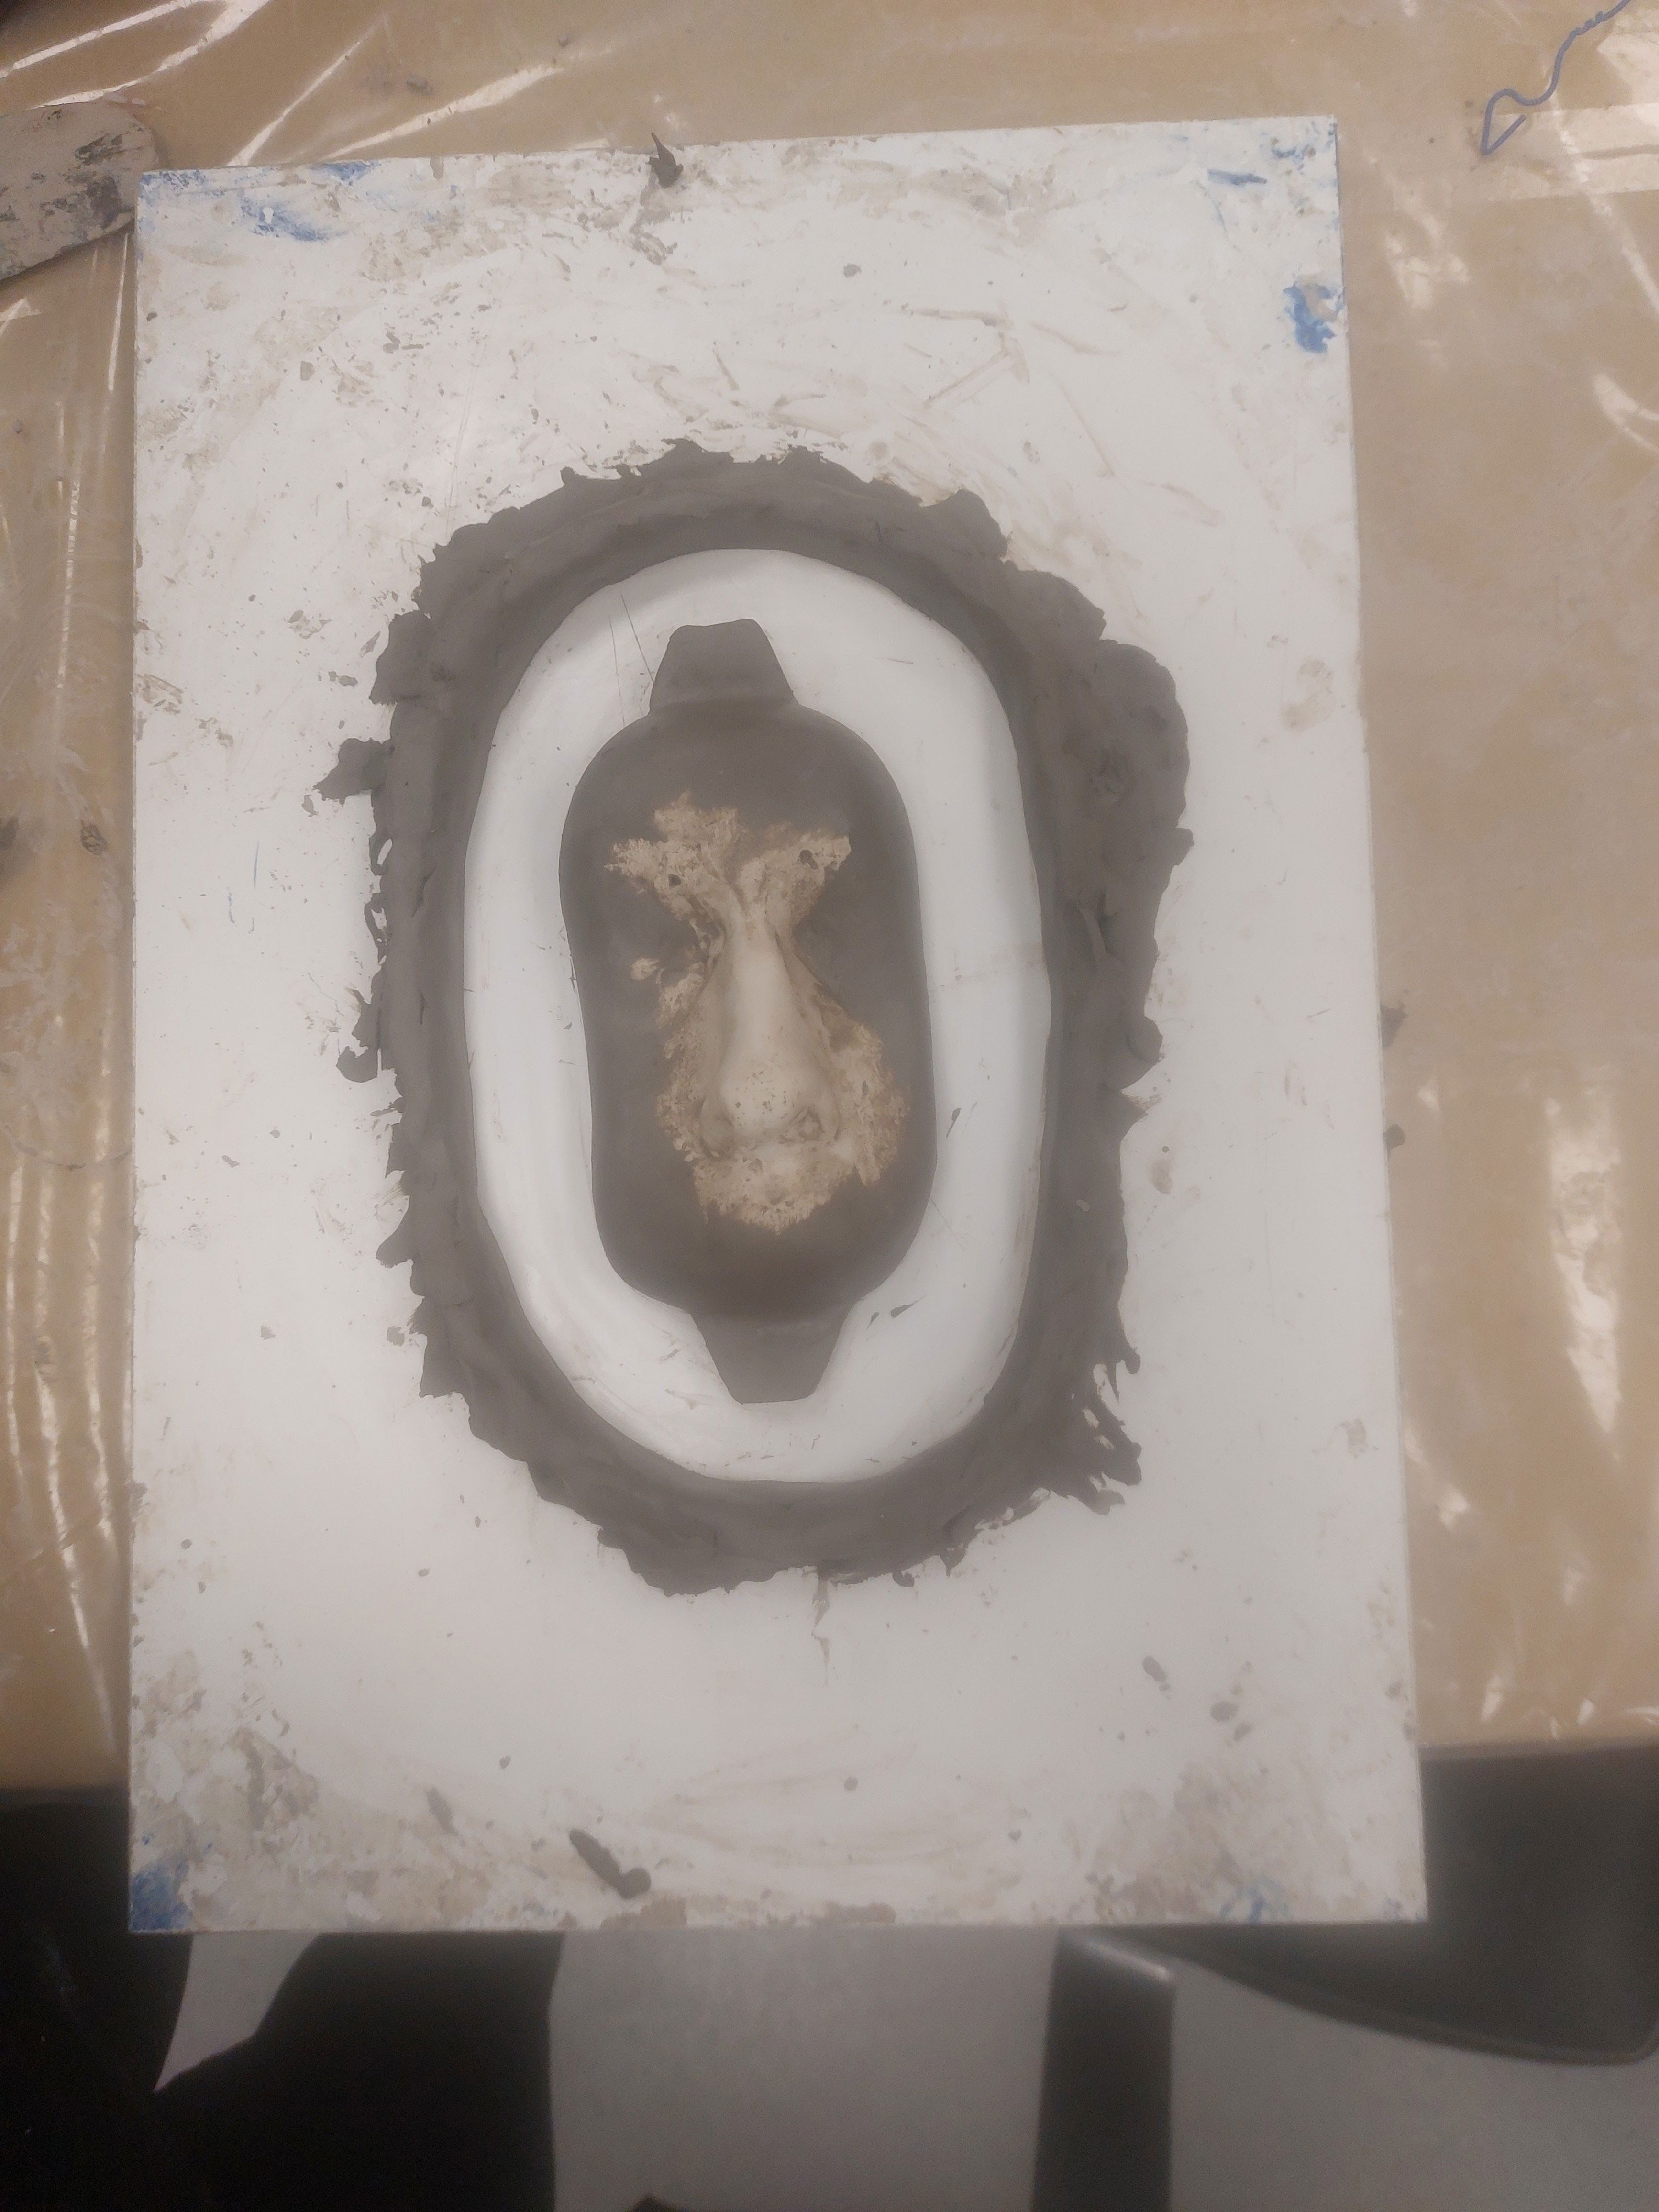
Figure 5: keys and wall (Keites-Gorman, 2024)
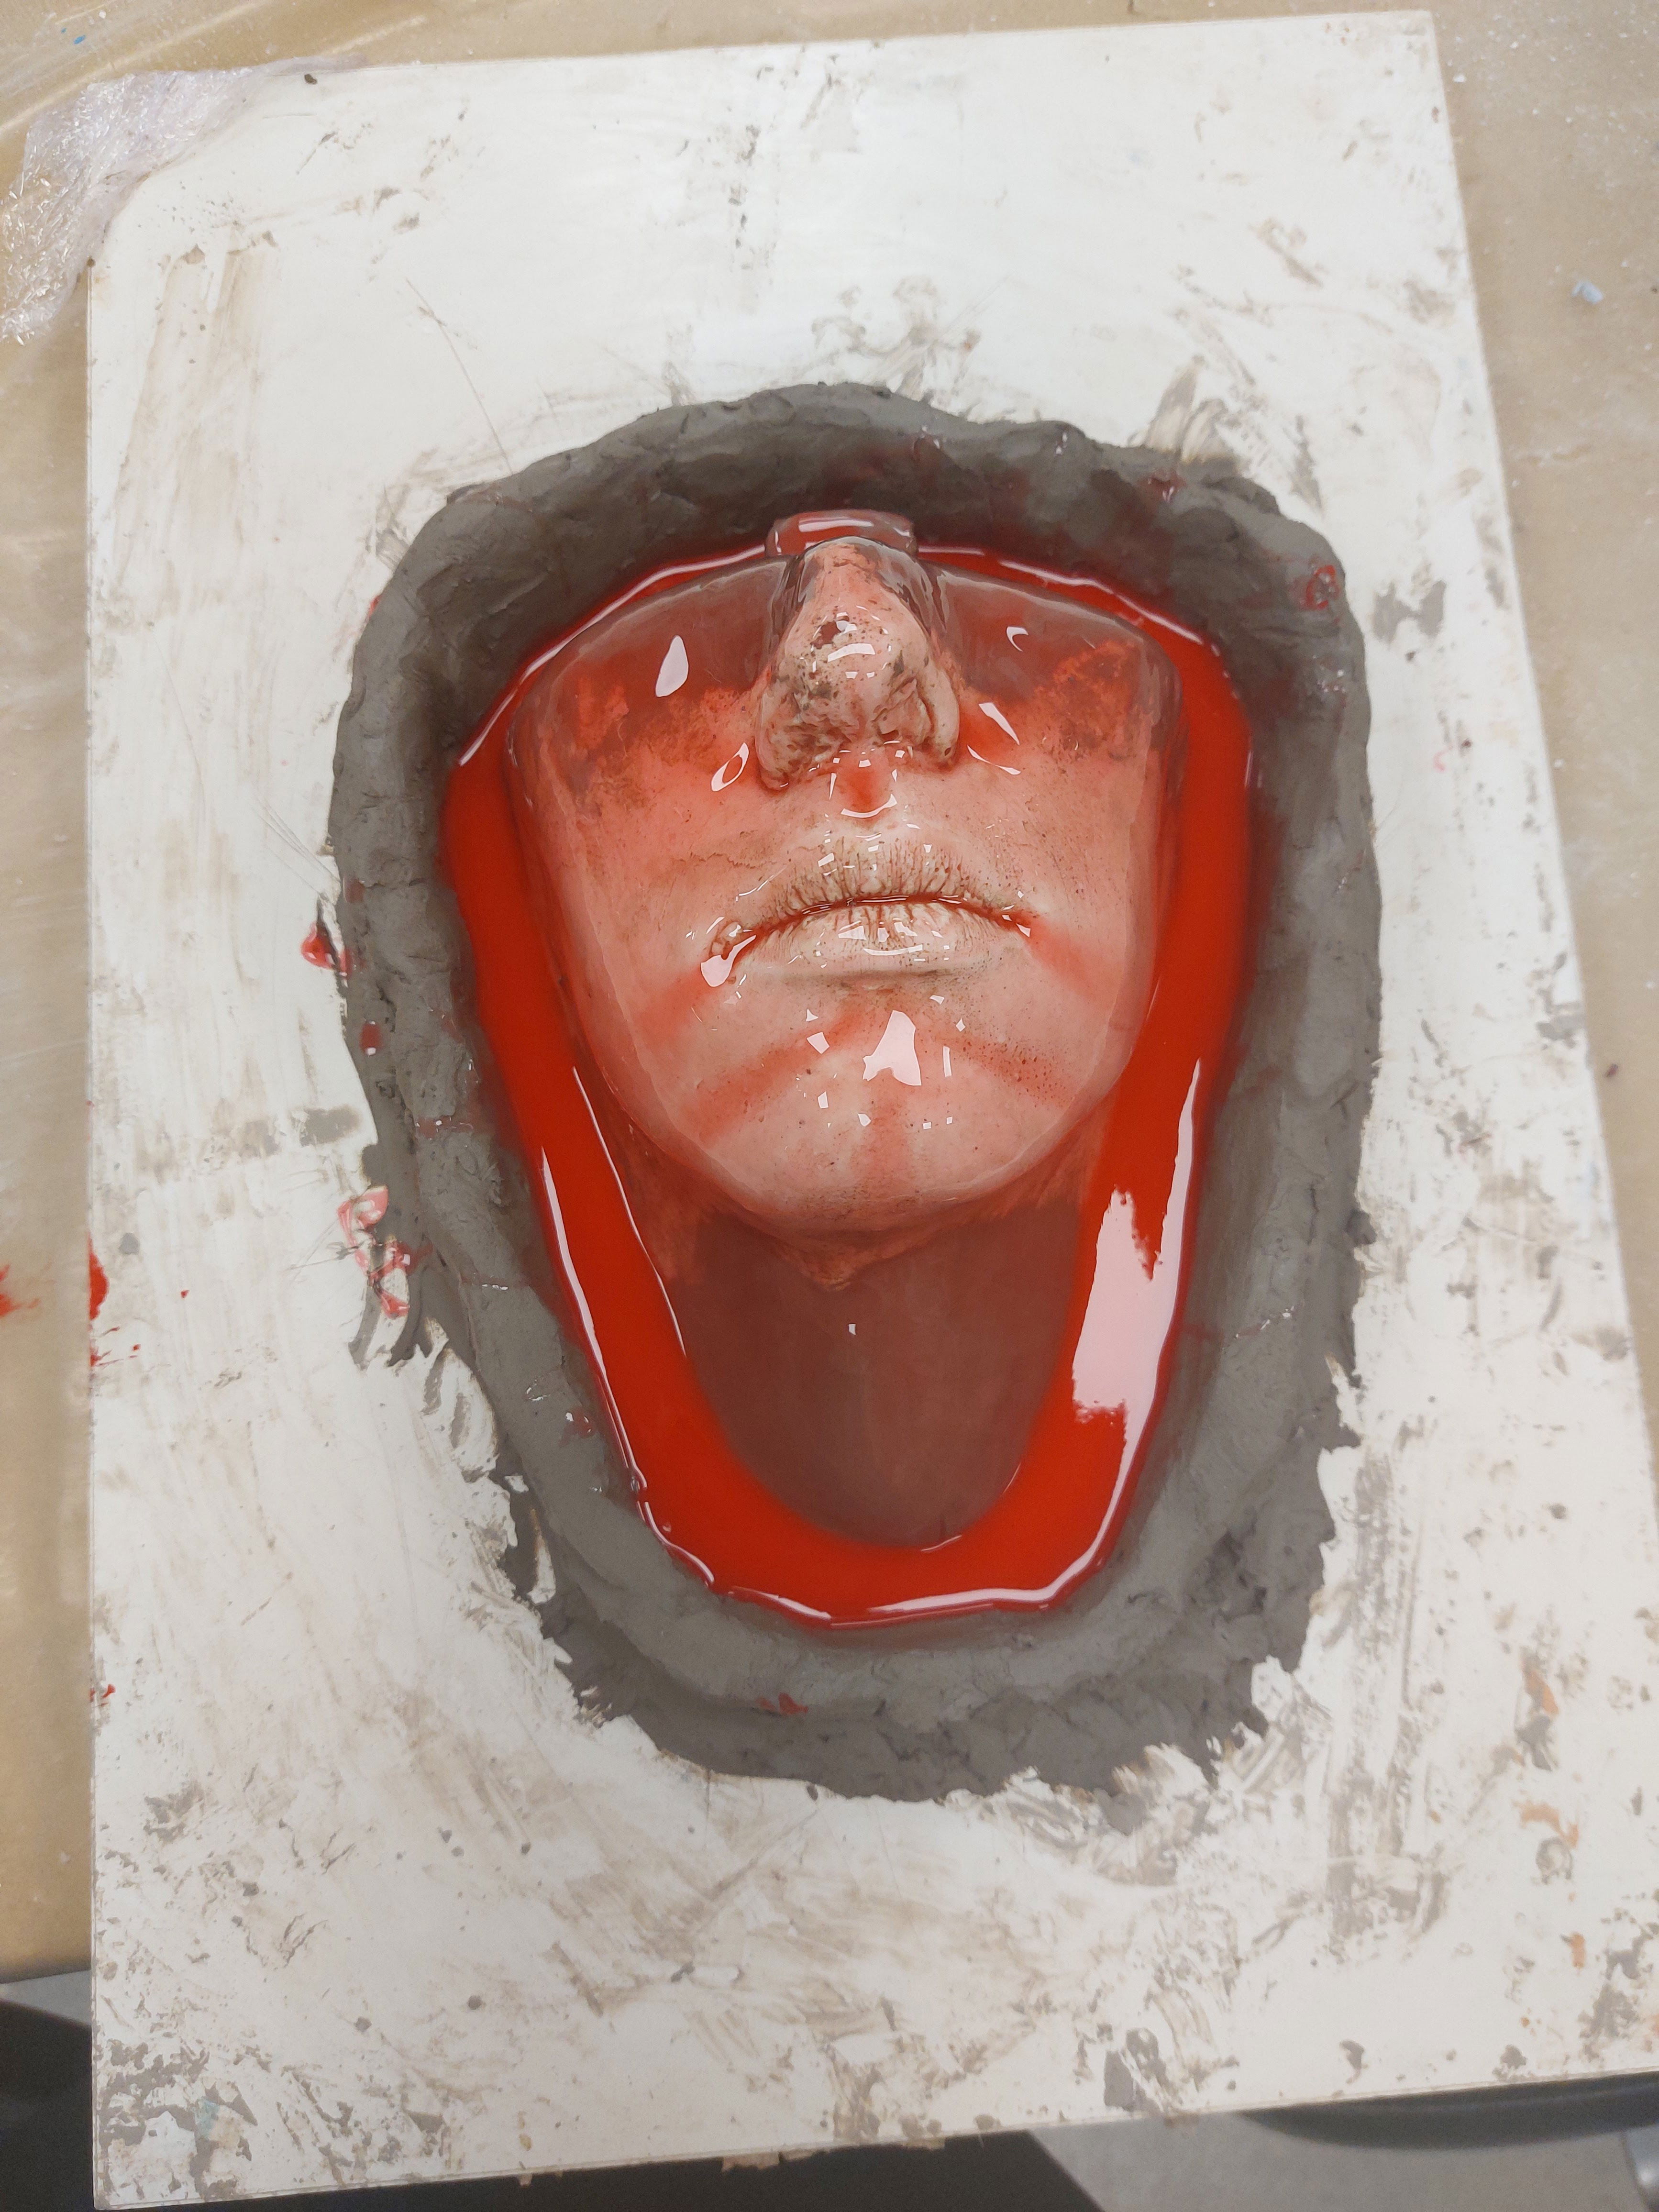
Figure 6: Silicone layers (Keites-Gorman, 2024)
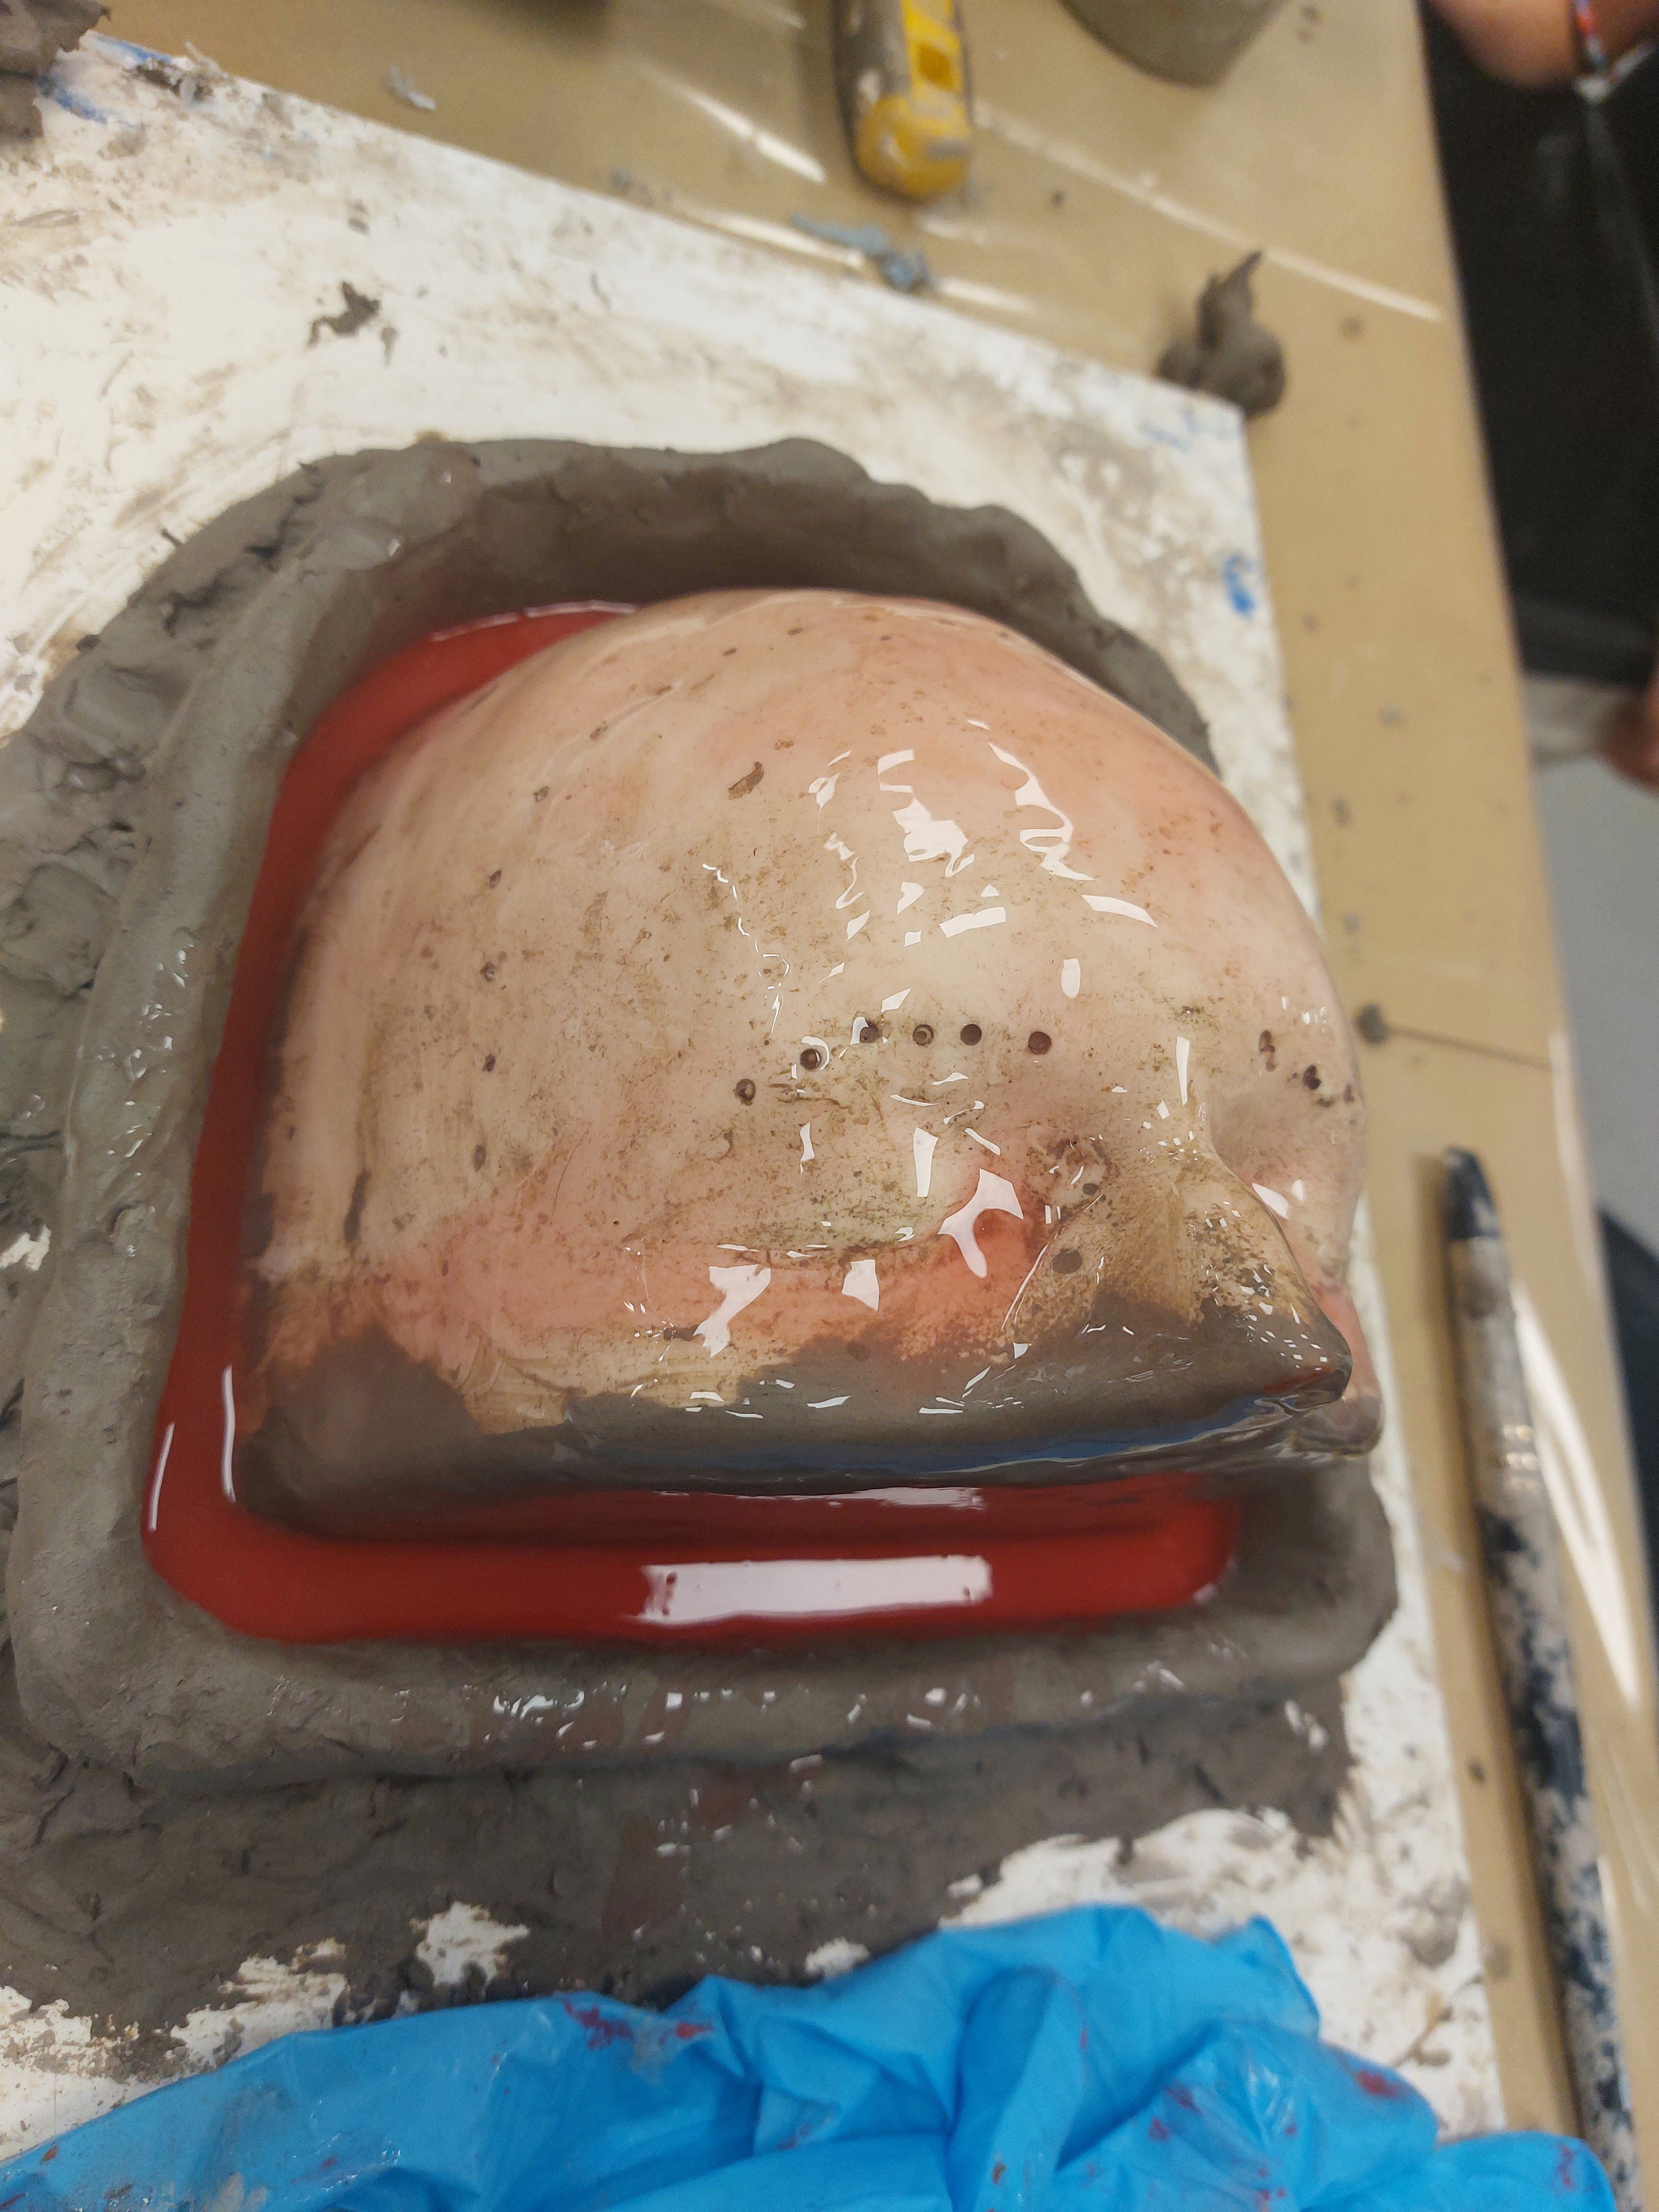
Figure 7: Silicone layers forehead (Keites-Gorman, 2024)
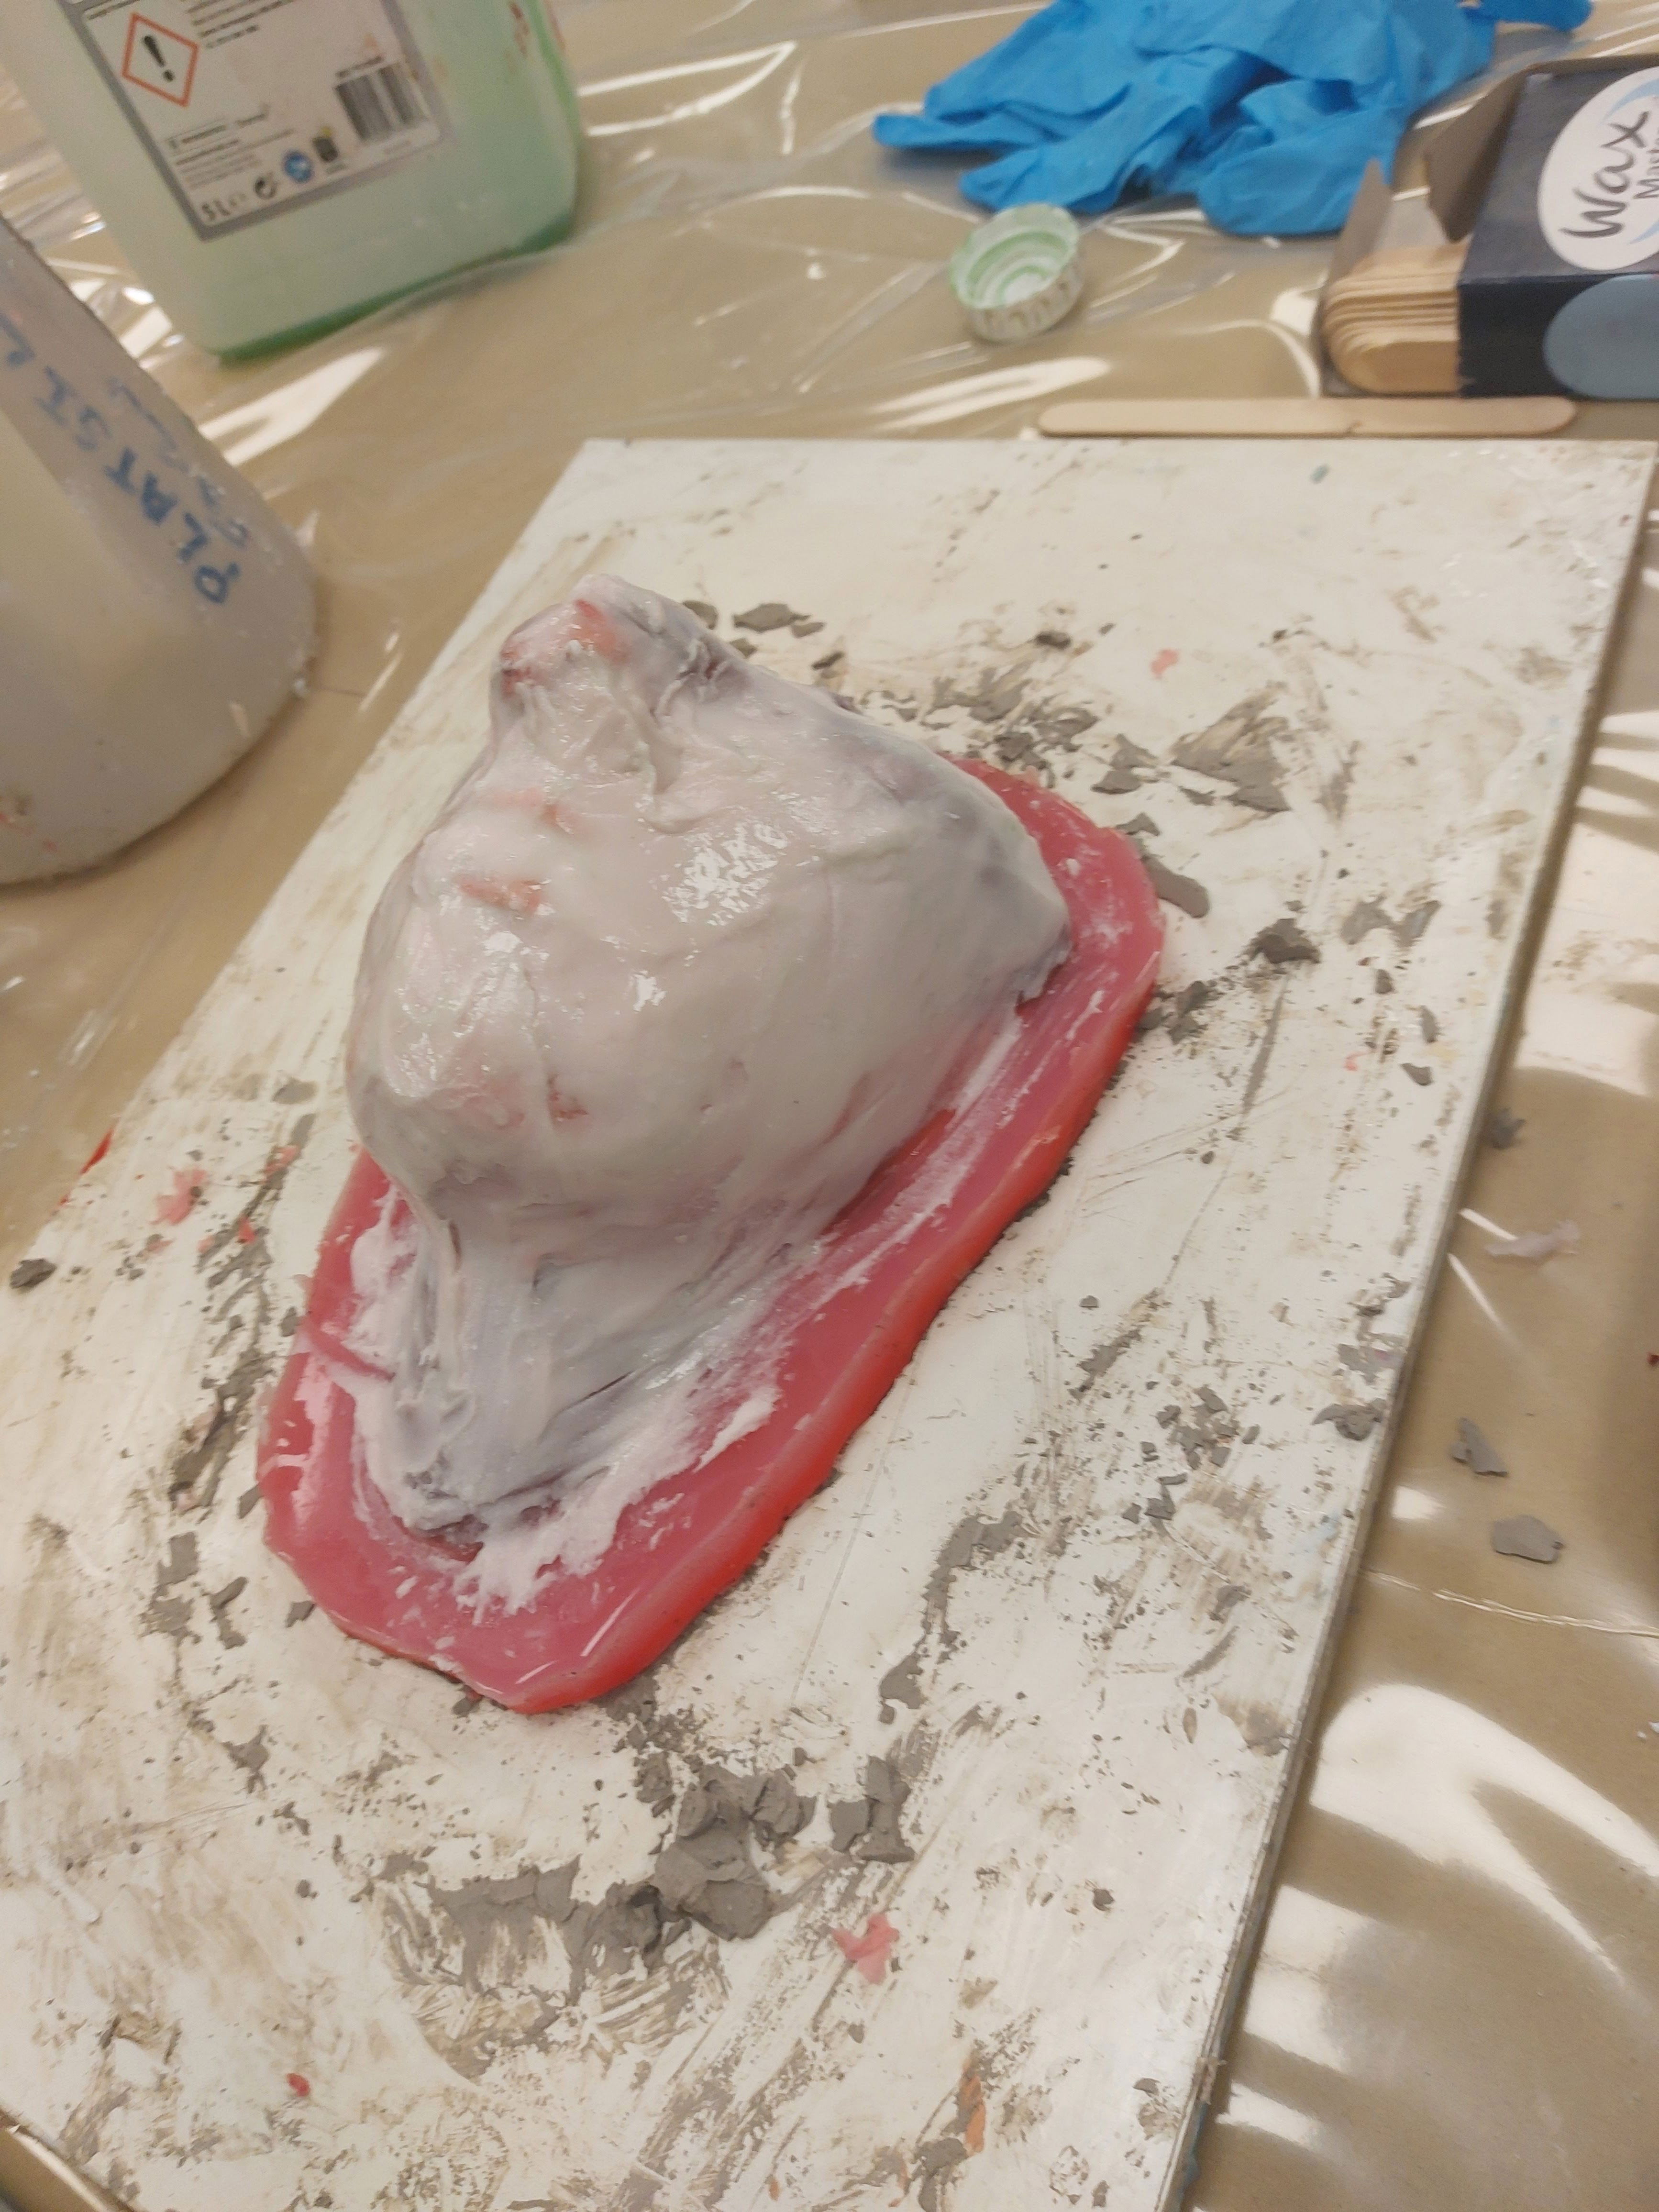
Figure 8: Poly fibre layers (Keites-Gorman, 2024)
Unfortunately, I don't have photos of each stage for all of them, which I don't know why I did that. I definitely need to get my camera out more often. But hopefully, you get a visualization of the steps I've done.
Now it's time to plaster the jacket. This just strengthens the silicone when we will pour polyurethane in as the silicone jacket is just not strong enough to hold itself. We only really need this jacket for this stage and it does not need to be perfect at all. It is a quite nice and easy step. All I did was add a wall of modrock around the positive core and then mix some thick plaster and spread it on, making sure it is spread evenly. And that's it!
You can see this step in the video below!
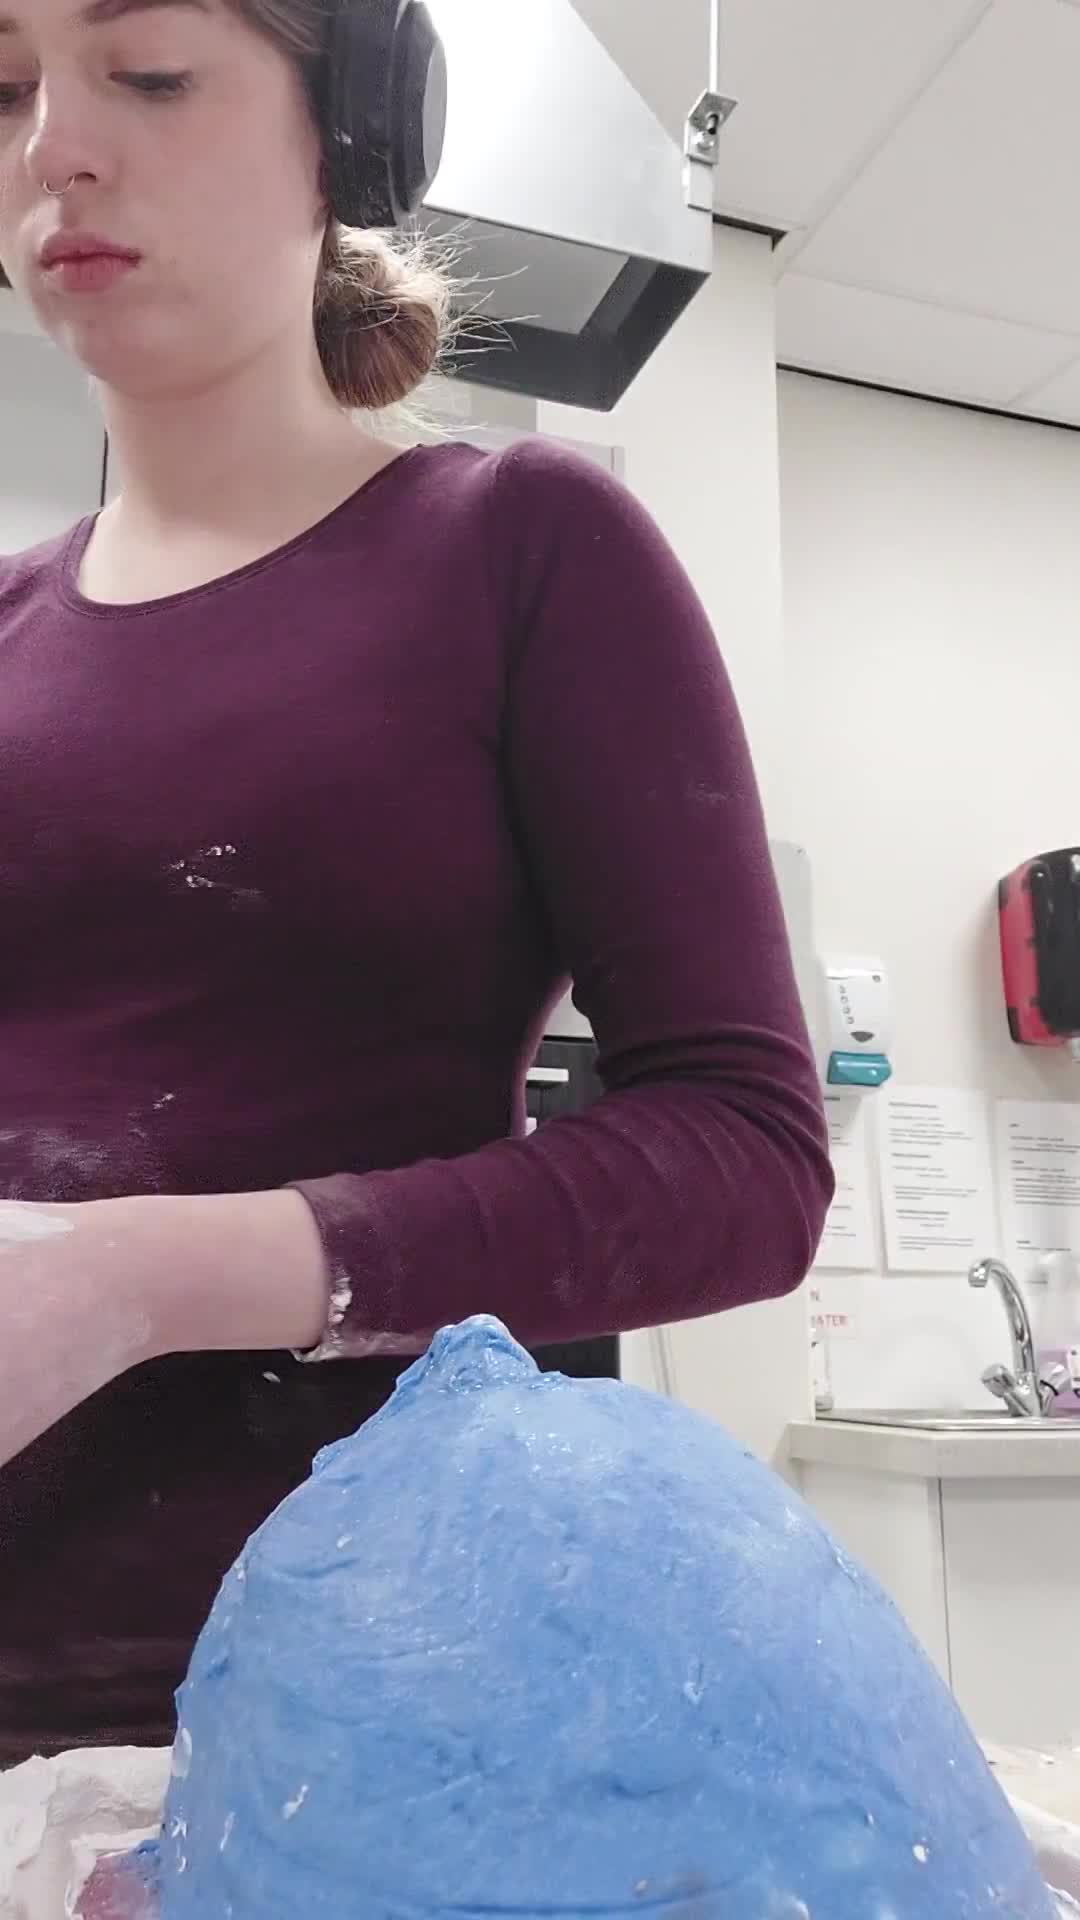
Figure 9: Plaster jacket (Keites-Gorman, 2024)
Polyurethane
So now we can remove the plaster cores and fill them up with polyurethane. The nose piece I did was just fully polyurethane with catalysis (isocyanate). The chin piece had a brush layer, a poly fibre layer, and a scrim layer before filling the rest with plaster. This helps with weight as polyurethane is heavy. However, plaster is a lot weaker, and I noticed a lot of chips as I was using it. It is a great way to cut on the budget. For the forehead piece, I did the same process as well. In an industrial setting, if cost is not a concern, both parts of the mold would be made using only PU resin. You just need to create a barrier using foam board, then simply mix enough PU resin and fill it to the top. (Mold Making - Gorton Studio, 2023)That would have been great and definitely saved some armache.
Here's a video of me doing forehead piece.
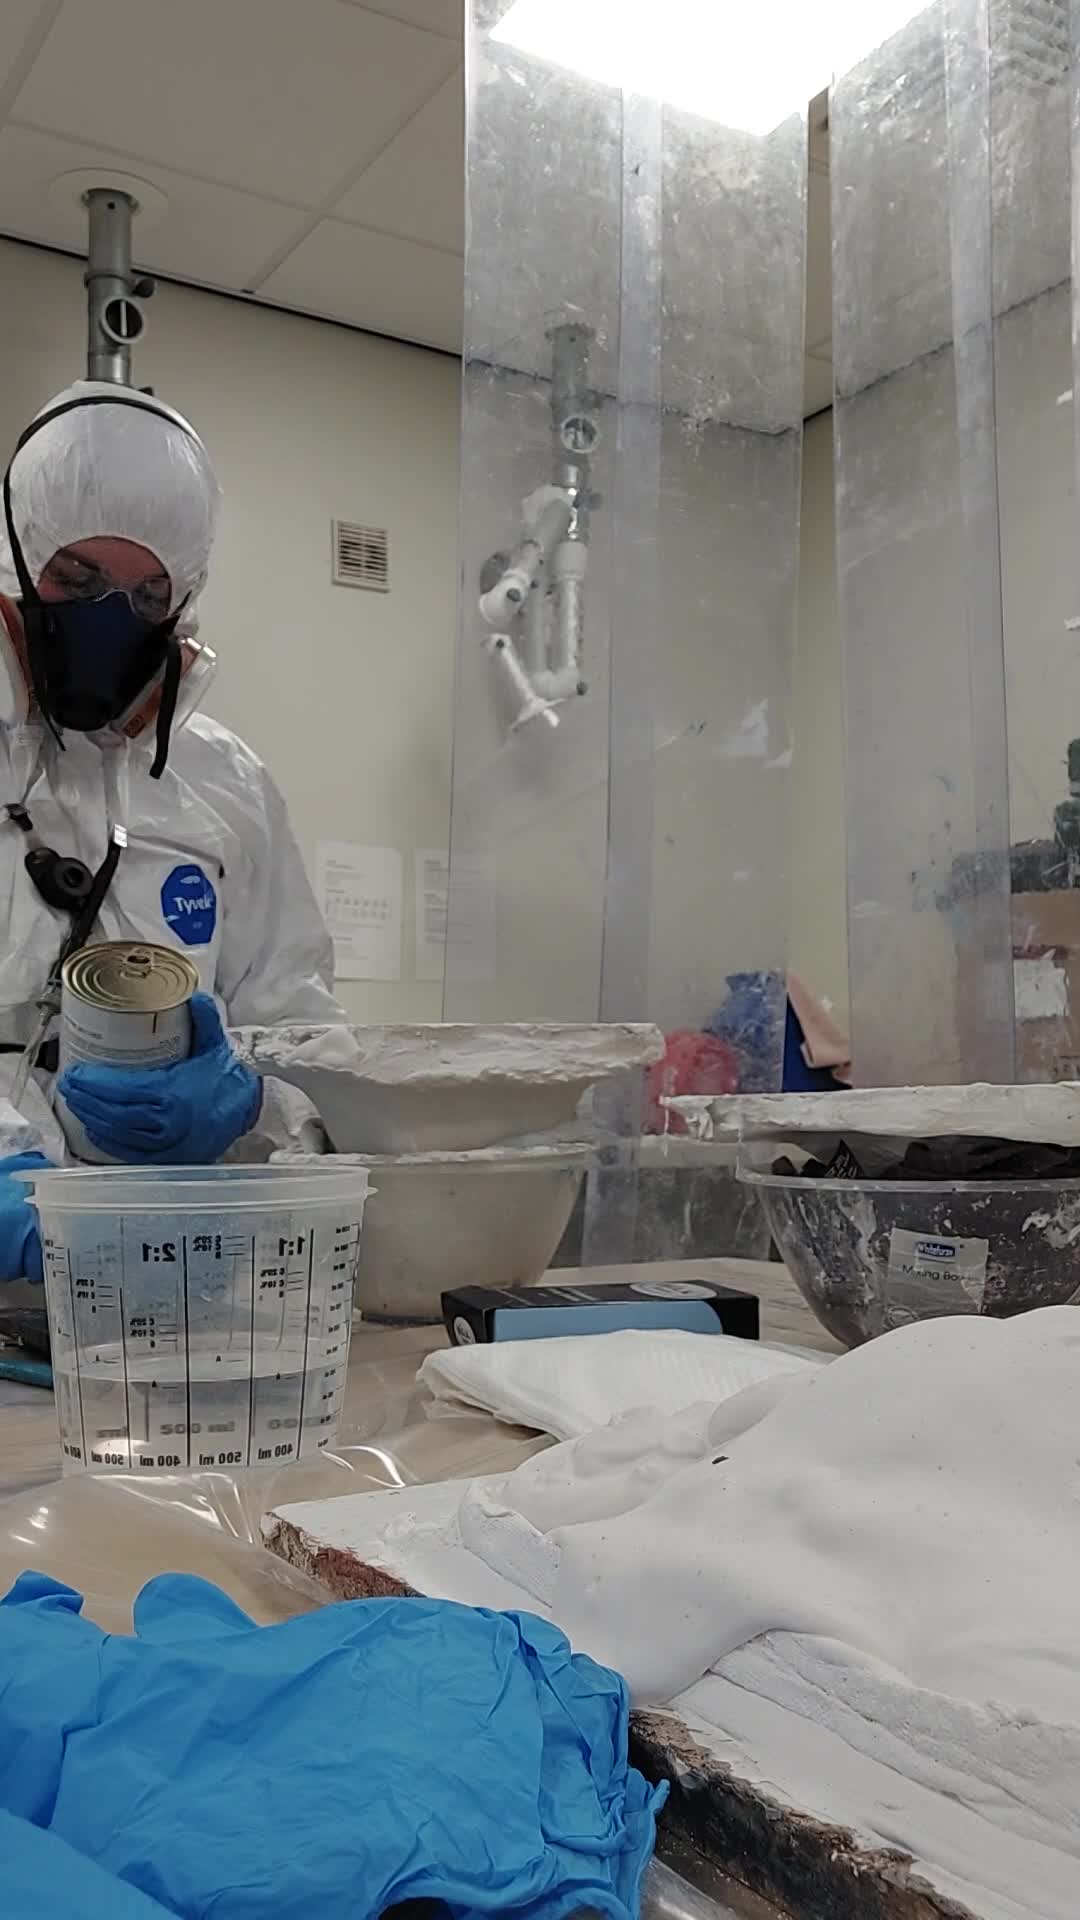
Figure 10: Polyurethane (Keites-Gorman, 2024)
Here are some more photos of this process.
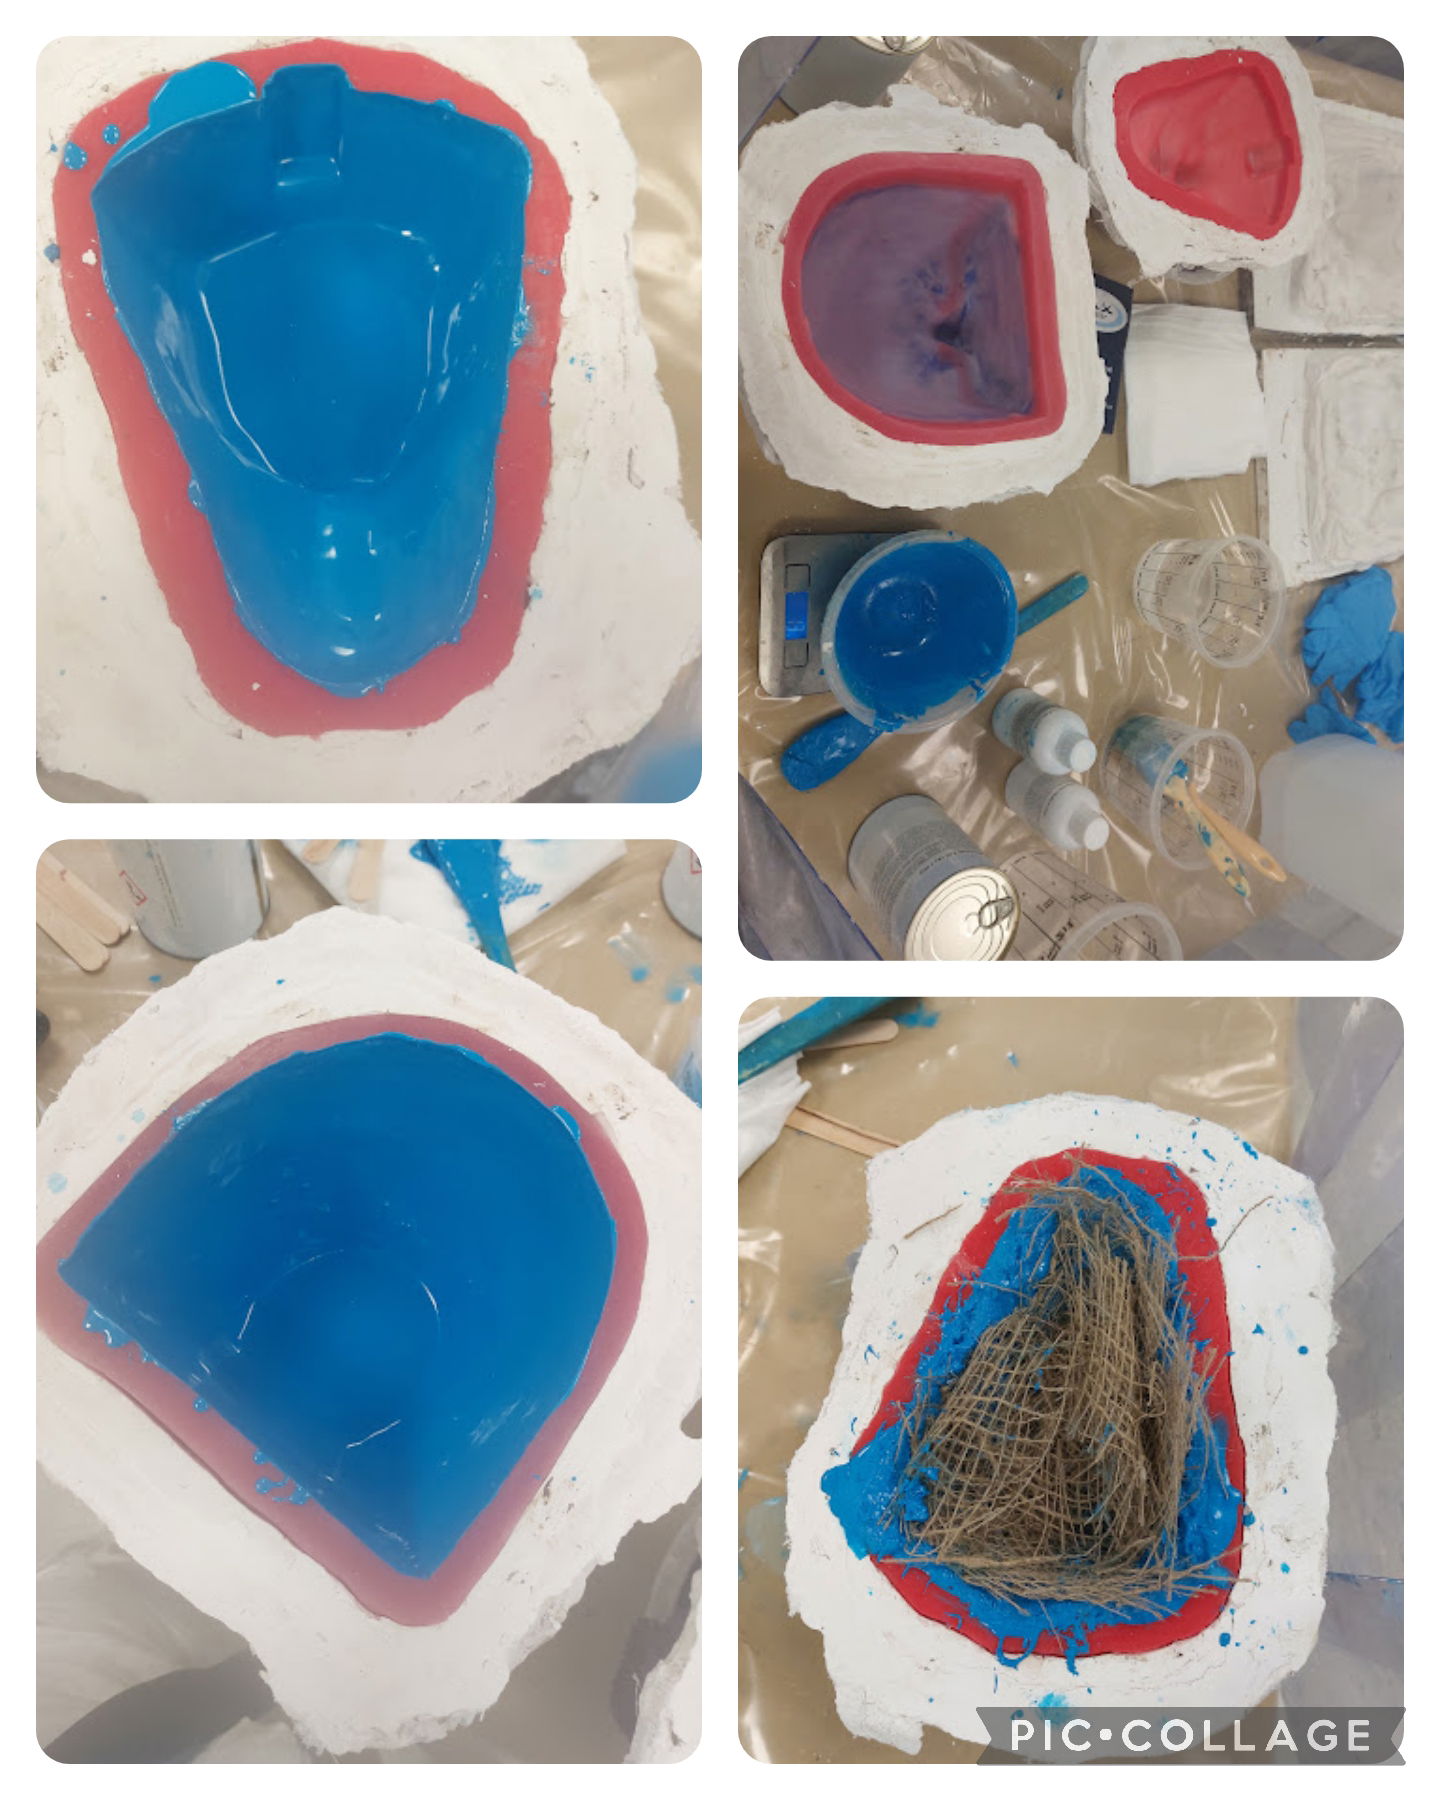
Figure 11: Brush layer chin (Keites-Gorman, 2024)
Figure 12: Workstation (Keites-Gorman, 2024)
Figure 13: Brush layer forehead (Keites-Gorman, 2024)
Figure 14: Scrim layer (Keites-Gorman, 2024)
This is the result of how they came out !
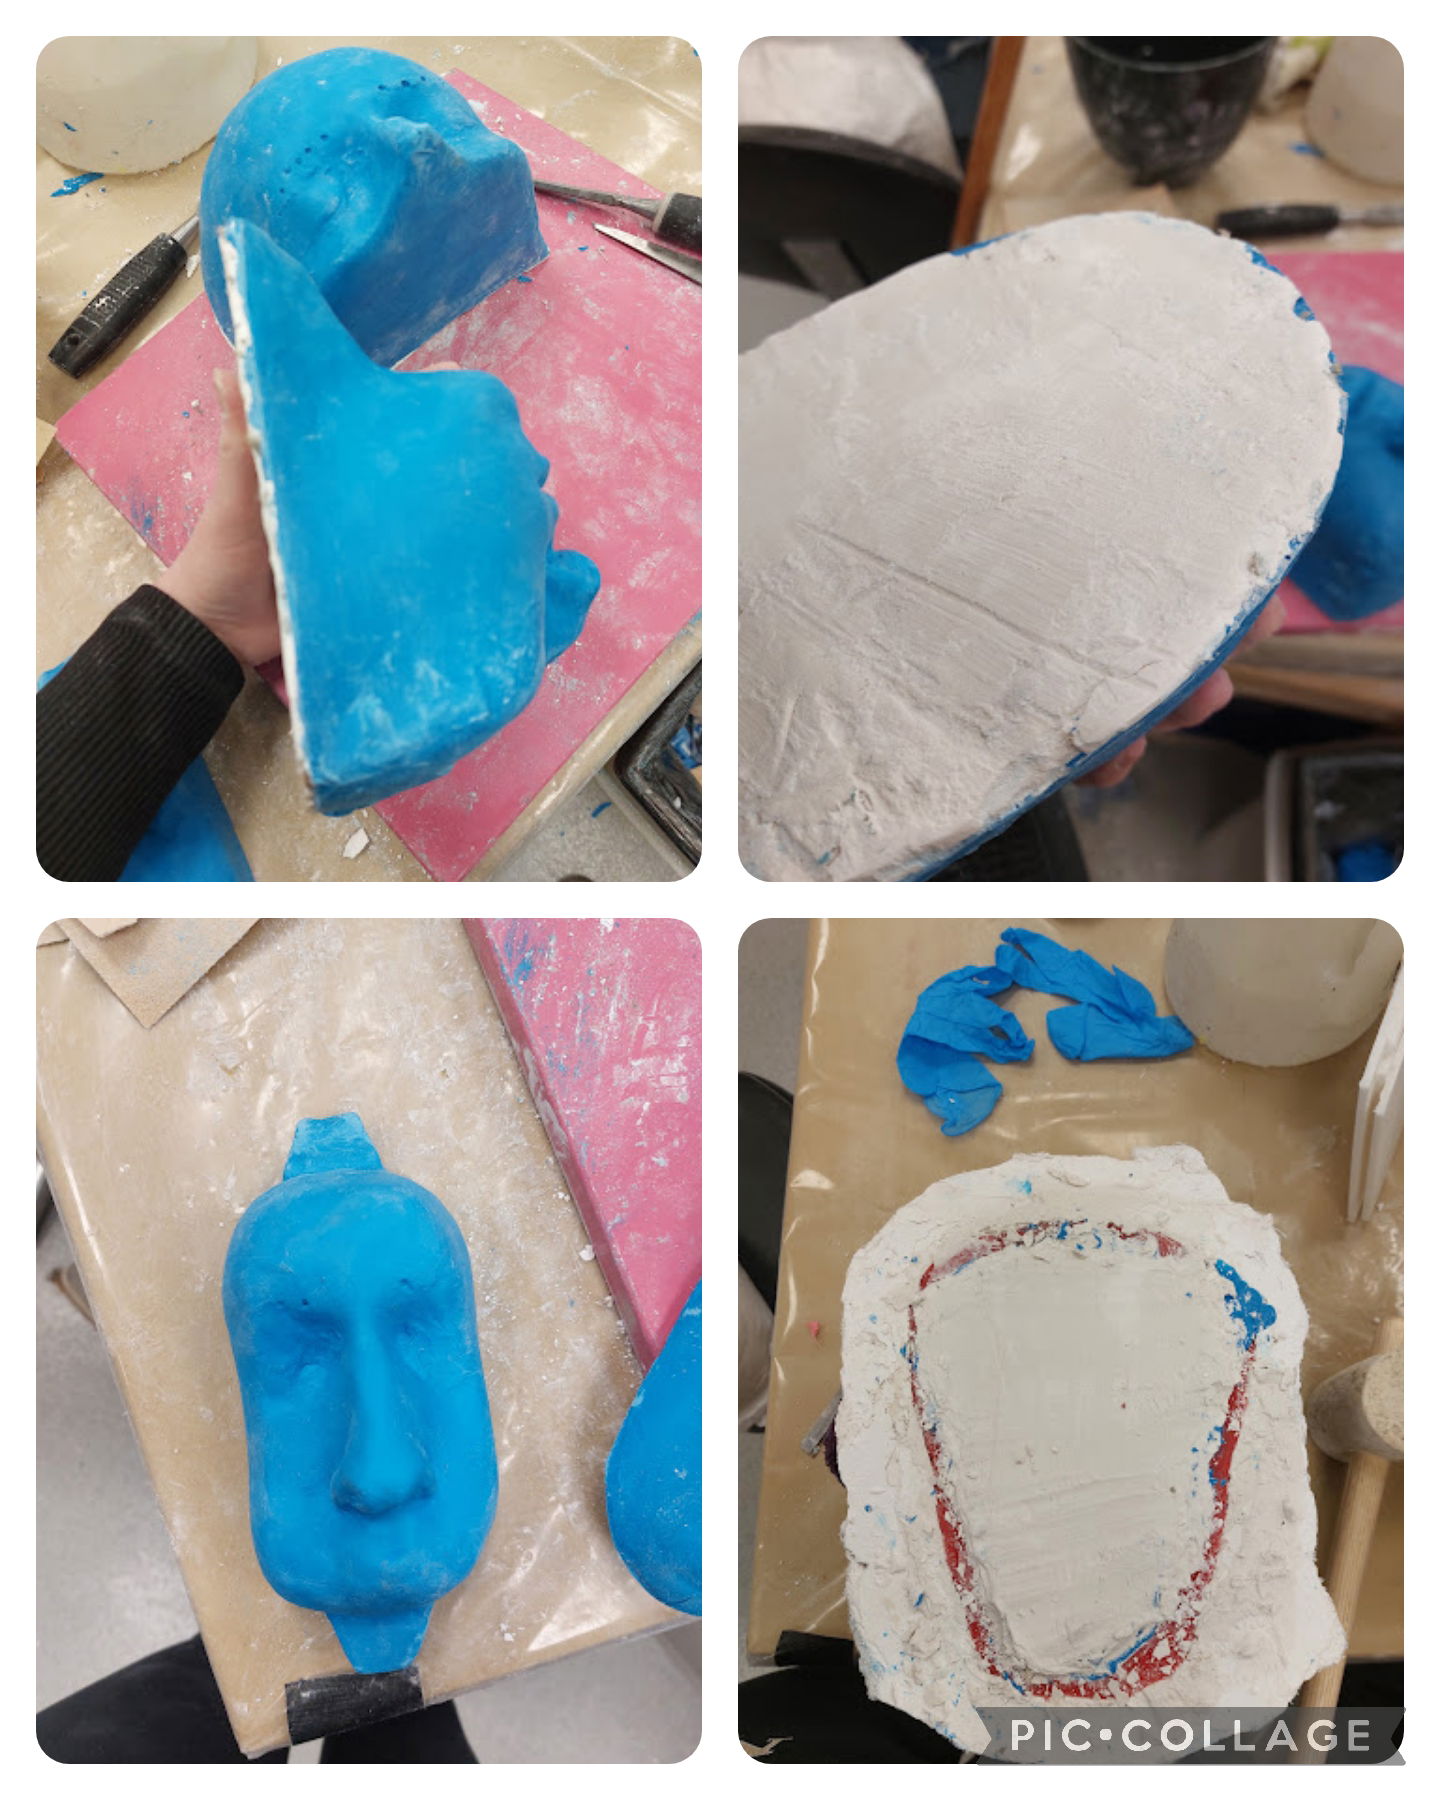
Figure 15: Positive chin (Keites-Gorman, 2024)
Figure 16: Plater back (Keites-Gorman, 2024)
Figure 17: Positive nose core (Keites-Gorman, 2024)
Figure 18: Plaster jacket (Keites-Gorman, 2024)
Separating the sculpt and transferring
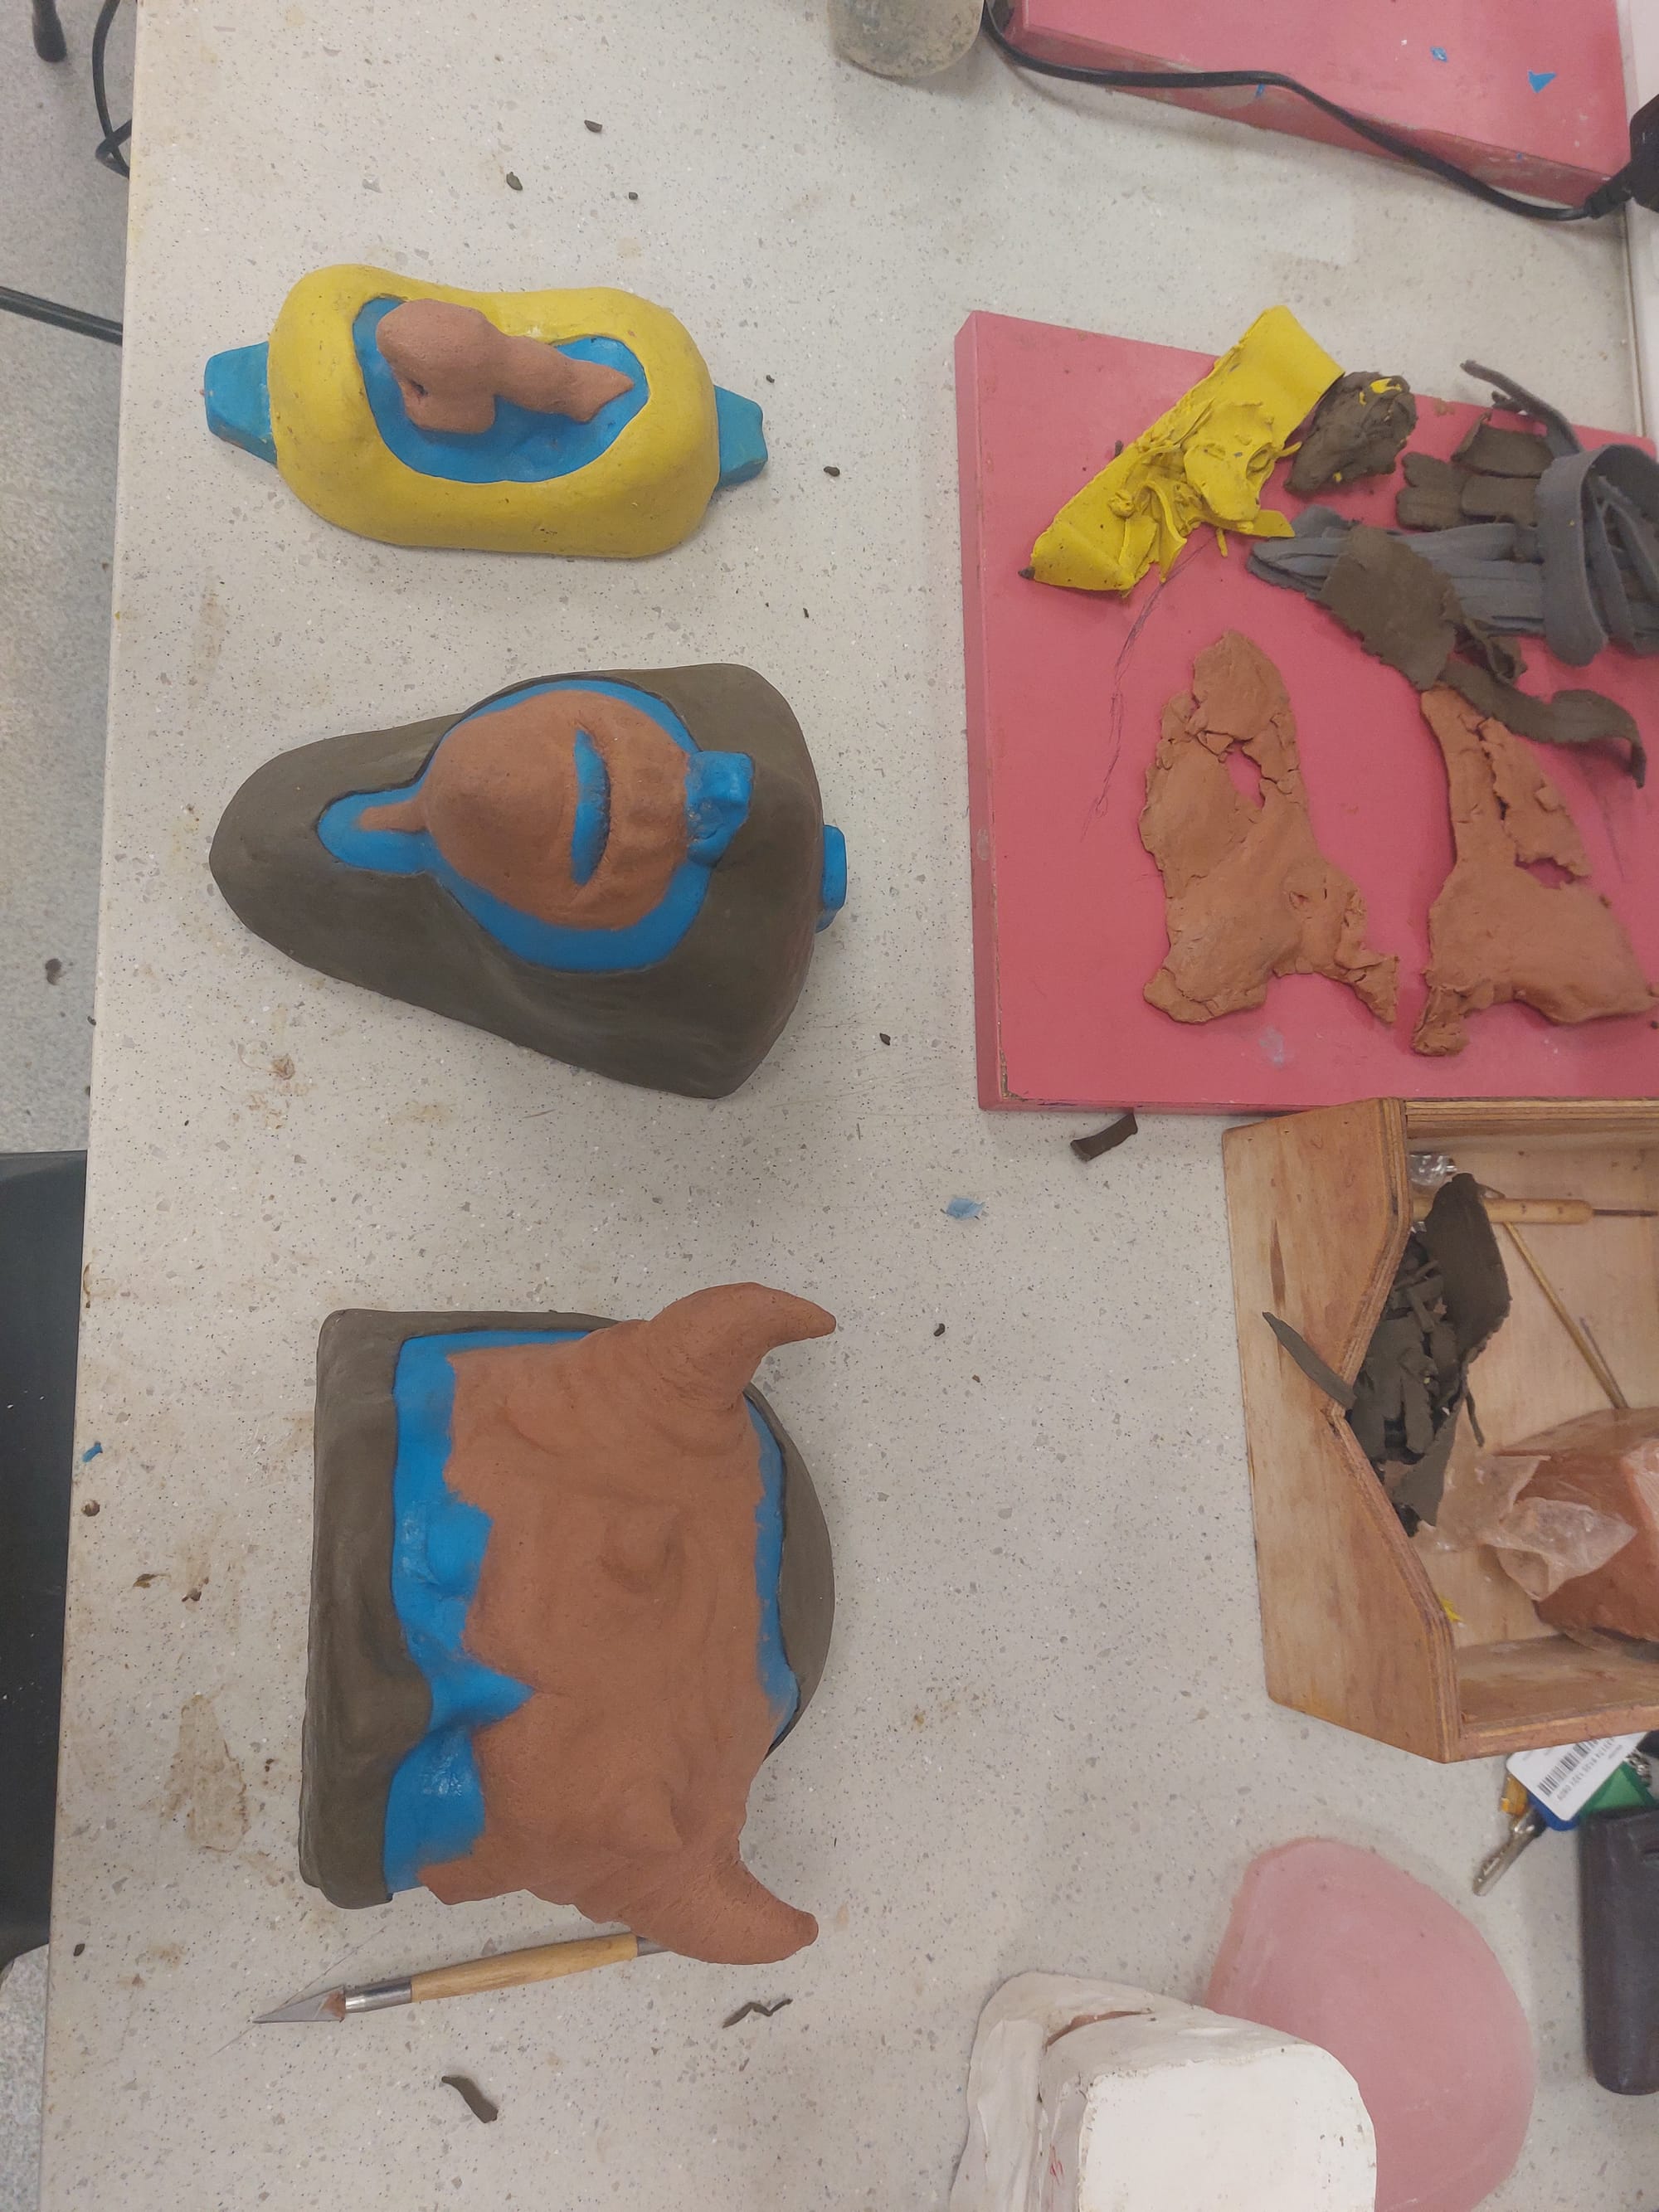
So now I could transfer my scuplt onto the cores. I did not need the cheeks at this time as they will be flat molds. There is more information on the Running Pieces blog about moulding the cheeks.
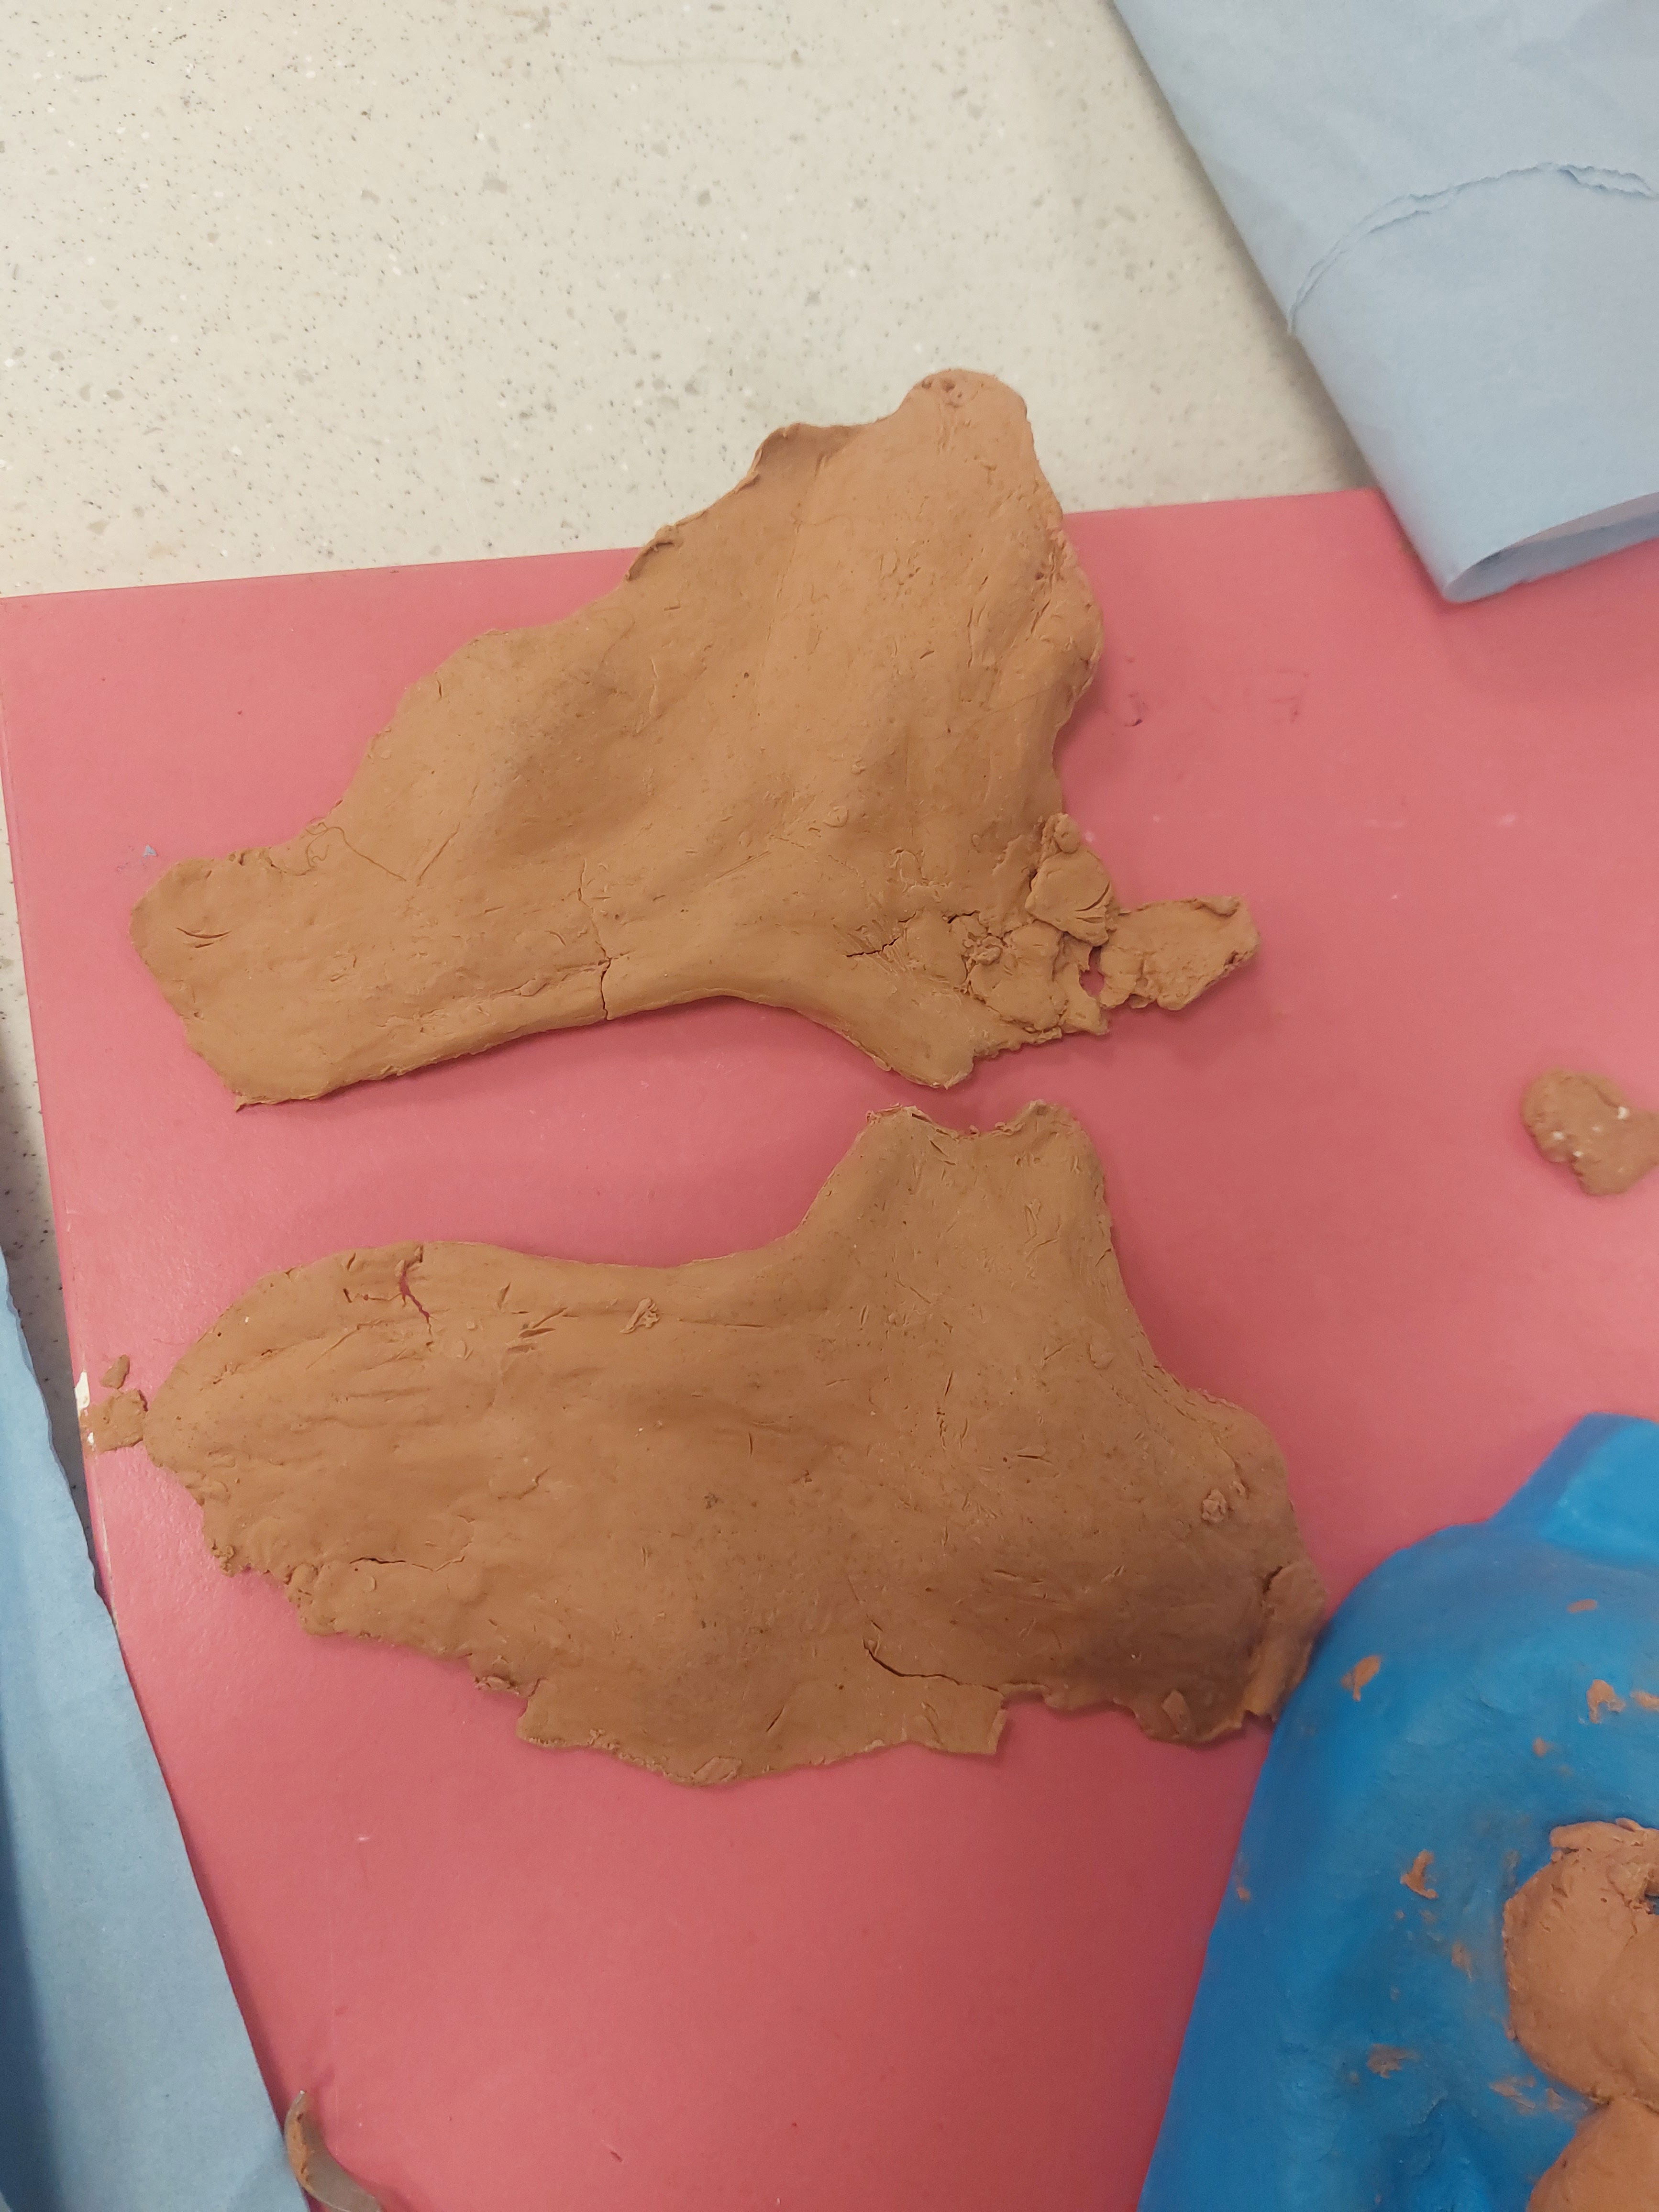
Figure 19: Cheek pieces (Keites-Gorman, 2024)
I finally reached a point where I was happy with the shape of the sides, although it took longer than expected. It was time to transfer them onto my positive polyurethane cores. There was a specific order to assembling the puzzle, with certain pieces needing to go under others to fit together properly, making the process more complex. I began with the chin/mouth, fortunately, it didn't crumble as much and didn't require as much reshaping. Ensuring that I didn't alter the shape of the edges was challenging, as the next piece might not fit correctly on top. I focused on refining and cleaning up the sculpt, adding details and making the edges as thin as possible. Next, I worked on the nose, which crumbled and split into two pieces. The lines cut out of the nose were essential for connecting the cheeks and forehead to the top, which became more difficult due to the crumbling. It took several attempts to rebuild the clay and restore it to its original state. It was hard to sculpt it without having a reference to the whole face when it was all together.
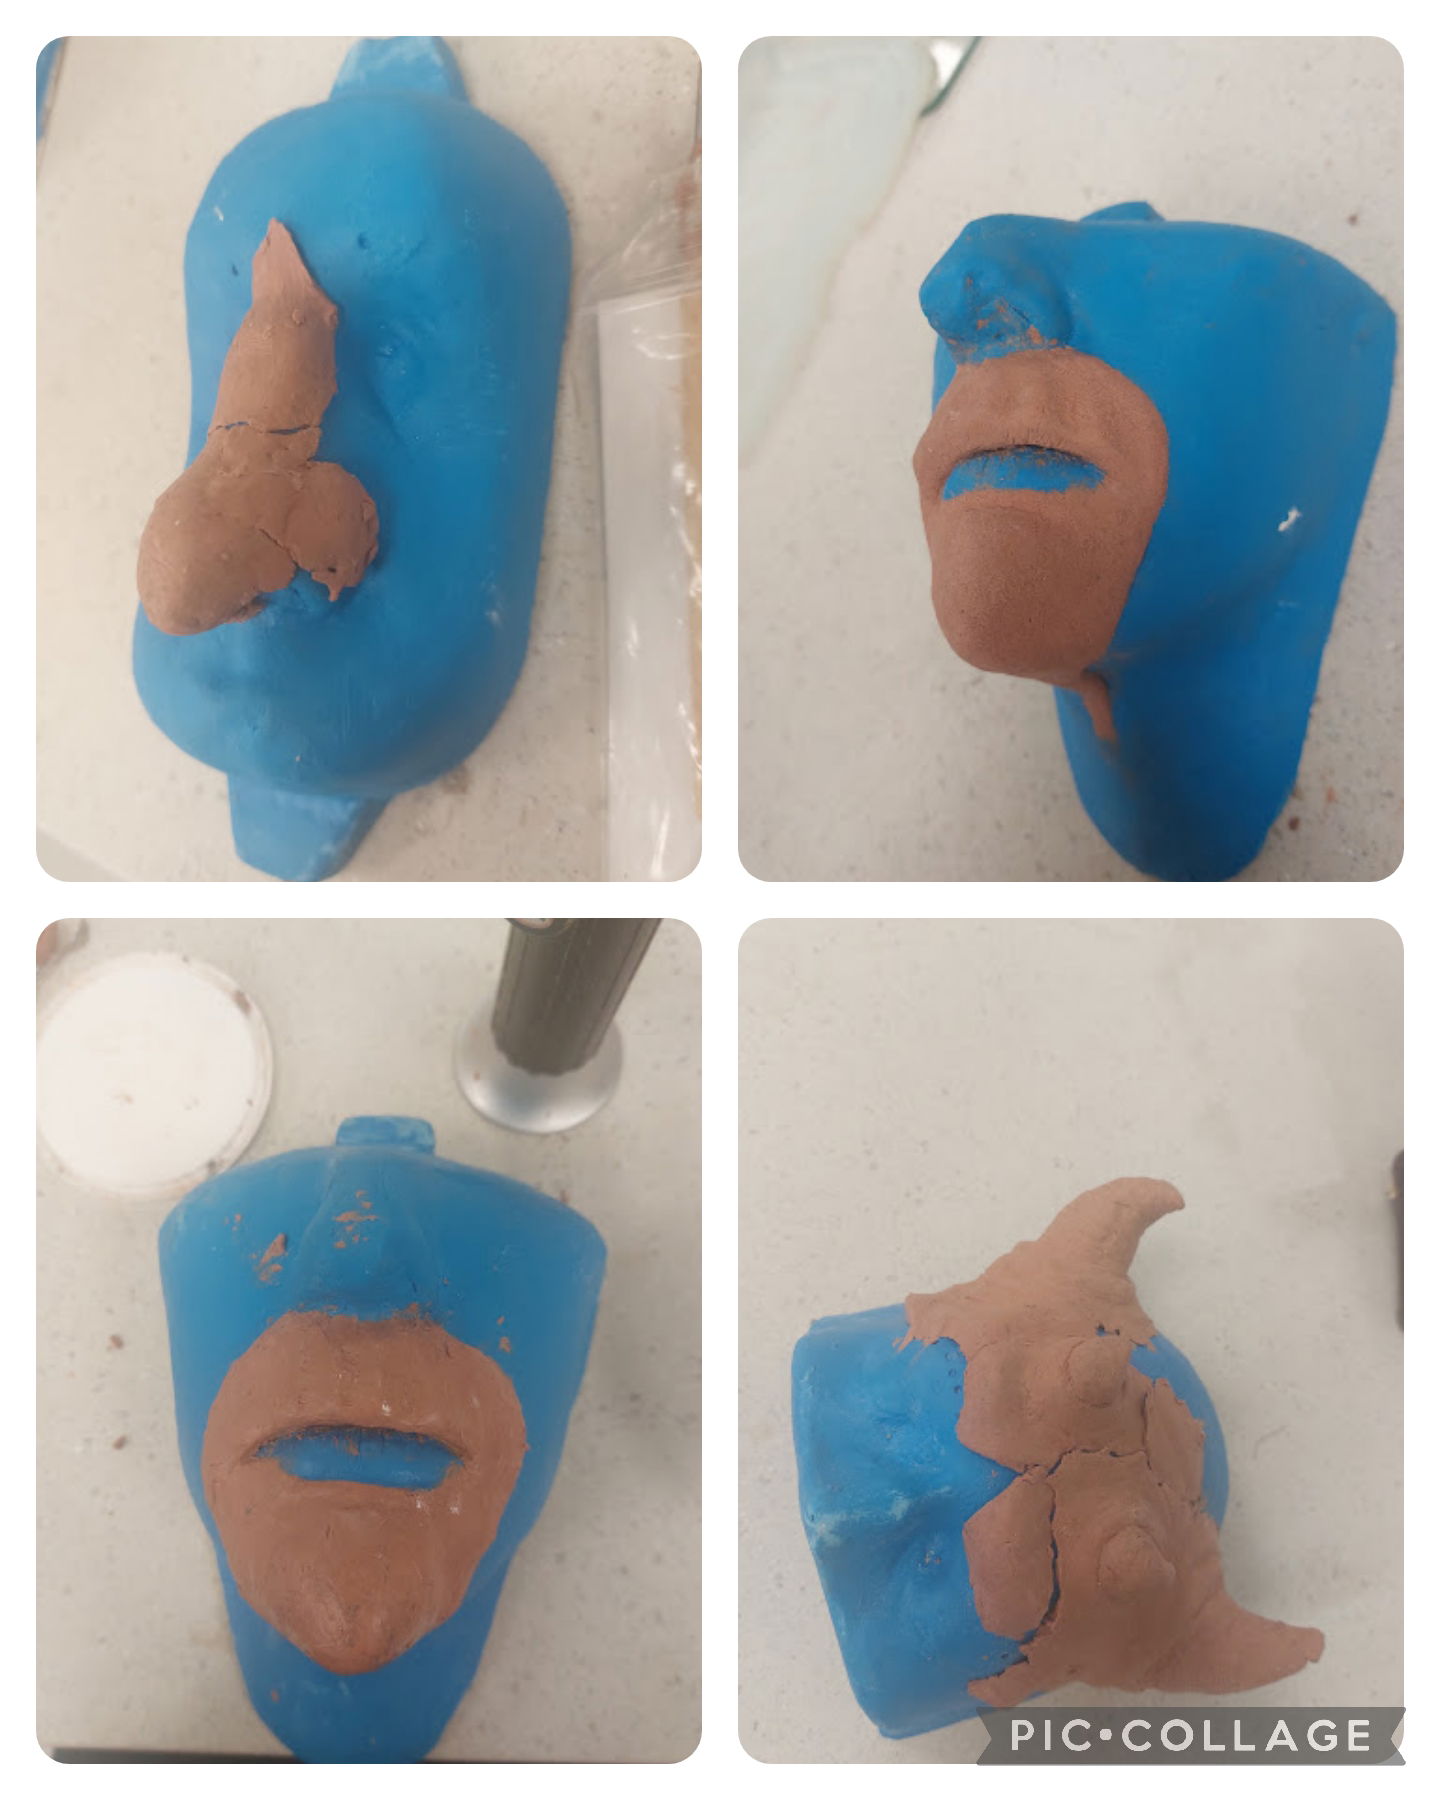
Figure 20: Nose transfer (Keites-Gorman,2024)
Figure 21: Chin transfer (Keites-Gorman,2024)
Figure 22: Chin transfer front (Keites-Gorman,2024)
Figure 23: Forehead transfer (Keites-Gorman,2024)
Moving on to the forehead, it also crumbled quite a bit. There were still good edges in contact, so it wasn't as difficult, but it took several attempts to rebuild it. (fig 23) I also had to hollow out the large horns on each side, keeping them separate for moulding later. (fig 28).
I carefully arranged my checks on a board to let them flatten out before setting them aside. My top priority was to create the negative polyurethane, while I planned to work on sculpting the cheeks at home. Despite falling behind due to a family emergency over Easter, I was determined to start making the negatives as time was running out to produce the pieces. At this juncture, I had made zero progress, and my exam was scheduled for the end of May. I meticulously rolled out plaster in 3mm strips, ensuring they were all even and covering most of the cores, leaving an inch around the sculpt and the keys. This process was meticulously carried out for all three areas: forehead, nose, and chin.
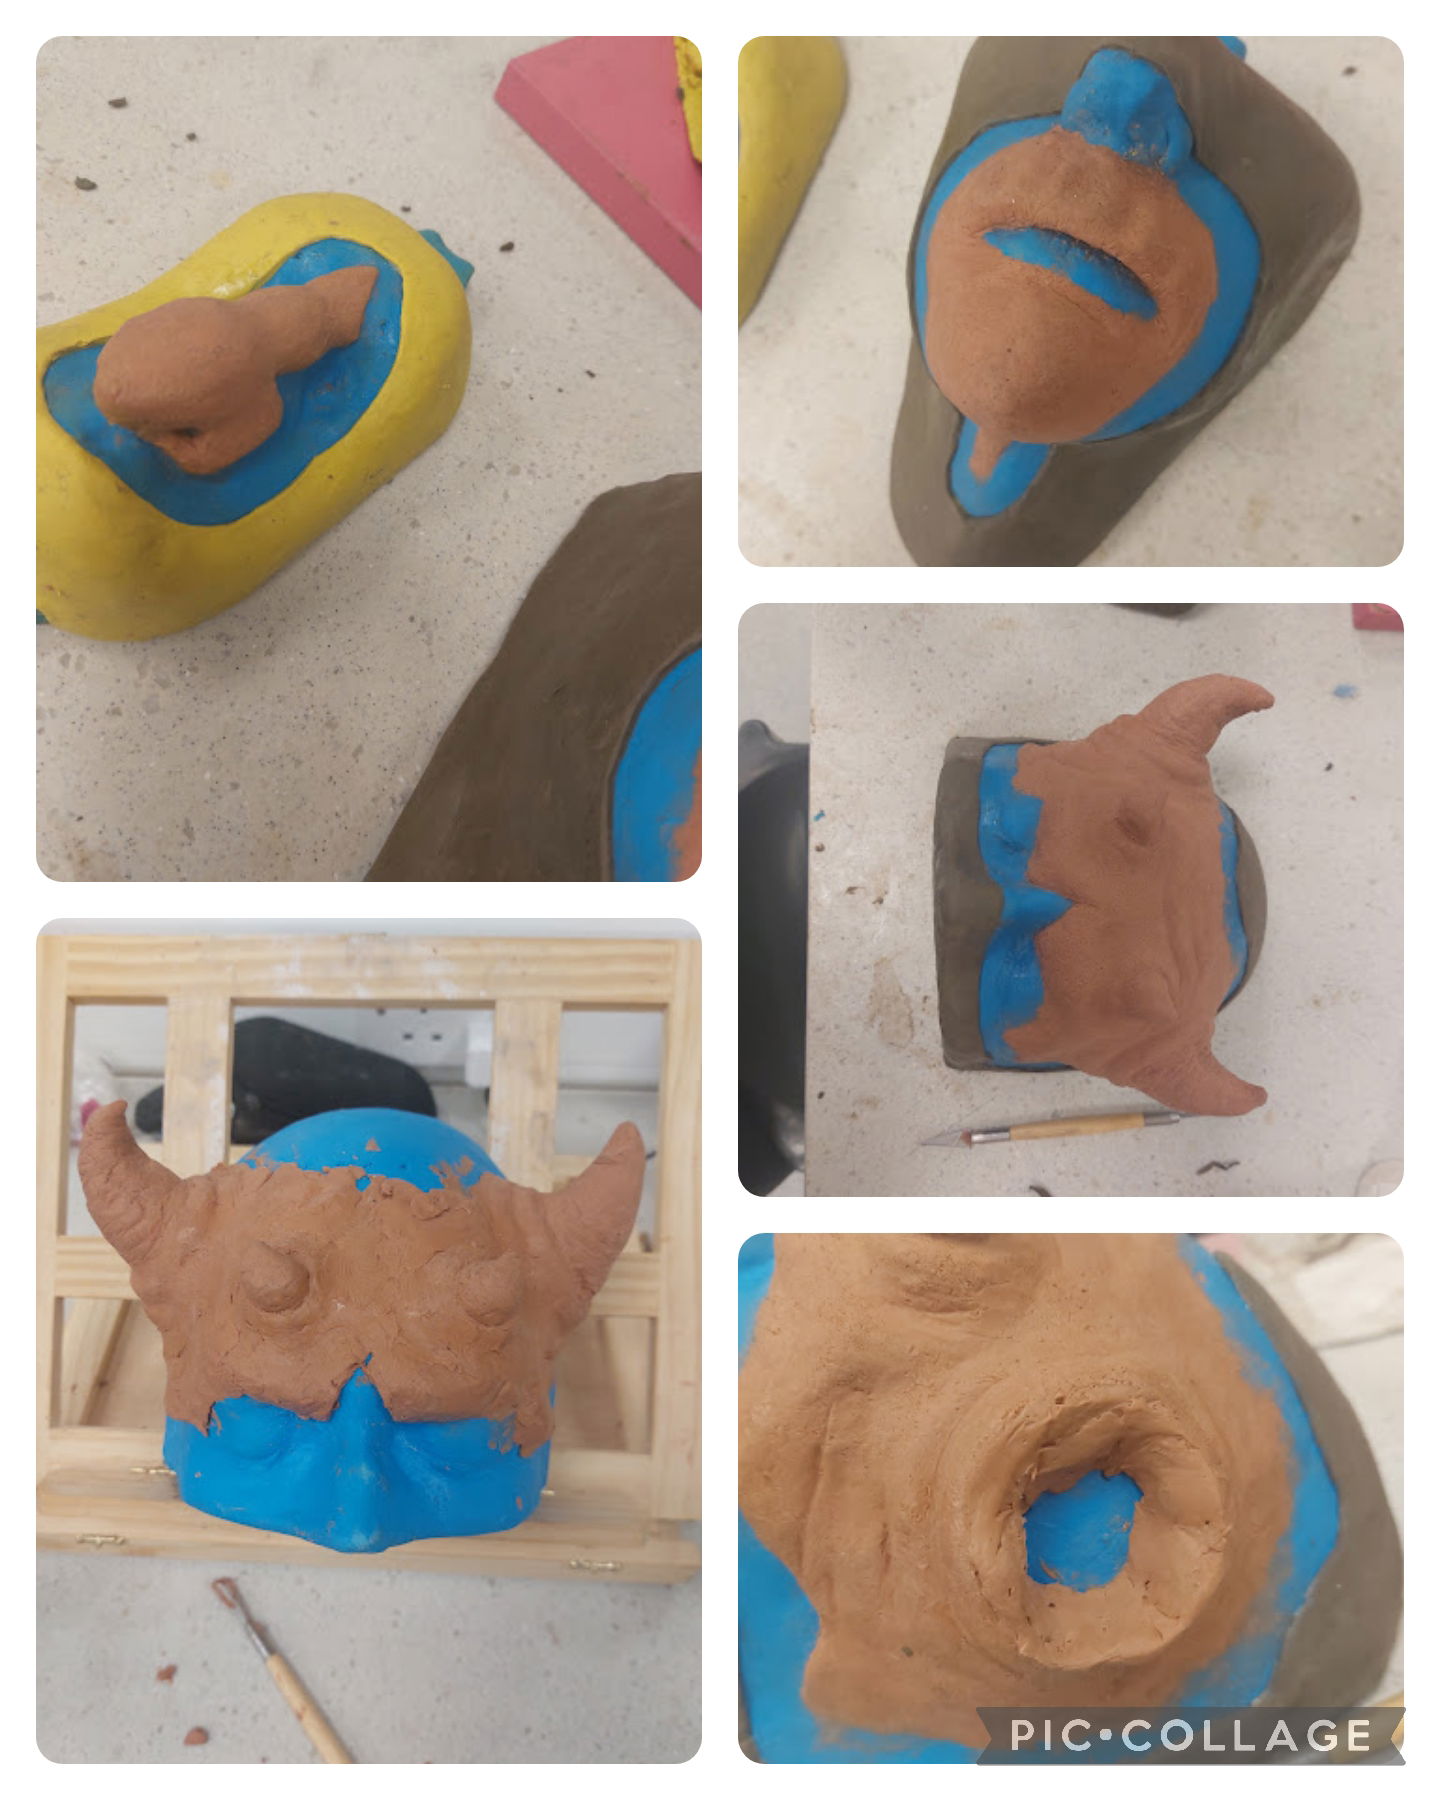
Figure 24: Nose positive complete (Keites-Gorman, 2024)
Figure 25: Chin positive complete (Keites-Gorman, 2024)
Figure 26: Forehead positive complete (Keites-Gorman, 2024)
Figure 27: forehead sculpt (Keites-Gorman, 2024)
Figure 28: hollowed horns (Keites-Gorman, 2024)
Why do we do this?
Now, it is a good question. When learning to conform moulds, it was difficult to picture how to create the negatives. This clay helps push the silicone to the right places, creating a gap around the sculpt. This means that the gap we created will have no silicone and will just be cap plastic, making the pieces bendable. I think I did a pretty good job considering the time restraints, but I wish I had neatened the edges more. I did smooth it well. I definitely would do a better job next time, now that I understand the purpose and importance of this step.
I also had to fill the horns so there were no undercuts, which is never good in running pieces. Lastly, I put a buff clay border around each positive core. It felt like I was never going to get to make my negatives, but these steps are really important and would defeat the point of making the negatives if I skipped these steps. Unfortunately, as much as it can be frustrating, it is worthwhile to perfect these stages. I definitely did not and made mistakes in the exam stage. It was interesting how that impacted the next stage and a really important learning curve I experienced in this.
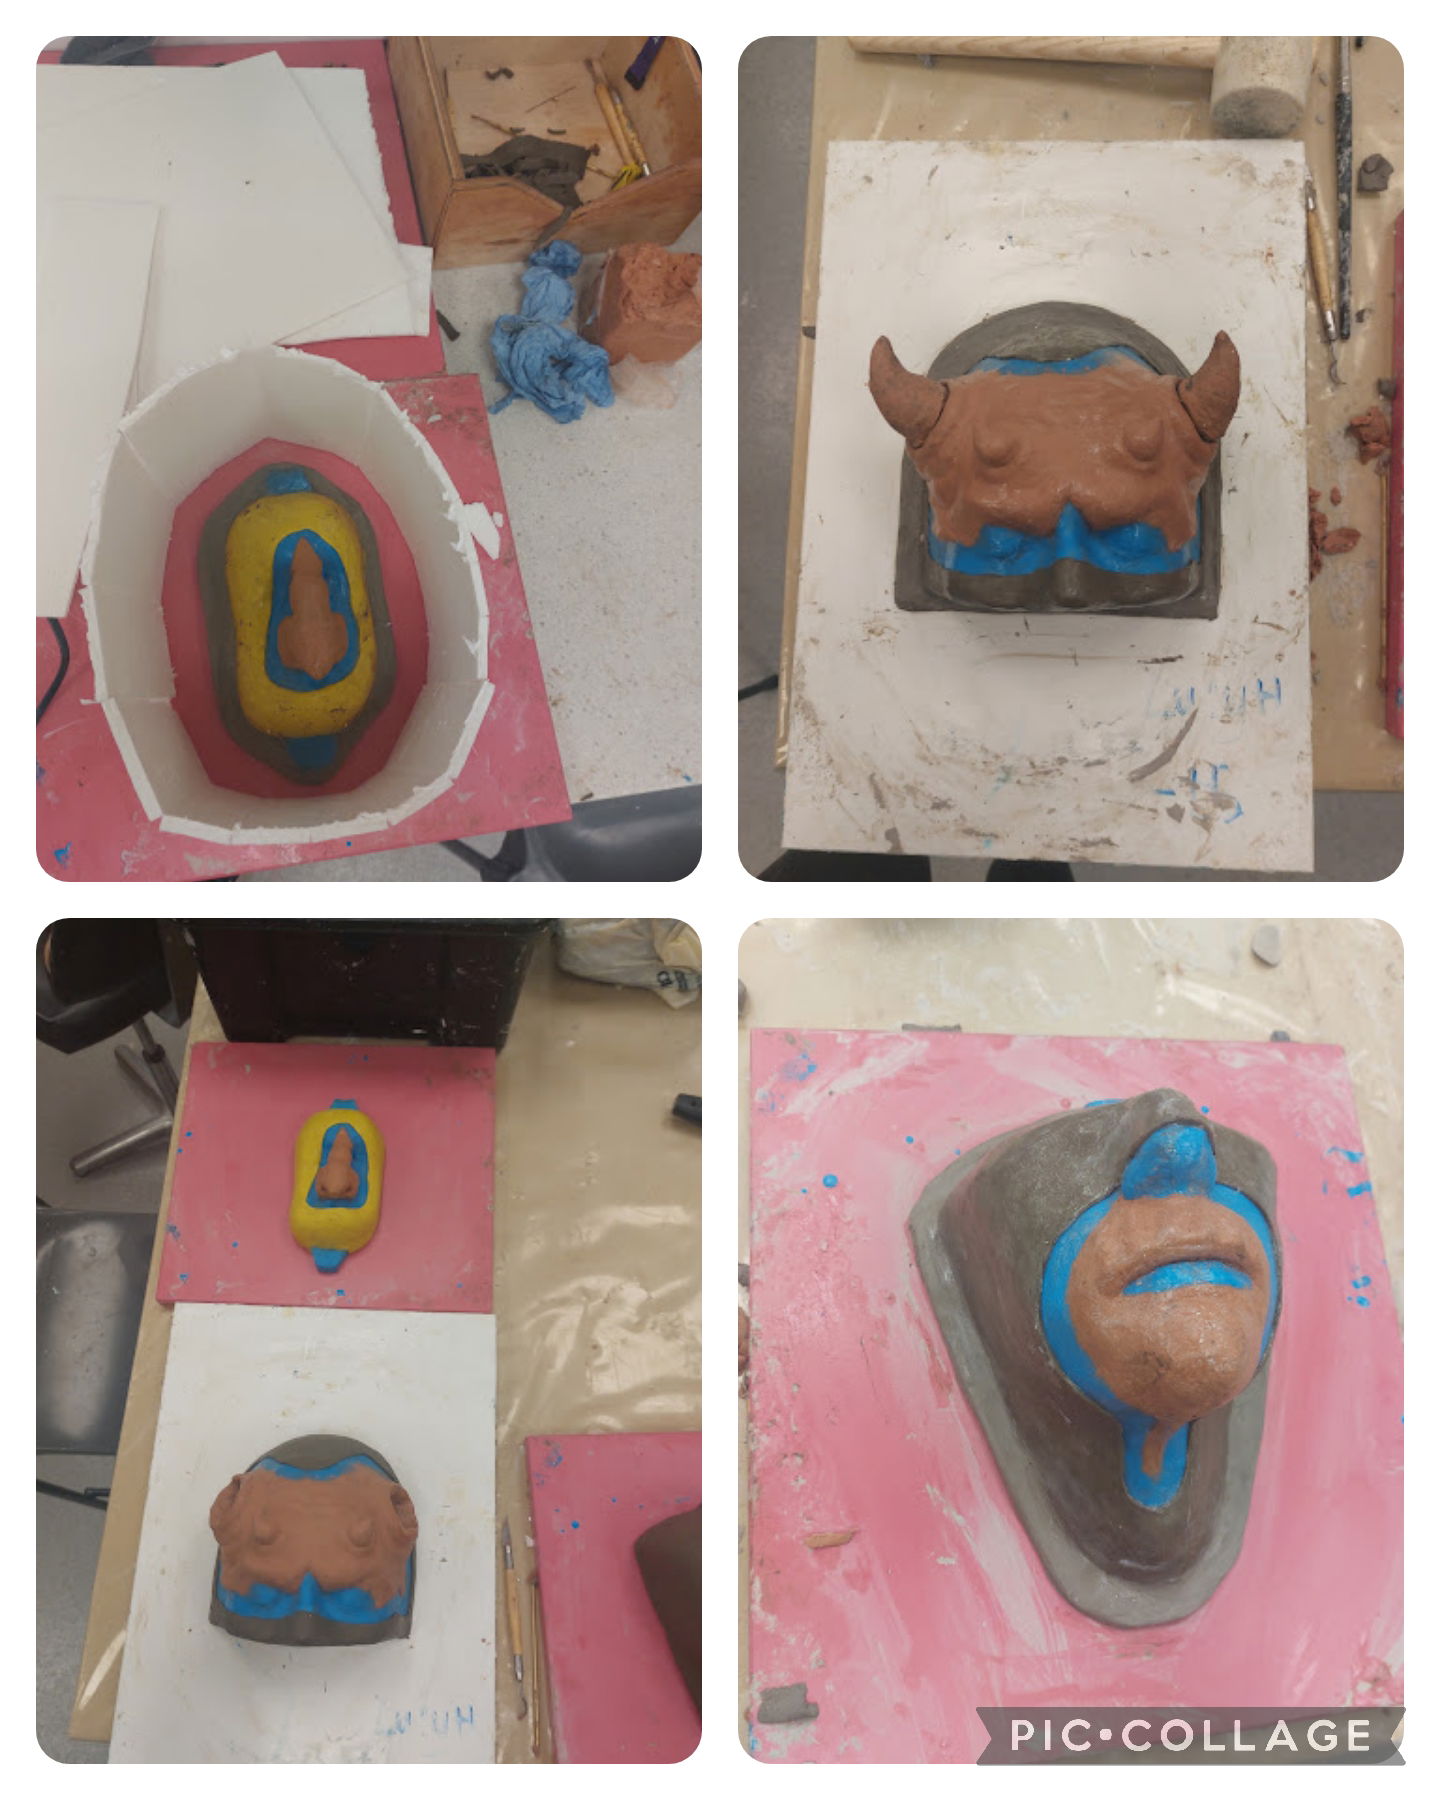
Figure 29: Negative prep (Keites-Gorman, 2024)
Figure 30: Forehead core (Keites-Gorman, 2024)
Figure 31: Prep for flange wall (Keites-Gorman, 2024)
Figure 32: Flange wall on chin (Keites-Gorman, 2024)
Future me with evaluation
I definitely messed up with the clay border (flange wall), as I discovered when trying to separate my negative and positive. My tutor had to go in with a sander and sand down the forehead piece in particular because the positive and negative were at the same level, which made it nearly impossible to separate. Because it was a deep mould, that also added to the difficulty. Next time, I will definitely make the border thicker and neater, as it really makes a difference and just adds more work and time.
I started by creating the negatives, which I was really looking forward to. Unfortunately, I made a mistake in the next step. I was supposed to create a border around the sculpture to pour the polyurethane, but I misunderstood and left a gap instead of putting the border on the clay edge. Using a border would have helped me use less polyurethane, which is important as it's quite expensive.
I had to redo the process, which was a bit frustrating but necessary (fig 29). I placed the foam board as close as possible around each of the flange walls and hot glued any edges or gaps. Then, I applied a generous amount of Vaseline to the mold to ensure that the negative and positive could be separated easily.
Next, it was time to work with the polyurethane to create the negative. I have never shaken so many tins in my life. The process of preparing the negatives was exhausting and left my arms sore for days. To catch up on lost time, I decided to dedicate a full day to complete all three negatives, which was tiring but satisfying in the end.
Reference list
Mould Making - Gorton Studio (2023). https://www.gortonstudio.co.uk/learning-path/mould-making/.
Figure list
Figure 1: Keites-Gorman, E. (2024). Sculpt in water. [Own Work]. York College, UK
.Figure 2: Keites-Gorman, E. (2024). Sculpt sections [Own Work]. York College, UK.
Figure 3: Keites-Gorman, E. (2024). Master mold. [Own Work]. York College, UK.
Figure 4: Keites-Gorman, E. (2024). Positive core making. [Own Work]. York College, UK.
Figure 5: Keites-Gorman, E. (2024). Keys and wall. [Own Work]. York College, UK.
Figure 6: Keites-Gorman, E. (2024). Silicone layers. [Own Work]. York College, UK.
Figure 7: Keites-Gorman, E. (2024). Silicone layers forhead. [Own Work]. York College, UK
.Figure 8: Keites-Gorman, E. (2024). Poly fibre layers. [Own Work]. York College, UK.
Figure 9: Keites-Gorman, E. (2024). Plaster jacket. [Own Work]. York College, UK.
Figure 10: Keites-Gorman, E. (2024). Polyurethane. [Own Work]. York College, UK.
Figure 11: Keites-Gorman, E. (2024). Brush layer chin. [Own Work]. York College, UK.
Figure 12: Keites-Gorman, E. (2024). Workstation. [Own Work]. York College, UK.
Figure 13: Keites-Gorman, E. (2024). Brush layer forehead. [Own Work]. York College, UK.
Figure 14: Keites-Gorman, E. (2024). Scrim layer. [Own Work]. York College, UK.
Figure 15: Keites-Gorman, E. (2024). Positive chin. [Own Work]. York College, UK.
Figure 16: Keites-Gorman, E. (2024). Plaster back. [Own Work]. York College, UK.
Figure 17: Keites-Gorman, E. (2024).Positive Nose core. [Own Work]. York College, UK.
Figure 18: Keites-Gorman, E. (2024).Plaster jacket. [Own Work]. York College, UK.
Figure 19: Keites-Gorman, E. (2024).Cheek pieces. [Own Work]. York College, UK.
Figure 20: Keites-Gorman, E. (2024). Nose Transfer. [Own Work]. York College, UK.
Figure 21: Keites-Gorman, E. (2024). Chin Transfer. [Own Work]. York College, UK.
Figure 22: Keites-Gorman, E. (2024). Chin Transfer front. [Own Work]. York College, UK.
Figure 23: Keites-Gorman, E. (2024). Forehead Transfer. [Own Work]. York College, UK.
Figure 24: Keites-Gorman, E. (2024). Nose positive complete. [Own Work]. York College, UK.
Figure 25: Keites-Gorman, E. (2024). Chin positive complete. [Own Work]. York College, UK.
Figure 26: Keites-Gorman, E. (2024).Forehead positive complete. [Own Work]. York College, UK.
Figure 27: Keites-Gorman, E. (2024). Forehead sculpt. [Own Work]. York College, UK.
Figure 28: Keites-Gorman, E. (2024). Hollowed horns. [Own Work]. York College, UK.
Figure 29: Keites-Gorman, E. (2024).Negative prep. [Own Work]. York College, UK.
Figure 30: Keites-Gorman, E. (2024). Forehead core. [Own Work]. York College, UK.
Figure 31: Keites-Gorman, E. (2024).Prep for flange wall. [Own Work]. York College, UK.Figure 32: Keites-Gorman, E. (2024).Flange wall on chin. [Own Work]. York College, UK.